
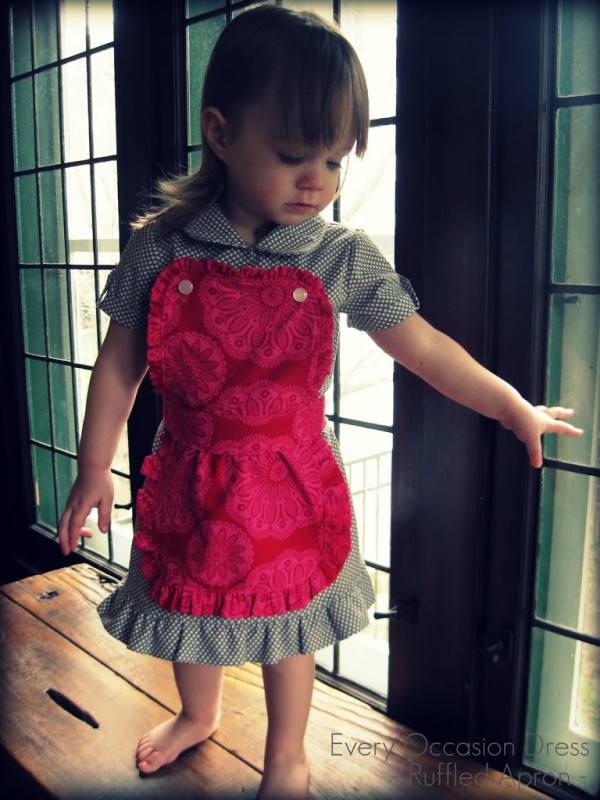
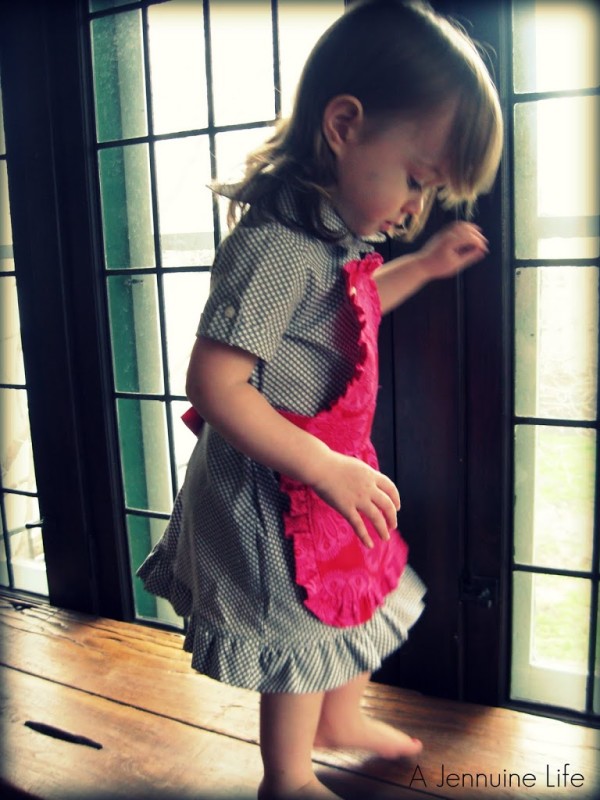
This tutorial has been a long time in the making! This dress was from my final entry in Project Toddler Runway – The Personal Challenge. I was able to get a friend’s daughter to model the dress for me, but in order to use her, I had to rush the construction of the dress and the aprons and wasn’t able to take photos for a tutorial. When April from Wildflowers and Whimsy approached me about doing a giveway for her Spring Fling, I thought it was a perfect opportunity to make another dress and get the photos for a tutorial.
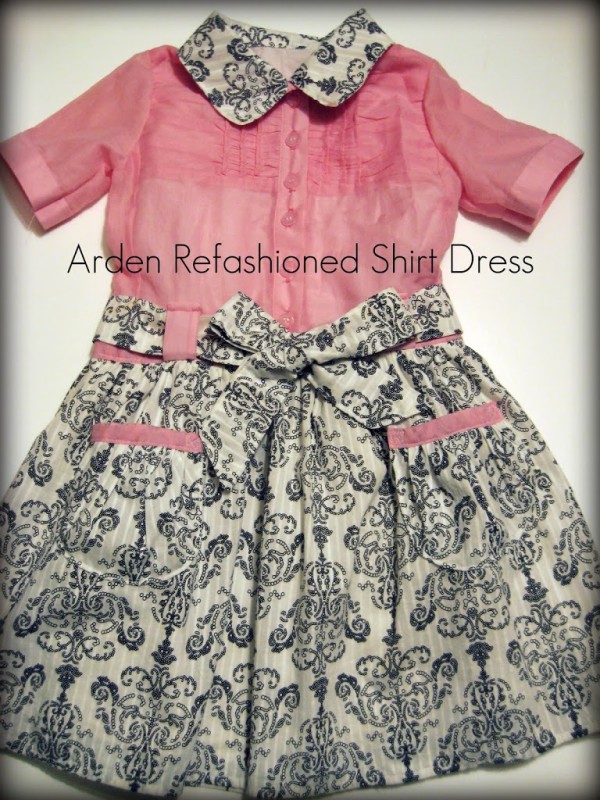
I decided not to do a full tutorial for the dress, since I covered the construction of the collar and sleeves in the tutorial for my Arden Refashioned Shirt Dress.
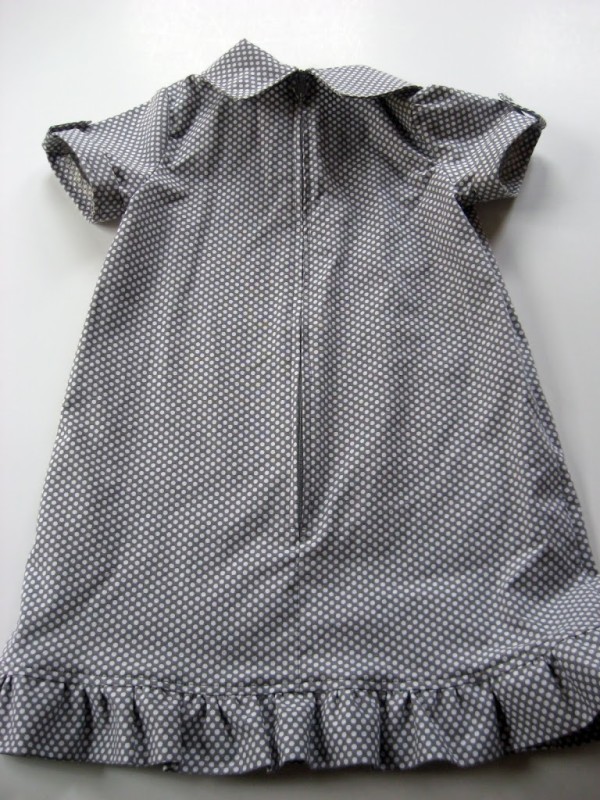
There are a few main differences – I used a back closure (originally I did buttons on my version, but it turned out to be difficult to get on and off, so I switched to a zipper for the giveway version – much easier!), so I had to split the collar in the back, I made it an a-line dress measuring about 18.5″ long, and then added a 2″ ruffle at the bottom. You’d want to keep the fabric for the dress pretty simple to keep your options open for the aprons.
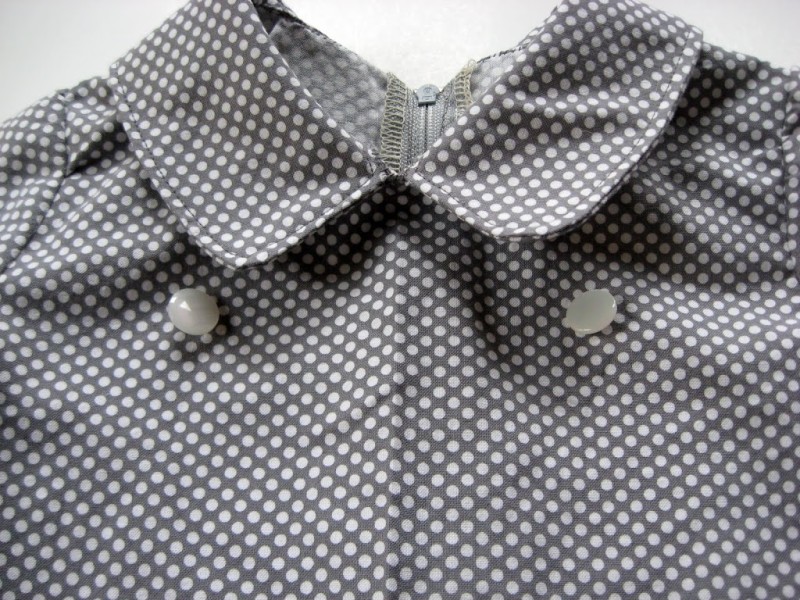
Then, to attach the interchangeable aprons, I added buttons to the front 4.5″ apart and just below the collar.
So here goes with the first of the two interchangeable aprons – the Ruffled Apron:
Every Occasion Dress – Ruffled Apron
Skill Level – Beginner
Items Needed –
Fabric – 1/2 to 2/3 yard
Coordinating thread
Sewing machine
Iron
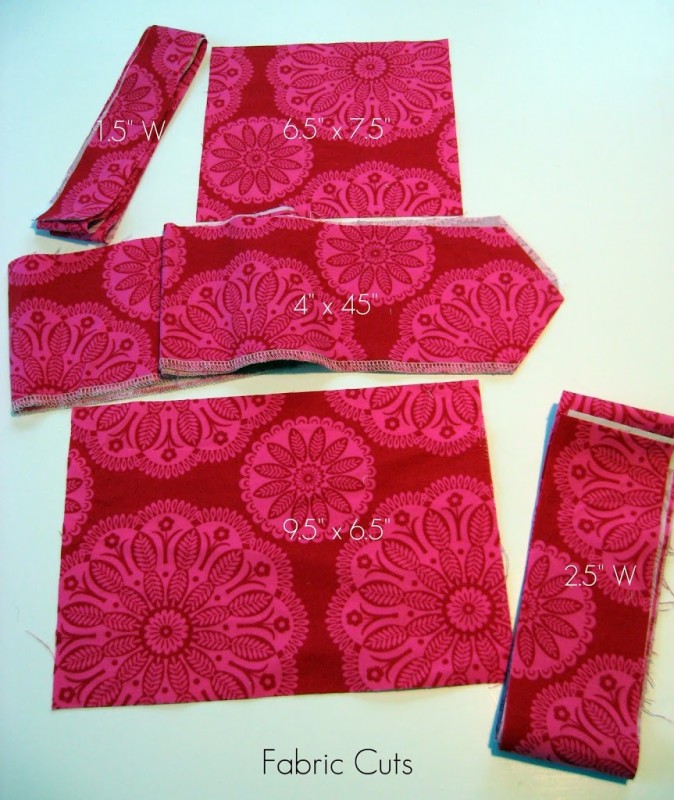
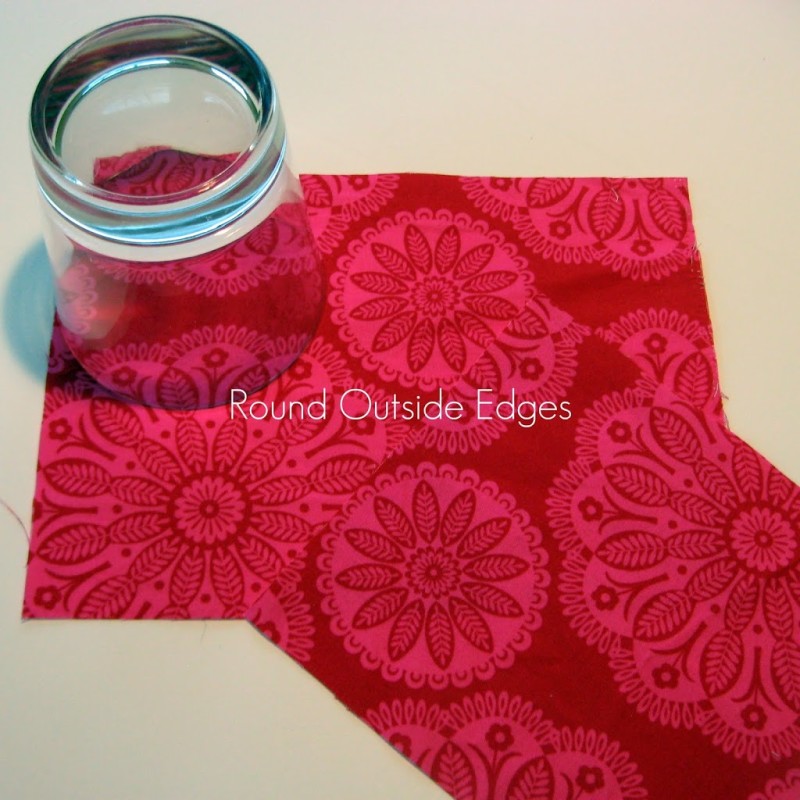
Dimensions given are for a 2T apron. Adjust accordingly to get desired size – though the dimensions would probably work well for a pretty good range of sizes. Sew with a 3/8″ or 1/2″ seam allowance; keeping the same allowance throughout the project. I used a 3/8″ seam allowance.
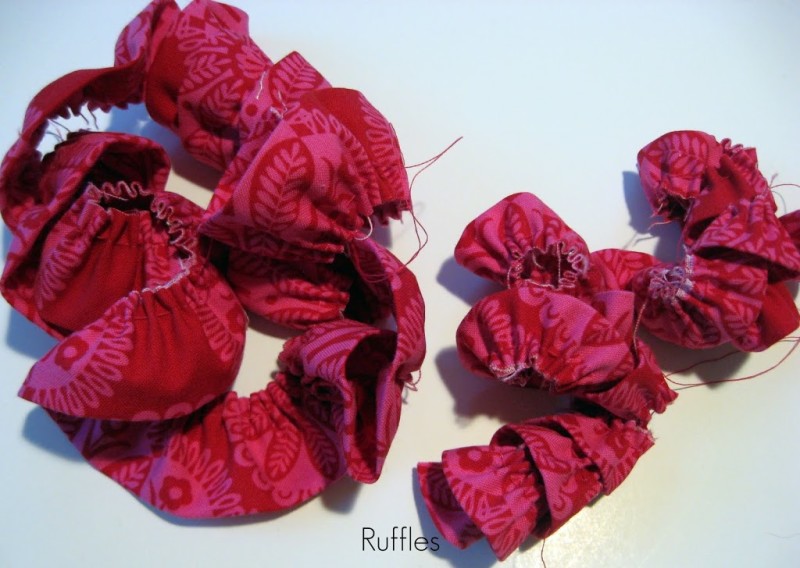

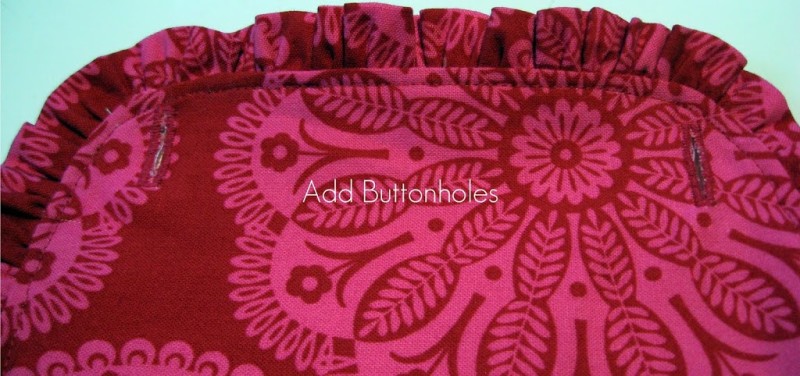
4. Pin Ruffles – Matching raw edges, pin the ruffled strips to the outside edges of the right sides of your top and bottom pieces. Stitch in place; stay stitch at beggining and ends. Finish the edges using a serger or a zig-zag stitch.
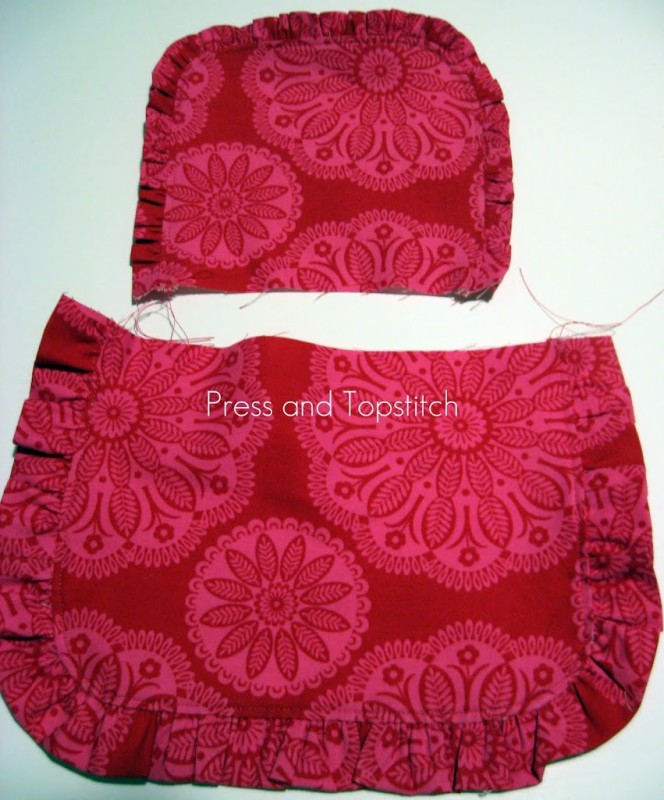
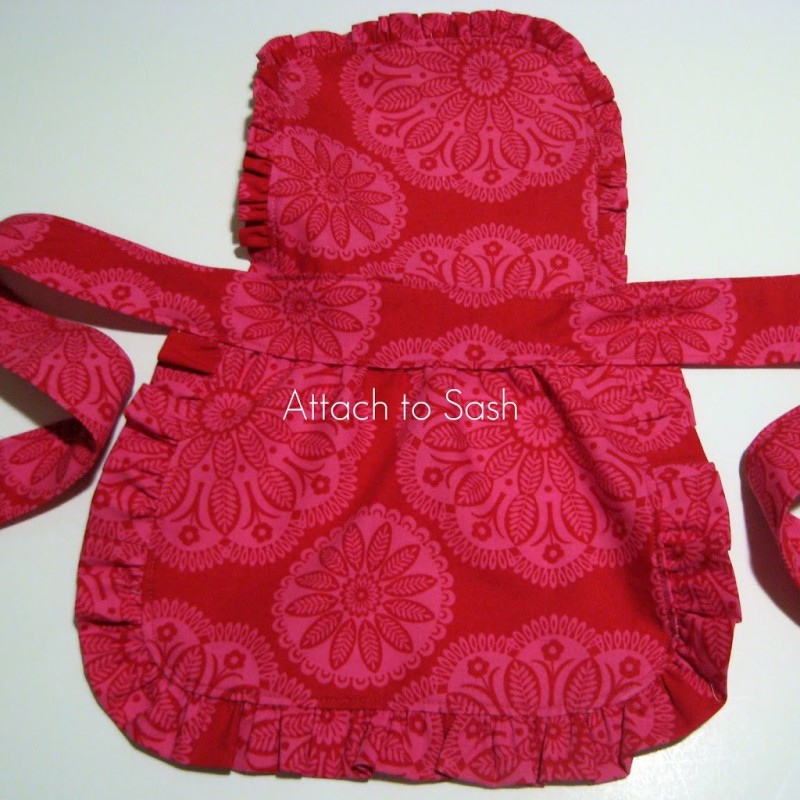
8. Attach Top and Bottom Pieces to Sash – Pinning from the top and lining up the inside edge of your finishing stitches with the topstitch line on the sash, attach the top and bottom pieces, making sure the centers of the sash and both pieces are in line. Stich in place over top of the topstitching on the sash.


I have been waiting FOREVER for this tutorial. I just adore this outfit so much. I do not have a girl, but I do have a niece.
oh my niece would look so cute in that. Wish I was a better sewer!
This is such a cute idea. Thanks for sharing.
That is so beautiful. I love the colors and the idea with the apron. It came out SO good. http://www.mylifeunzipped.blogspot.com
Oh my goodness, that is so cute! I will have to keep this in mind for my nieces.
This is really cute. I love the polka dot print.
megan
craftycpa.blogspot.com
Oh my, that is so stinkin’ cute. Is it bad that I sometimes hope the baby is a girl so that I can dress her in ruffles?
Eeecckk!!! This is so so adorable. Little girl, ruffly cute apron, so perfect 🙂 Thanks for linking up to Your Whims Wednesday!! Hope to see ya again this week 🙂
this is so cute! thanks for sharing! we’ll be featuring this tomorrow! you can grab a featured button if you want! ^^)
Hi! you and your project was nominated to TSWL’s Finest for April 2011. I will send you your vote for me button and spread the word! Voting will start today on our blog!