
Remember last Saturday I said I was going to a one day DSLR photography seminar and that I would try to share what I learned with you? Well, here we go! Now, don’t flip past if you don’t have a DSLR – most of what I’m going to talk about can be applied to your point and shoot since most of them have a manual mode. I’m also going to try to share some of the little tricks that I think have helped my pics get better.
The first part of the class the teacher started talking about how to set up a studio shot and I started thinking “oh boy, this is not at all what I wanted”. But we got past that part, and some of it is still pretty applicable with the exception of the professional lighting aspect.
I’ll start with the mechanics of shooting in manual. There are tons of handy guides and actual professionals out there talking about what ISO speed, f-stop and shutter speed settings you should use so I’m not going to get super detailed here.
Manual Setup: First things first – at least browse through your camera’s manual, mainly just so you know what all the buttons do and how to change settings. I had played around with the manual settings on my camera, but couldn’t figure out how to change f-stop in manual mode. So I stuck with shooting in aperture priority. Turns out, I just needed to hold one button down while rolling a little dial.
- Start by setting the white balance on your camera. This helps your camera adjust to the differences in light between full sun, indoor light bulbs, flash, etc…
- Set the ISO speed – a general rule of thumb is the brighter your surroundings, the lower ISO you will use. Higher numbered ISO will allow you to take photos in lower light, but will result in grainier resolution.
- Then set the f-stop or aperture. The lower numbers the more bokeh, or blurry fore-and-background you will get. I read once a nice rule of thumb that your f-stop should be around the number of subjects in your photo – so if you’re shooting a picture of one baby f 3.5 or lower if your lens allows it will have your little subject in focus but everything around blurry, while a group shot should be more like f 8 so everyone will be in focus.
- Once you have ISO and aperture set, then set the shutter speed. DSLRs should have an internal meter that helps you determine what shutter speed will allow optimal light, or exposure compensation. On my Canon Rebel T3, it shows up as a scale something like this: -3..2..1..x..1..2..+3. a little light will appear along this scale and then adjust so the light falls close to the center.
Now here’s where you have to play around with things. Once you have your ISO and f-stop set, your shutter speed might need to be super slow to get enough light which will cause you to get a blurry photo if your or your subject are moving. You can use a tripod if you’re the one moving, but if your subject is moving then you need to start over and use a higher ISO and readjust your shutter speed. Most people can’t get a focused photo with a shutter speed slower than 1/80.
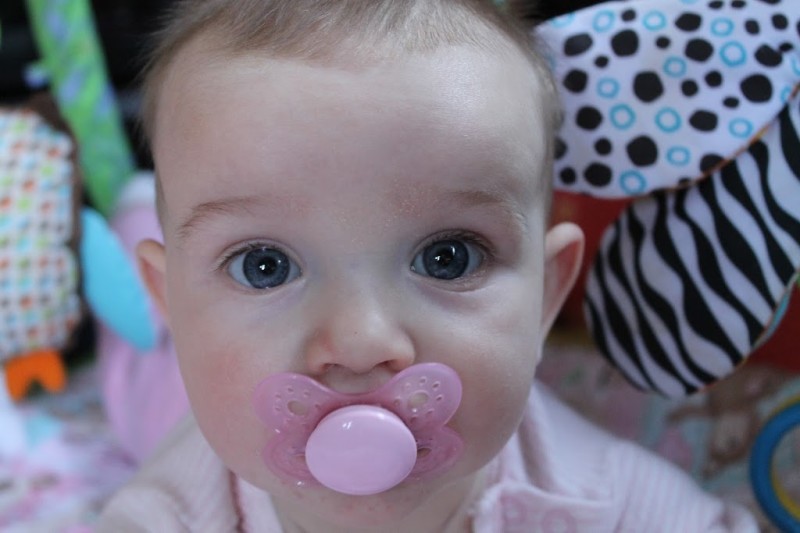
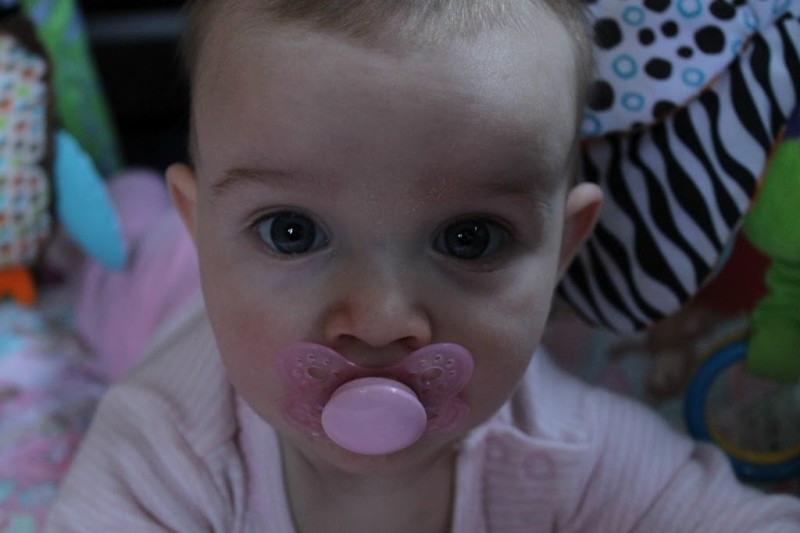
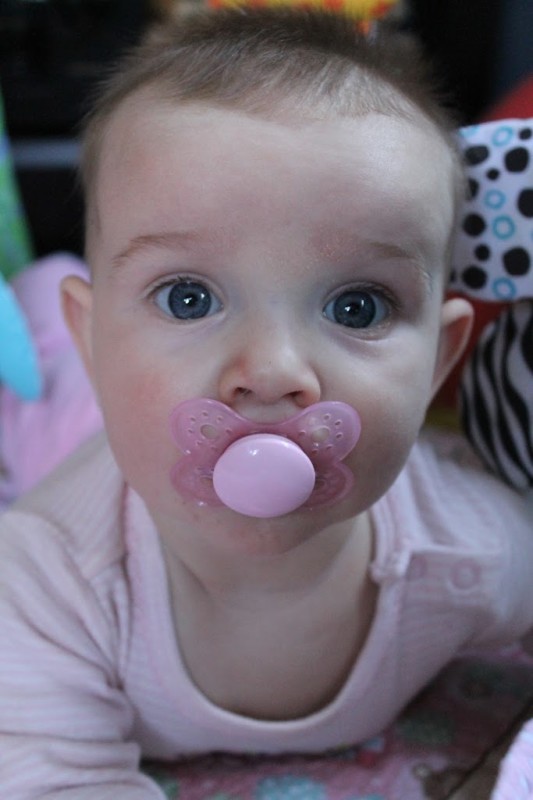
Here’s some photos straight out of the camera to try to demonstrate (using my new favorite model – Hadley!):
All of these were shot in my living room with northern and western exposure on a sunny day in the late morning. I set the white balance to cloudy since I didn’t have any lights on inside but there wasn’t a ton of light coming in.
-
A rule of thumb is “if it bends, bend it”. Referring to elbows, knees, wrists, etc.
-
Body and head should face different directions
-
The camera should be at about eye level for head and shoulders portraits, chin to chest for 3/4 length and chest to waist level for full length portraits
-
Avoid flat lighting – portraits usually look best with one side brighter than the other side.
-
A 2/3 face is appealing – 2/3 of the face is toward the camera, so 1/3 is in less light.
-
Use natural light whenever possible. Even if that means setting up a shot inches away from the french doors leading out to your deck (it’s a common sight for me to be crouching on the floor to snap project photos)
-
Get a couple of foam core boards. I have a black and a white board I use for 90% of my photos. I know it’s not terribly original, but I often don’t have a whole lot of time before tiny people start waking up, so it’s quick and easy – and way better than a cluttered background. If you’re shooting something really small, scrapbook paper would be cool.
-
Use the macro (flower) setting on your point-and-shoot, or even on your DSLR (you don’t have to shoot in manual ALL the time!)
-
Use the largest file size setting on your camera, and post photos as large as your blog layout will allow. I adjusted the body of my blog to allow the extra large photo size.
-
When editing your project photos – make one of them square so you can use that one for linky parties. Have some fun with titles and fonts to make a good shot for Pinterest while you’re at it!

Once I don’t have an almost 4 year old helping me at the computer, I will be reading this and trying some of the tips! We just got a DSLR for Christmas, and sadly I haven’t been able to get past the point and shoot!
Great tips! I’m always interested in ways to take better photos. Thanks for sharing at Terrific Tuesdays.
Rachel
Stopping by from the Girl Creative Blog Hop! http://queenofsavings.com
I enjoyed your portrait photography tips. One thing to be aware of is if your ISO is really high, like 1600 – 3200 your pictures will have more ‘noise’ or ‘grain’ in them. Unless you’re shooting with a professional DSLR it’s best to stick with an ISO of less than 1000, so that the quality of your photos is better. I know that’s not always possible…it’s just something to keep in mind.
do you really need a dslr? A small point and shoot camera is best suited for home photography. Plus they are more durable and compact.
Do you really need a DSLR, a compact is better for home photography. Less settings and easier to shoot as well.
Absolutely a point and shoot is perfect for most home photography. I wanted to try to improve my product photos for my Etsy shop, as well as become our family photographer instead of going to a studio which will save us money in the long run. I’ve seen a huge improvement in my photographs already and I still have lots to learn!