
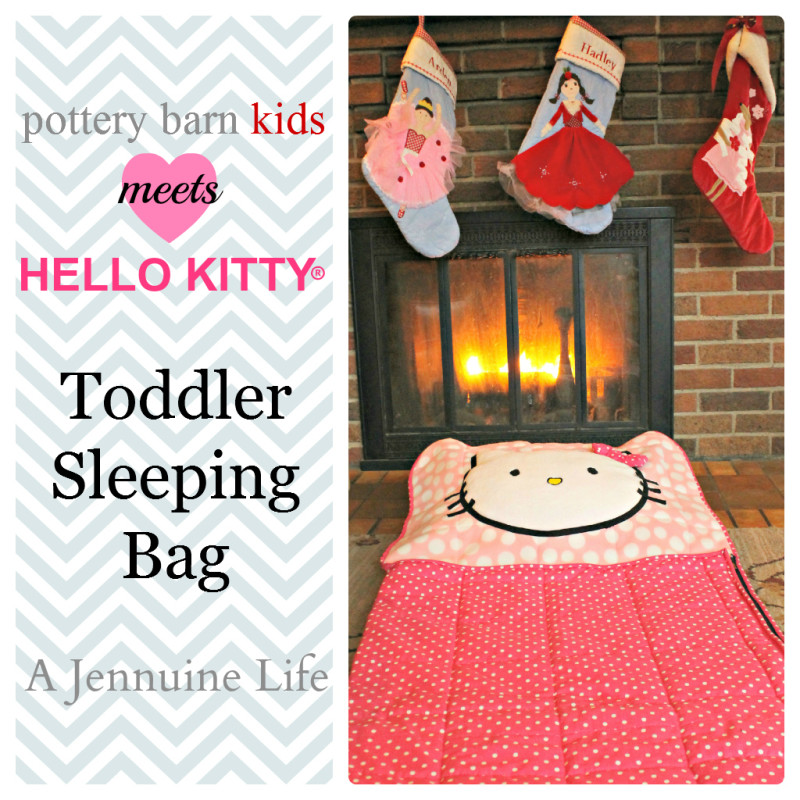
Do you have a Hello Kitty obsessed little girl? I guess there could be boys, but seems more like a girl thing, right? I have one here and pretty much if there’s something that Hello Kitty can be on, she’s got it. I admit to feeding the habit, since I like Kitty better than a lot of the other licensed characters out there.
Anyways, I had already been sort of plotting a sleeping bag for Arden for Christmas, and then she and Dave were reading the “floppy book” aka the Pottery Barn Kids catalog and apparently she went gonzo about the sherpa sleeping bags. So my sorta-kinda idea got pushed right to the top of the list of things to get done. Oh, and I’m having surgery for my Morton’s Neuroma on my sewing foot. On Friday. So I knew I had to get on the ball.
Do you want to make a toddler sleeping bag for your little one? Here’s how I did it; I’ll describe the Hello Kitty version, but you could just as easily make any other character your little one prefers:
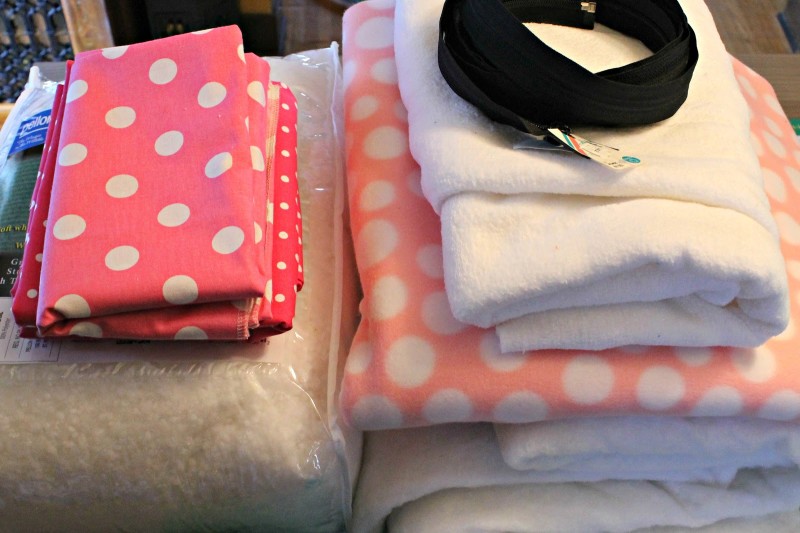
Supplies:
- Inside fabric – about 1 3/4 yards;Â I used blizzard fleece because Arden prefers soft blankets.
- Outerbindingbow fabric – 3 yards
- Plush fabric for face – 2/3 yard
- Quilt batting; I used a twin sized prepackaged high loft polyester quilt battting
- Fiber fill; I found a cluster fiber fill called Perfect Loft by Pellon that I loved for this project. Seriously, it will be my go-to fill for stuffed animals and dolls and such going forward.
- Sleeping bag zipper
- Double fold bias tape
- 1″ Elastic; I used a package of the Dritz colored elastic and used about 40″
- Scraps of fleece and knit fabric for the eyes and nose
- Heat n’ Bond Light or Wonder-Under
- Stitch-N-Tear
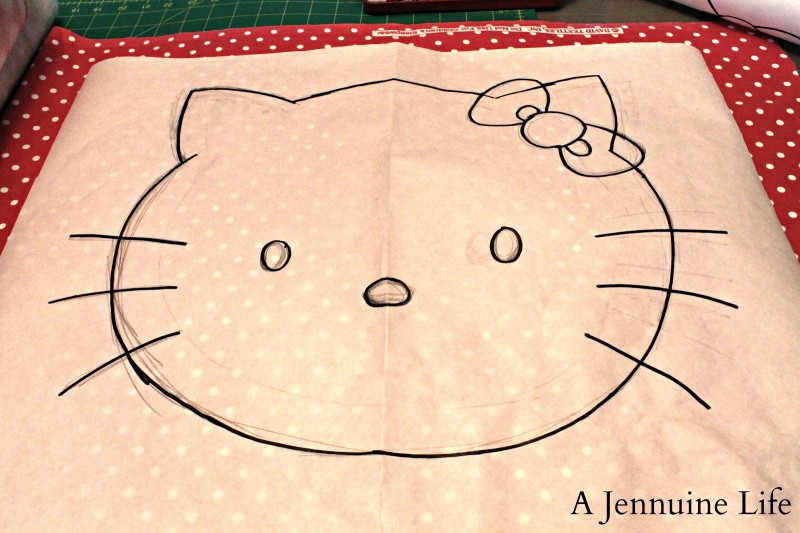
I started out by drafting the picture of Kitty onto freezer paper. You can see the fold line from when I took my rough draft to the window as a makeshift light box and made sure the image was symmetrical. Once I was happy with it, I drew over the pencil lines with a Sharpie.
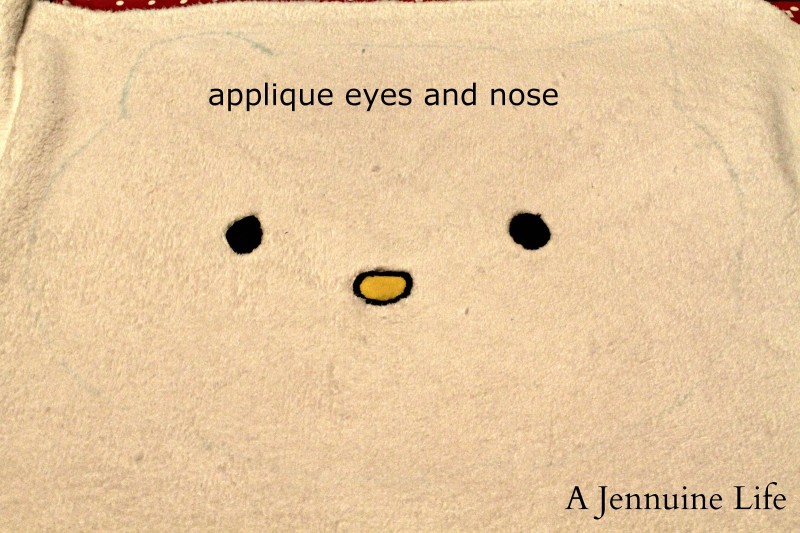
Using an alcohol marker or other non-permanent marking pen, transfer the pattern outlines onto the plush fabric. I used scraps of black fleece and a little bit of yellow knit fabric from other projects. Iron the Heat-N-Bond onto the back and then peel away the paper backing. Iron in place using a pressing cloth. With black thread and a tight zig-zag stitch, appique the pieces in place with the tear away interfacing underneath. Take your time with this and a tip is to pivot the fabric when the needle is in the down position on the right or outside of the curve so there arent any gaps in the stitches. Stop and admire how three little scraps of fabric applique’d onto fuzzy fabric can be so cute!
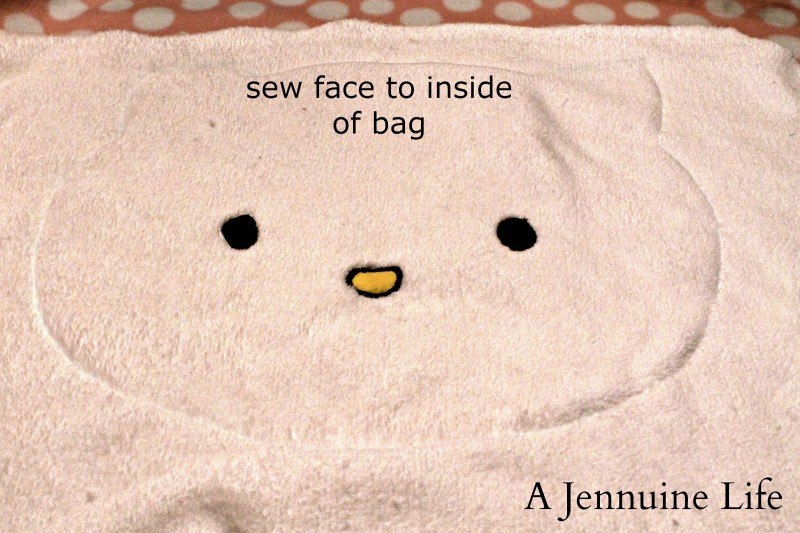
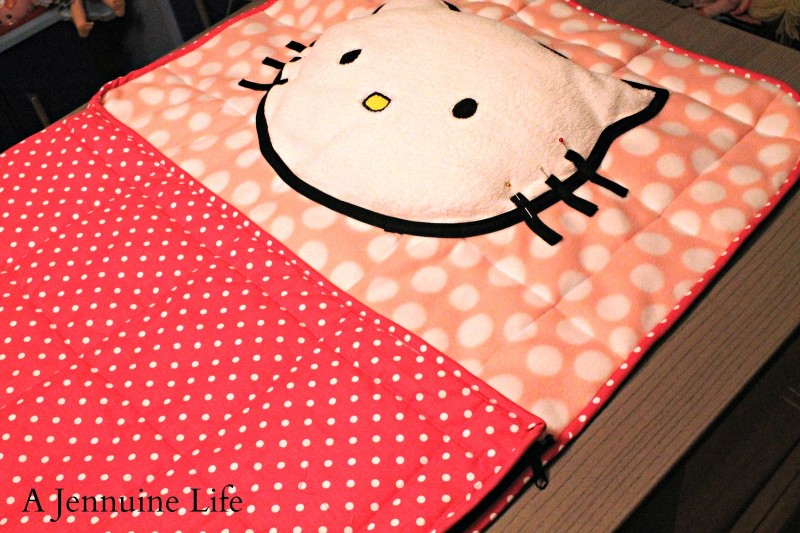
Figure out the placement for the face. You want it to be centered on the inside top right half of the sleeping bag. The three yards of outside fabric is cut into two 1.5 yard sections in order to get the width, so each side of the sleeping bag is about 27″ across.
Following the marked outline, sew the face to the inside fabric leaving about 3″ open for stuffing.
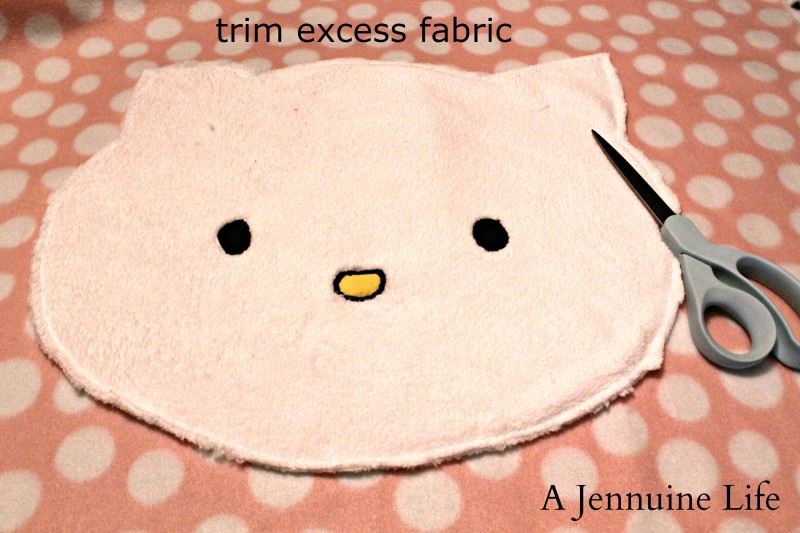
Trim away the excess fabric. Try to get pretty close to the line of stitching, but don’t clip the threads.
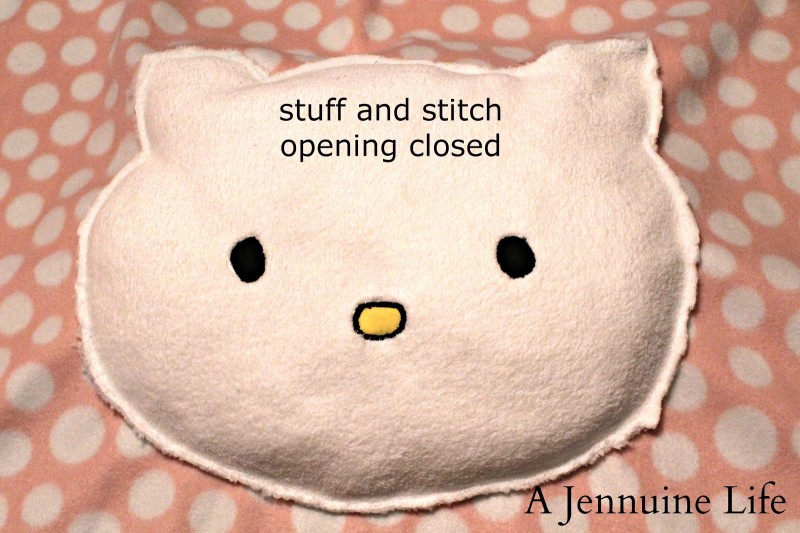
Stuff the face lightly and stitch the opening closed.
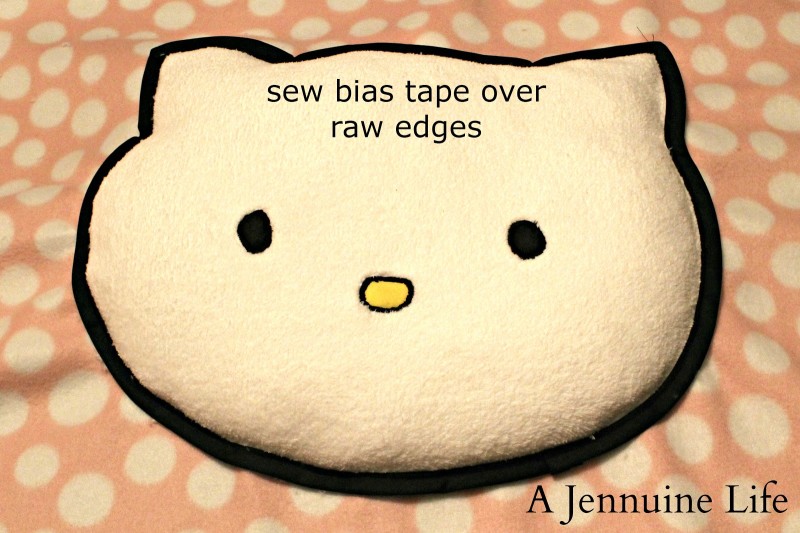
Now the fun part: sew the bias tape over the raw edges. Fold the tape closed and with the folded edge away from the face stitch close to the edge with the tape lined up on or just inside the line of sewing. Pinch miters into the angles as you go. Fold the last 1/2″ under to enclose the raw edges. Repeat along the outer edge.

Add the whiskers. First I opened the tape up all the way and folded each end under 1/4″ to enclose the raw edges. Pin in place and stitch close to the edges up to the binding around the face. See my note above about how I would have done this in the reverse and sewn the inside bit on first and then finished them here. I ended up just stitching the ends closed and leaving them loose from the point of the face outline.
Here’s where you can decide to follow a more quilter’s version with a binding like I did, or you could make a simpler version and insert the zipper at this point and turn it right side out and quilt it. There’s a nice tutorial for that as a doll version by Polka Dot Chair, but I’m pretty sure you could make it work for this.
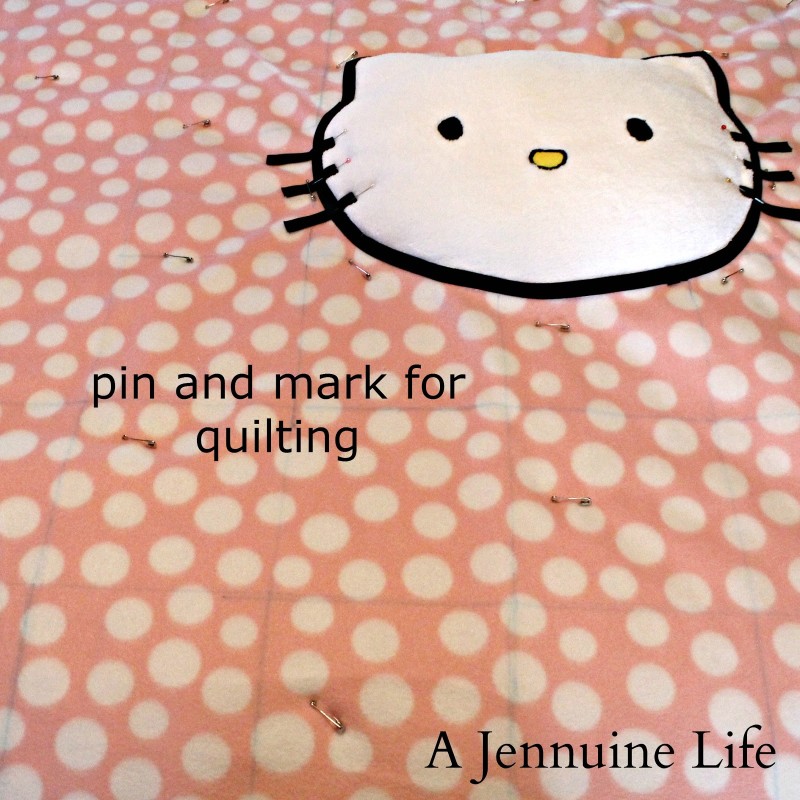
Here’s the way I did it. I wanted the look of the quilt binding and it’s where my comfort zone is. This is where all the quilters out there will start to feel right at home. Lay your outer fabric right side down on a table or the floor. Now spread the quilt batting over the top of that and then the inside fabric. Make sure all layers are nice and smooth and everything is lined up straight. This is where you’ll have a nice 20″ or so of the outer fabric in excess. Hang onto that, you’ll use it to make the quilt binding. Pin in place using quilting pins, or baste if that’s your preferred method. Mark the quilting pattern. I made mine really simple and kept with the look of a classic sleeping bag by marking a 6″ grid. Stitch along the quilting lines.
I recently purchased a walking foot and man, does that make this part sooo much nicer!
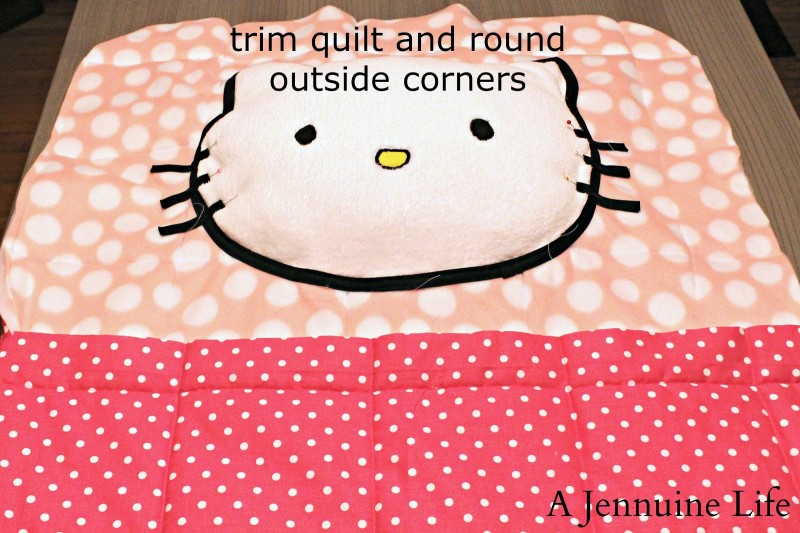
Trim away the excess fabric. Square up and straighten any edges. I used a dinner plate to make my rounded corners. For this bag I wanted to mimic the look of the Pottery Barn bags, so I cut away the fabric over the face. I’m thinking some lucky dolly gets a sleeping bag to match with this piece!

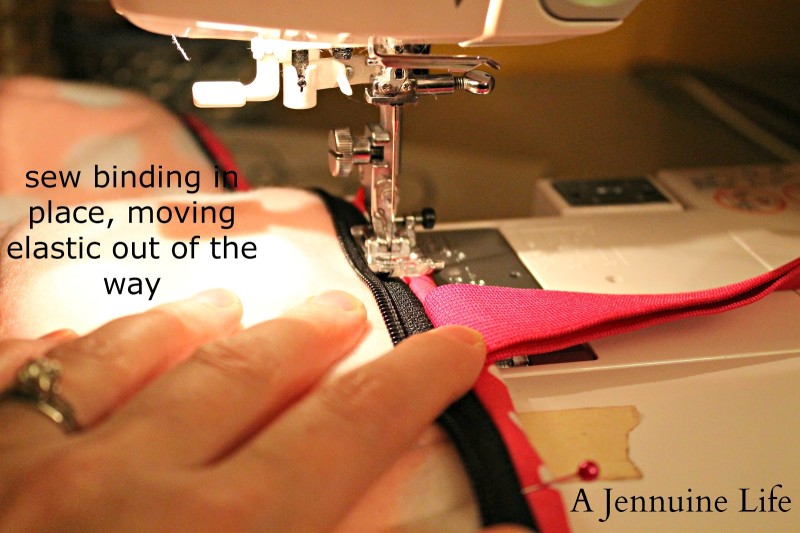
Now don’t run away on me for this part. This is so much easier than putting a zipper in clothing because 1. It’s a separating zipper, and 2. You WANT the stitching to be further away from the zipper teeth so there’s room for the binding and for the zipper to work smoothly.
I started on the left side. Open the zipper all the way so you have two parts. Starting about 1″ away from where the bag folds, pin in place along the raw edges with the teeth to the inside. Sew about 1/4″ from the edge, moving the zipper part out of the way as needed. I didn’t even use a zipper foot since I wasn’t stitching close to the teeth.
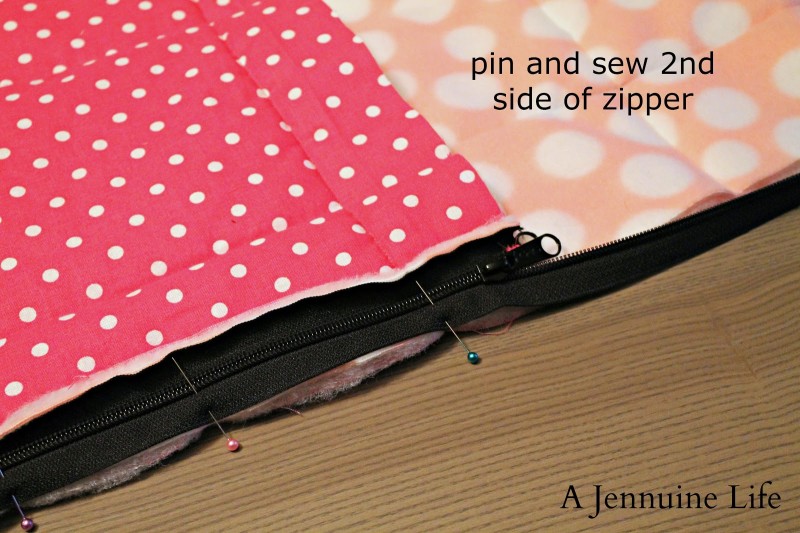
Now, zip the other half of the zipper back in. Pin and sew in place as shown with the teeth pointing into the sleeping bag and the raw edges lined up. Sew about 1/4″ from the edge. Figure out where you want the zipper to end and sew stop with a zig-zag stitch over the teeth on each side. You can see a little bit of mine in the pink thread. Now, cut the excess zipper away.
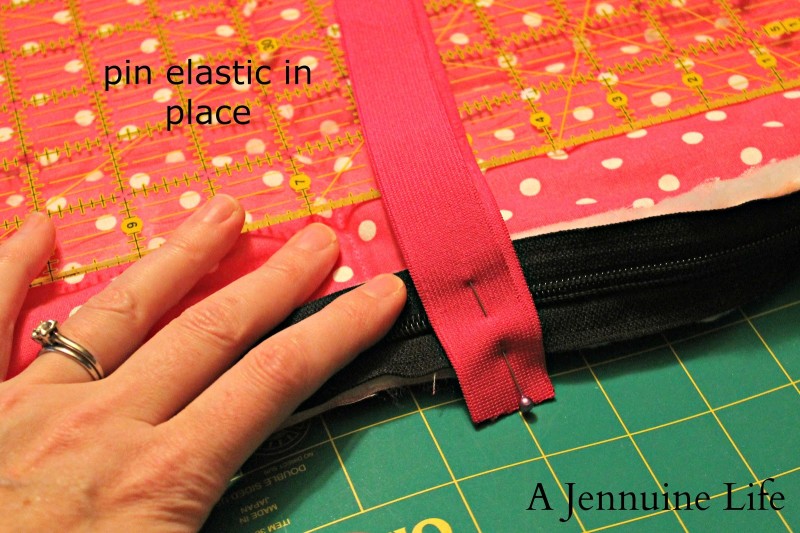
I wanted to add elastic to easily hold the bag closed when it was rolled up. Measure the length around your bag when it’s rolled and cut two pieces of elastic that length. Mine were 20″ each. I placed them 6″ in from the edges and attached them to the bottom of the bag. You need to do this before the binding so the raw edges are enclosed.
Bind your quilt. I ventured into the world of continuous bias following the tutorial at Whipstitch, and I’m a complete convert. I will never cut strips and sew them together again for any project requiring more than three strips. I also follow the instructions by Heather Bailey for sewing on quilt bindings so you don’t have to enclose the edges. Try it; you’ll never go back to the old way!
I didn’t have the time to hand stitch the other side of the binding down, so I went with the quick and dirty method of wrapping the fold around and stitching in the ditch from the inside. It’s not perfect, but it’s done and it’s going to be laying against the floor 90% of the time.
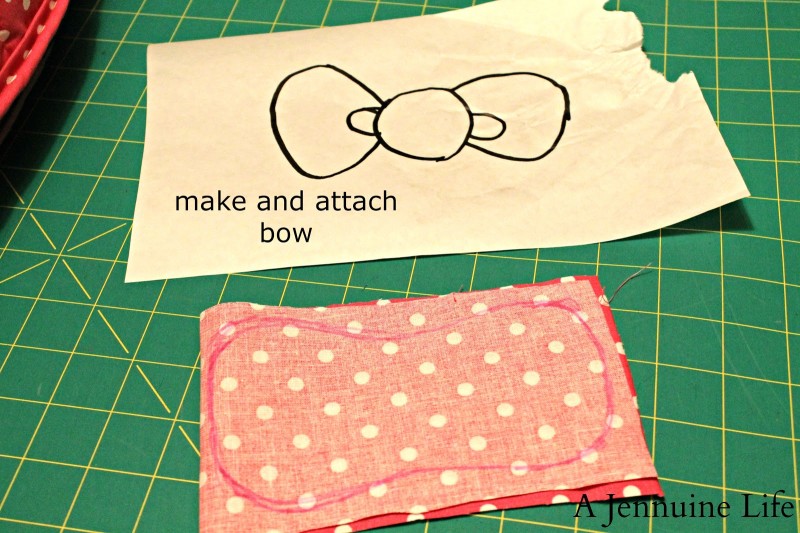
For the bow, I was originally thinking I’d applique something, but I decided to go three-dimensional and make a little bow. I just sketched out a bow shape the right size, sewed around it-turn-stuff a little-and stitch closed. I used some of the binding for the middle of the bow: just folded the edges inside and pressed in place and then stitched it closed around the bow. I tacked it in place with a little zig-zag stitch on each side of the middle in the little creases.
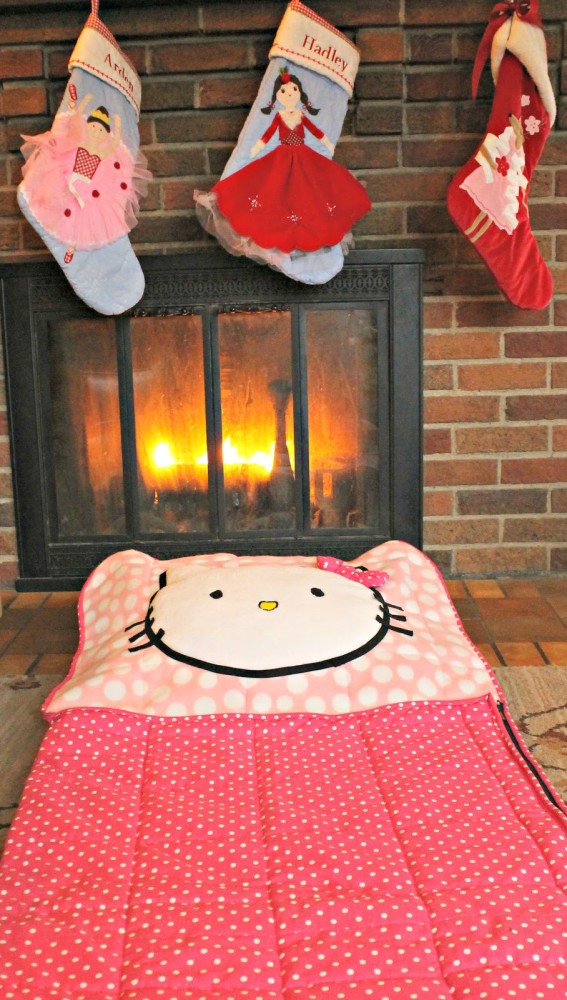
What do you think? Is she going to freak out on Christmas morning? I have a feeling I’m going to be seeing a lot of this – for naps, bedtime, and for elaborately staged pretend sleepovers.

A beauty shot of miss Kitty…
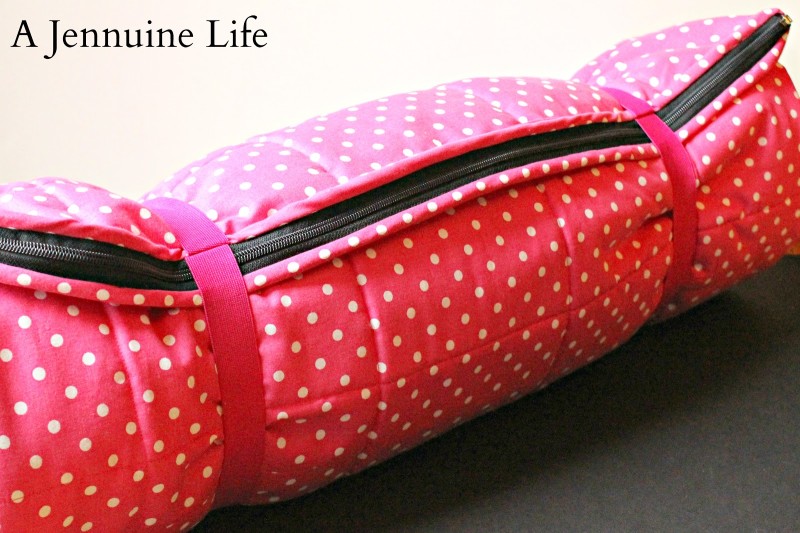
And here it is all rolled up.
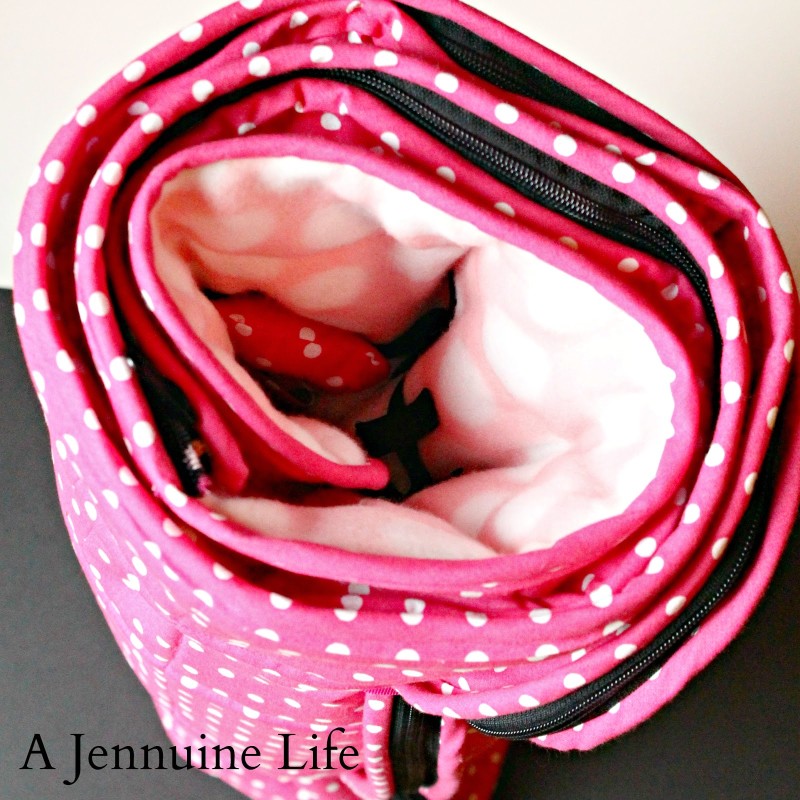
Ready for a sleepover!
This project was featured on:
 Â
   Â
  
That is awesome!!! Love what you did! Fabulous job hun!
This is adorable. I’m going to have to make this. I have a link party called Wednesdays Adorned From Above Blog Hop and would love to have you share this with everyone. It runs from Wednesday through midnight Sunday. Here is the link to the party.
http://www.adornedfromabove.com/2012/12/6-crafts-and-recipes-and-wednesdays.html
Debi @ Adorned From Above
You totally outdid yourself! What an amazing job! 🙂 Just pinned it!
I saw on my blog comments that you sent me an email but I didn’t get anything from you…..can you resend? diana@thegirlcreative.com Thanks!!
This is so cute! My niece loves Hello Kitty and I’m going to attempt to make this for her 6th birthday in May. What is the finished size of the sleeping bag? My niece is about 42″ tall and skinny, but I’d like for this to last at least a couple years as she grows. The fleece covers the entire inside correct? Thanks!
She’s sleeping on it right now so I can’t measure, but it’s a good foot longer than her toddler bed which uses a standard crib mattress. You could really make it as long as you’d like by buying more fabric. The zipper had plenty of extra length. The fleece does cover the entire inside of the bag. I’d love to see your finished sleeping bag!
Soo cute! Nice work.
Kristen – from Lipstick and Sawdust
This is adorable!! Both of my girls love Hello Kitty!! =) Thank you for the tutorial!
This is adorable! Both of my girls love Hello Kitty! Thank you for the tutorial =)
Amanda – from 2pixies1elf
oh how cute. I’ll have to make these 😀
We purchased a sleeping bag for a sleep over…the zipper broke after one use! I told my daughter that I could make one. This one is so cute! Thanks for the posting.
Very cute!! I’ve featured this on Copycat Crafts, love it! http://www.copycatcrafts.com/pb-kids-inspired-hello-kitty-toddler-sleeping-bag/