Today we have FrancesSuzanne, yet another sewing friend found through Project Run & Play sewalongs. These “sewing aunts” never fail to wow with their amazing details like piping – double and even triple piping at times!, and embroidery, just check out this amazing gem for the Love Is In the Air theme:
Drawn thread work (also known as pulled thread), is a form of counted-thread embroidery based on removing threads from the warp and/or the weft of a piece of even-weave fabric. The remaining threads are grouped or bundled together into a variety of patterns. It is also considered whitework embroidery because it was traditionally done in white thread on white fabric and is often combined with other whitework techniques.
Source:
Wikipedia
So without further delay, here is FrancesSuzanne:
Hi everyone! We are thrilled to be here….sharing a “Lost Art” of sewing! When Jenn asked us to share in this series, we racked our brains on what to share…. We are “sewing aunts,” instead of sewing mommas, that sew for our ‘baby’ sister’s girls {and share about our sewing adventures over at FrancesSuzanne}. If you’ve seen much of our work, it is no secret that our go-to embellishment detail is the French knot {as seen here, here, here, or here for a few examples}. But, who wants the same old, same old when posting on a friend’s site? We wanted something different, so we opted to go the road less never traveled {at least by us} and attempted the “Lost Art” of drawn thread.
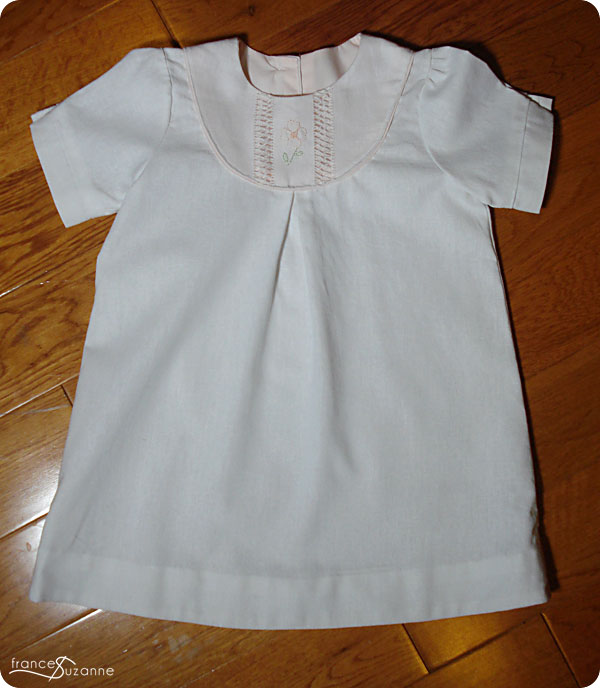
We began with the Oliver + S Playdate Dress – again, a pattern we had not attempted. We are not ‘live on the edge’ sort of girls…..but Oliver + S has never let us down! We made a size 12 months, in the hopes that it will carry CL well into the fall season. Other variations, besides the ‘drawn thread component’ {that we will be sharing momentarily} were changing the original sleeves with Oliver + S Puppet Show sleeves {following Gail’s amazing directions} and foregoing the pockets in the outfit.
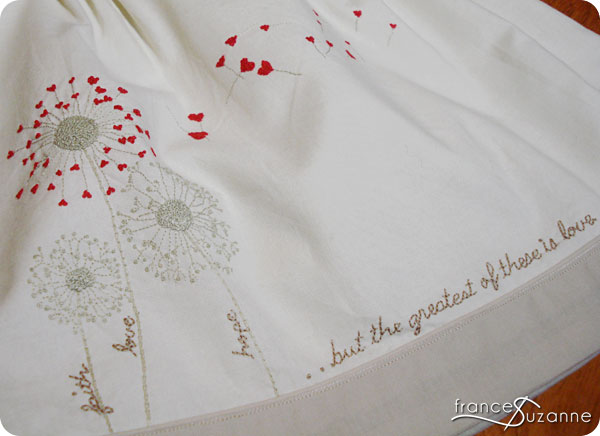
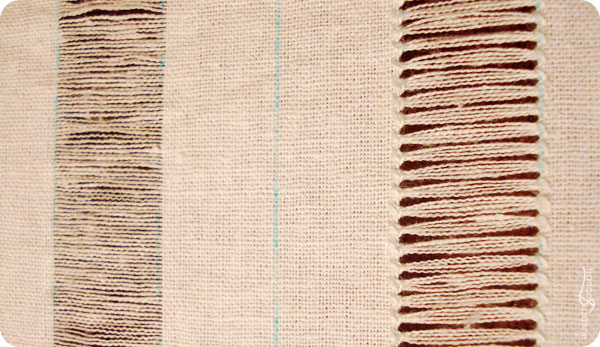
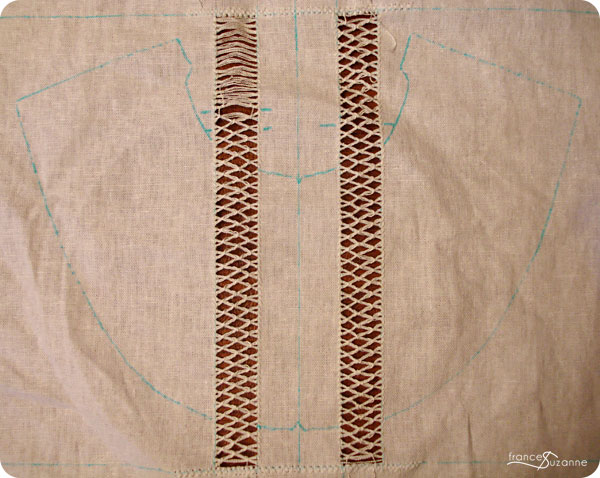
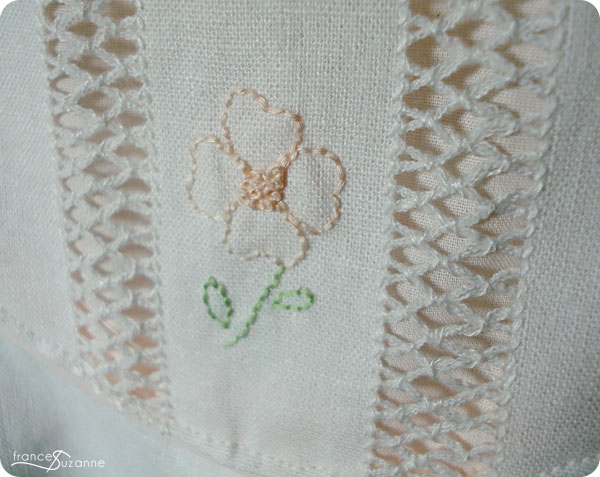
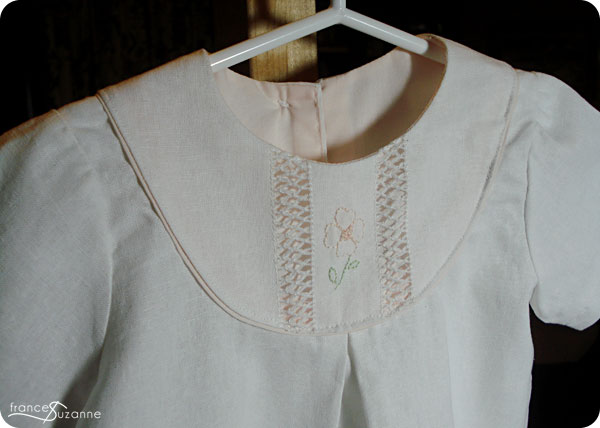
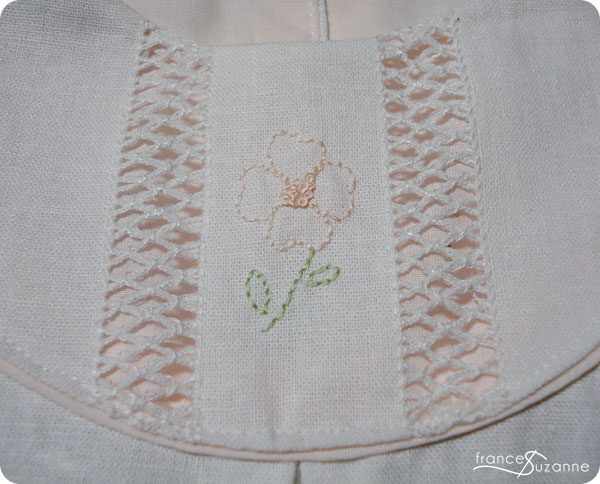
The dress was made from white linen and accented with a light peach batiste on the flat piping and yoke lining areas. Our focal point for the outfit, using drawn thread, was in the yoke piece portion. A large rectangle of white linen was cut – with dimensions large enough to fit the entire front yoke across. The center was marked, as well as the area marked for the two ruffles on either side of it.
Heritage Shoppe was our starting point / online tutorial to guide us through the drawn thread process. Martha, of Southern Matriarch {to see her flawless, professional version of drawn thread, check it out here}, was also extremely helpful in our drawn thread quest {although in the end we went a bit rogue}….
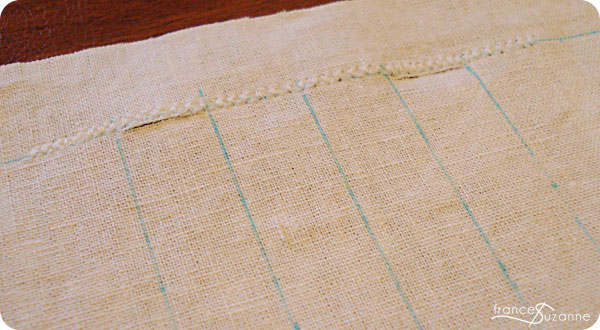
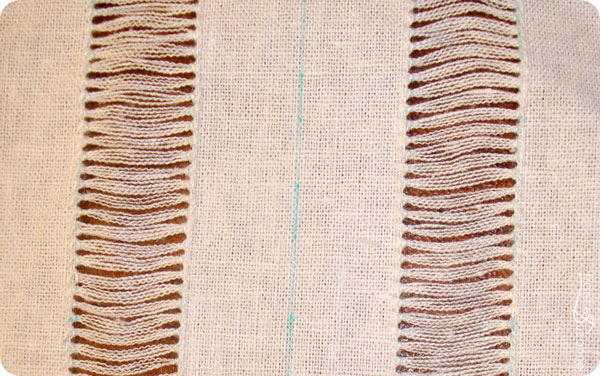
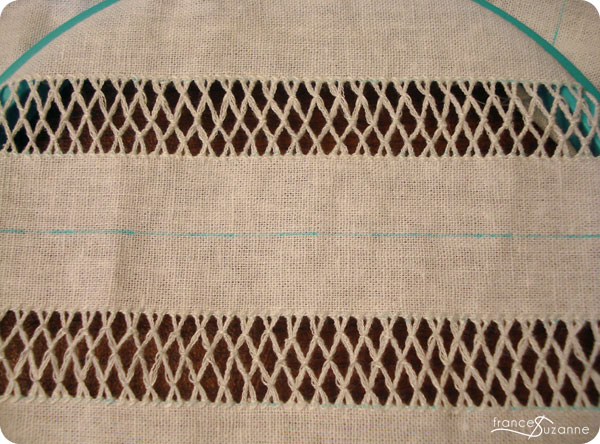
Edges were secured with a buttonhole stitch, and slits were made on the inside edges of the ruffle area.
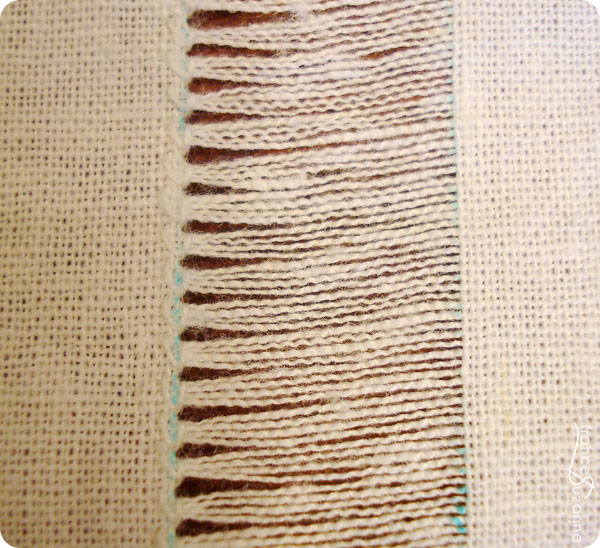
The ruffle areas were prepped for ‘drawn thread’ by removing threads within the given space.
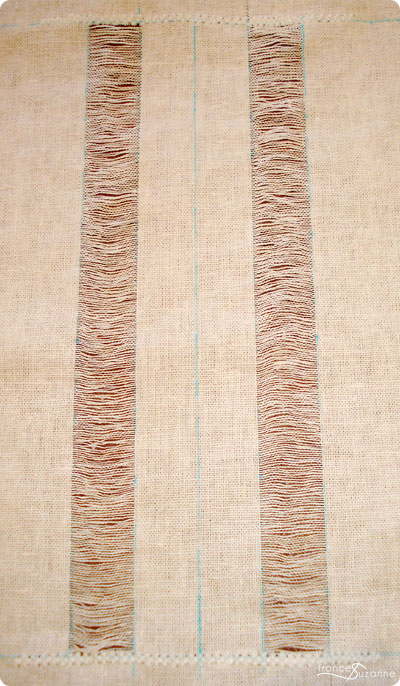
The sides were gathered in groups of four threads. One side of four done {photo below}.
Then, two sides done {photo below}.
And finally, all four sides were completed {photo below}.
The drawn thread design was painfully completed…..and no, that is not a typo: painfully!
{note top portion of the hoop embroidery….blech!}.
Needless to say, half of it was done again….living and learning by our novice mistakes.
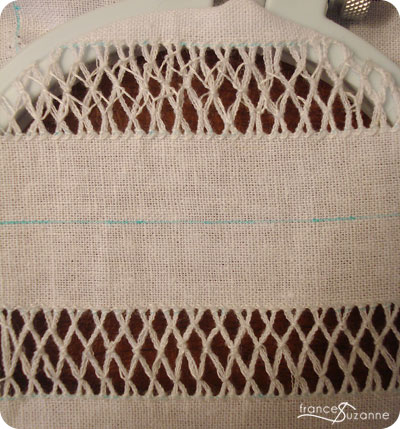
The yoke was traced on the rectangle.
Then, prior to cutting the yoke pattern piece, we reinforced the drawn thread area by zigzag stitching and adding a thin layer of liquid glue to it.
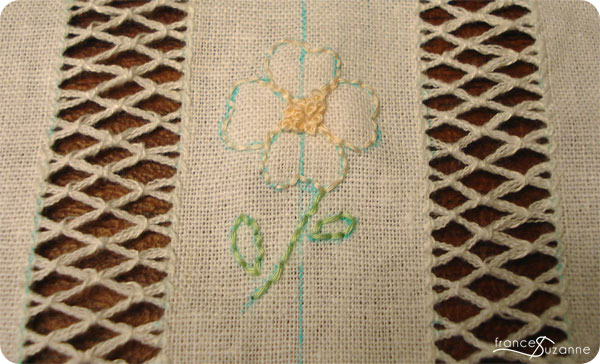
A small, shadow-embroidered flower was added to the center yoke. And, yes…we added our ‘signature’ French knots to the flower’s center portion…
Peach lining was placed underneath the drawn thread yoke.
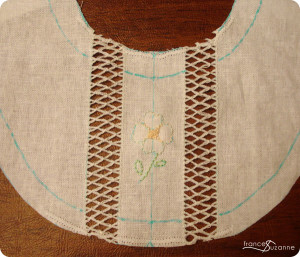
The yoke was then added to the main dress, and the results are shown below.
Unfortunately, we finished this “Lost Art” at the ninth hour, so there are no model shots to go with this post. And, it is our opinion that model shots make for a much more interesting post….just saying.
Now, truth be told, there might, or might not, have been a few tears through this process {at least by one of us}….but in the end, we’d both say: 1) we are glad we semi-learned the art of drawn thread and 2) we wouldn’t count it out of future sewing endeavors!!
Thanks so, so much ladies! I literally had to stop and e-mail back when I was pulling the html into this post and saw their project for the first time. uh-maz-ing! I’m already thinking up where I could use this technique!


This is gorgeous! And so labor intensive. But such a beautiful result!
Amazing! I never knew how this was done… learn something new every day…
Great job trying something new! This is similar to the hardanger embroidery I’ve done in the past. I’ll have to look into this method. It looks fantastic!
WOW! Stunning! I think I’d have to use some scrap linen to practise on a few times first but thank you so much for sharing 🙂 x
It is wonderful to see young sewists trying new to them techniques. This “lost art” is alive and well being preserved by the Smocking Arts Guild Of America. SAGA http://www.smocking.org is the website. Visit us and maybe you just might find another “lost art” we are preserving. Susan VH
Thanks for pushing us to try something new, Jenn!!! It’s been fun sharing with your readers today…
Wow! Beautiful! This dress is gorgeous! I haven’t done any hemstitching. (I can hardly believe that is true!) I love the peach colored fabric behind the handwork. It shows it to perfection.
Wow! It’s gorgeous!