
Browsing on Amazon, one of the cool things for books is the “Look Inside” feature.  It’s a great way to virtually flip through the pages and decide if the book is what you’re looking for.  That’s what I want to do for my patterns – give a tour to help you make a buying decision.
You can always download one of my free patterns, but those are simple designs and usually only one or a few sizes. Â One exception is the Naples Collar which is sized for newborn to 12 years. Â It’s probably the best sample of what a full Jennuine Design pattern includes. Â But humor me for a bit while I talk about what I offer in my patterns:
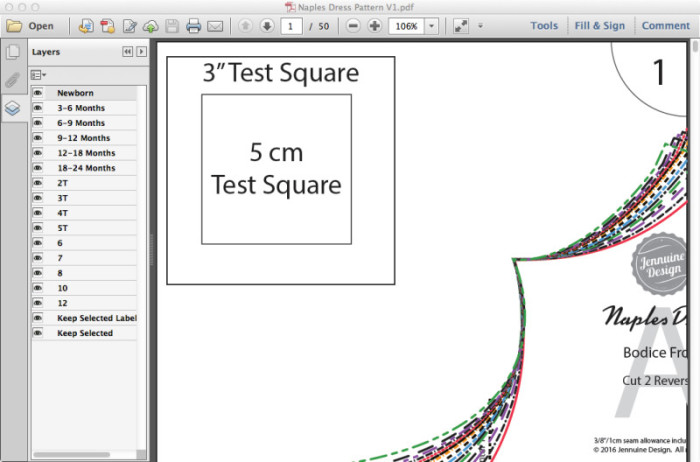
All Jennuine Design patterns have layers. Â I’m pretty sure everyone has heard of layers by now but just in case you’re new on the scene, they’re just about the most awesome feature of a digital sewing pattern aside from the design itself. Â You can turn individual sizes on and off, so you don’t have to try to follow your size while cutting. Â Need to combine two sizes? Â Just keep those two sizes on and blend between them.
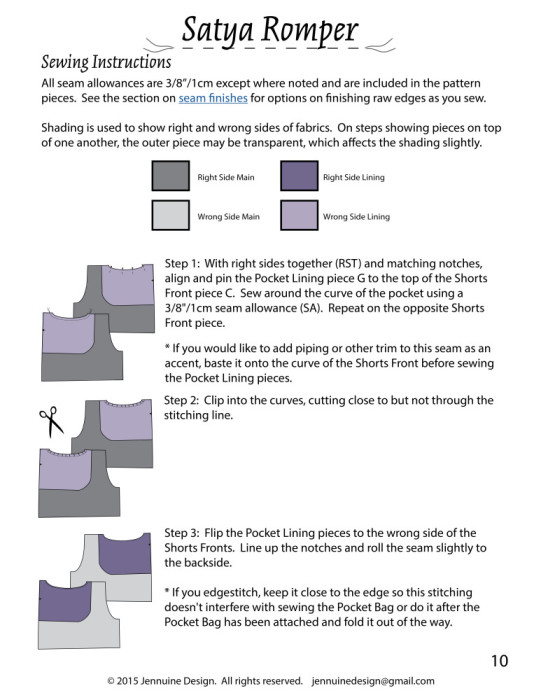
The tutorial is illustrated. Â I know there are those of you who prefer full-color photos, but hear me out. Â My computer drawn illustrations always have an obvious front and back side, don’t have patterns that could make it difficult to see details, are always consistent throughout the instructions, and here’s the kicker: parts can be made transparent so you can see what’s going on underneath. Â You can’t do that with a photograph. Â They also helped me transition easily for printed patterns.
I know, I know there are still some things that just aren’t easy to describe with illustrations – or photos for that matter. Â That’s why I have video tutorials for construction techniques that need a little more information.
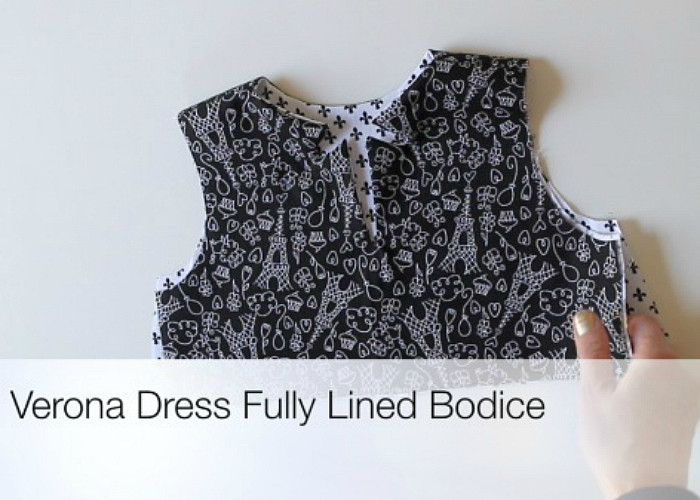
I’ve made a video for the “burrito roll” method for the Verona Dress, one for a similar technique on the LOL Swing Top, and another for shortening a zipper on the Moto Jacket.
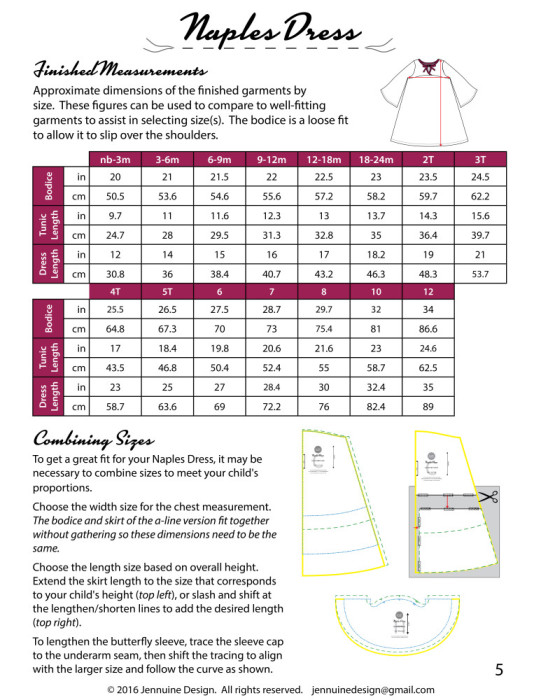
Both body measurements and finished measurements are given to help decide the size to make, and if you need to blend sizes there’s a section that describes how to accomplish that.  I’ve also started Fitting Files to help with specific challenges that might require a different approach.
The next two features from the pattern listing don’t really have an image to go along with them: full-sized pattern pieces with seam allowances included, seams are finished or enclosed for a professional result – I’m a fan of French seams, flat-felled seams, enclosed waistbands, casings and the like.
Measurements given in imperial and metric throughout – that means in every table, every time I mention seam allowances or distances, for fabric requirements, the scale square, etc. Â I’ve become VERY familiar with metric conversions!
Those are the features I bullet out on the pattern listings, but here’s a few more things, and some of these are less tangible:
I try really hard to prevent common mistakes and minimize head scratching/frantic scrolling moments.  For example there’ll be a prompt in the instructions to press hem allowances before sewing side seams or  sleeves.  Then when it’s time to hem you’re not trying to press in the round; it’s much easier to get an even hem on flat fabric.  If there’s a logical spot during construction to insert a size or care label, I’ll point that out.
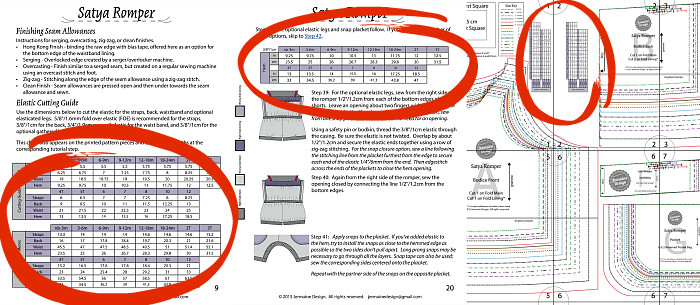
A great example of putting the information where it’s needed is the elastic guide for the Satya Romper. Â It appears just about anywhere I could think it could be helpful. Â There’s a large table in the introduction section of the tutorial, the specific lengths needed at the step – like here for the elastic at the back of the bodice, and the full tables appear again on the pattern pieces so you can keep it handy in printed form.
If I have a great method or trick for something, I’ll point that out in the tutorial. Â Some of these are from testers – one of my favorites is when clipping the shaped neckline of the Verona Dress, to stagger the snips between the main and lining fabrics to help prevent snipping through the stitching line – thanks Bonnie!
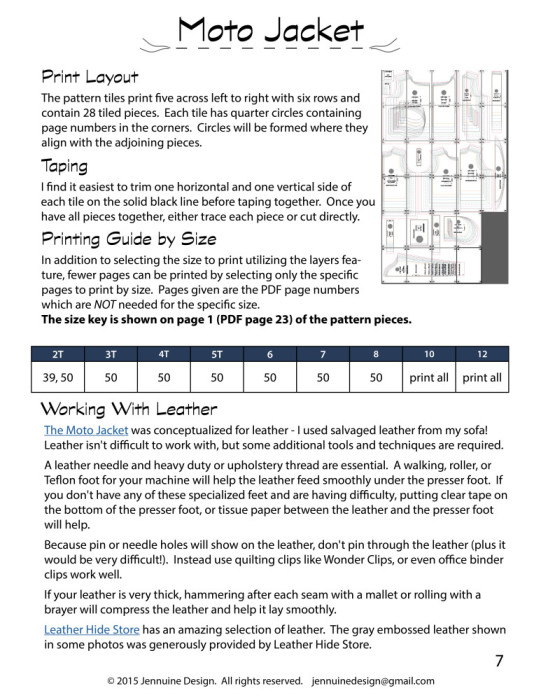
I give a printing guide by size to try to minimize the number of pages needed to print. Â This example from the Moto Jacket is the most simplified. Â The one for the Naples Dress was an entire page because I listed the pages by size and option – and frankly that pattern ended up having a TON of pages in total because each option was a space hog – Â if you print just the option/size you need it’s totally doable – I literally just pieced together a 5T butterfly sleeve, gathered skirt dress with a wide bow and it took me less than 10 minutes. Â I try to place the nested groups the best way possible to conserve paper which often means flipping or rotating pieces and paying attention so that if a piece for the smaller sizes can fit on one page I don’t make it span two or more.
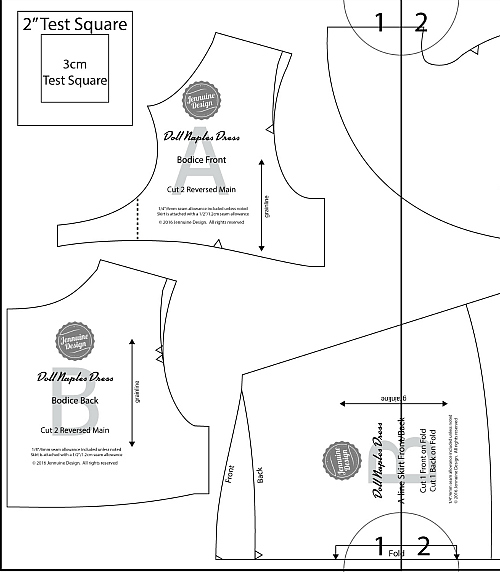
This image is from the Doll Naples Dress, but It illustrates the next point well: Seam allowances are trued. Â That means when you sew the bodice front to the bodice back at the shoulder, the stitching lines and seam allowances match. Â I’ve made a lot of patterns where that isn’t done and honestly it drives me batty! Â The last thing I want to do when I’m sewing is guess whether I should align at the neckline or the edge of the shoulder to make the bodice sew smoothly in later steps. Â Same thing with that little edge at the top of the skirt. Â For the doll pattern that only has one size I nested the front and back skirt on top of each other, so you can see how when that side seam is sewn it matches perfectly, and more importantly it transitions smoothly from the front to the back.
Another thing the image above shows are the labels and markings that are included: designer, pattern, piece name, cutting instructions, seam allowance, grainline and fold line if applicable, and notches or other markings. Â This is information that should be on all patterns.
I think that’s everything I wanted to cover – congratulations for reading through to the end! Â Now that you’ve made it through my infomercial, I‘d love to hear what feature is your favorite, or what feature you’ve seen that you’d like to find on a Jennuine Design pattern.
No comments yet.