

Jenn of A Jennuine Life:
This top was super easy to make and I was so happy when Shana from Ain’t No Mom Jeans affirmed my design choices with her amazing inspiration post! It does a pretty decent job of hiding my 21-week baby bump (and I get HUGE!), so it should do even better with the more modest demands of a postpartum jiggle belly!

I started with a yard of a polyester knit that had a nice weight and feel.
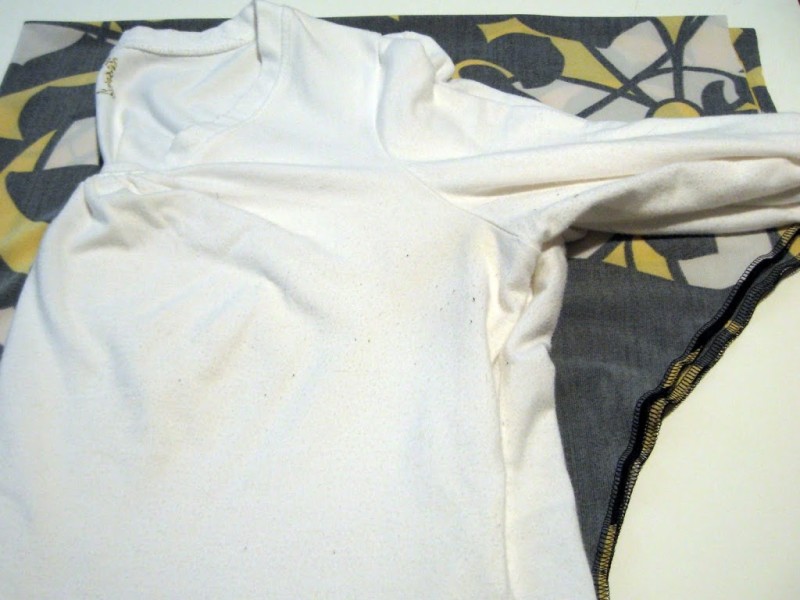
With the selvage edges together and then folded in half so the cut edges lined up, I laid a shirt folded in half lengthwise on top to use as a rough guide for cutting. I had the fold of the shirt a couple of inches over to allow plenty of extra space for gathering. For the sleeves, I just cut a gentle arc from the shirt sleeve to the side to create a bit of a Dolman sleeve. I used Nina, my serger to sew and finish the edges, but you could sew a seam with a regular sewing machine and using a ball-point needle and finish the edges with an overcast or zig-zag stitch.
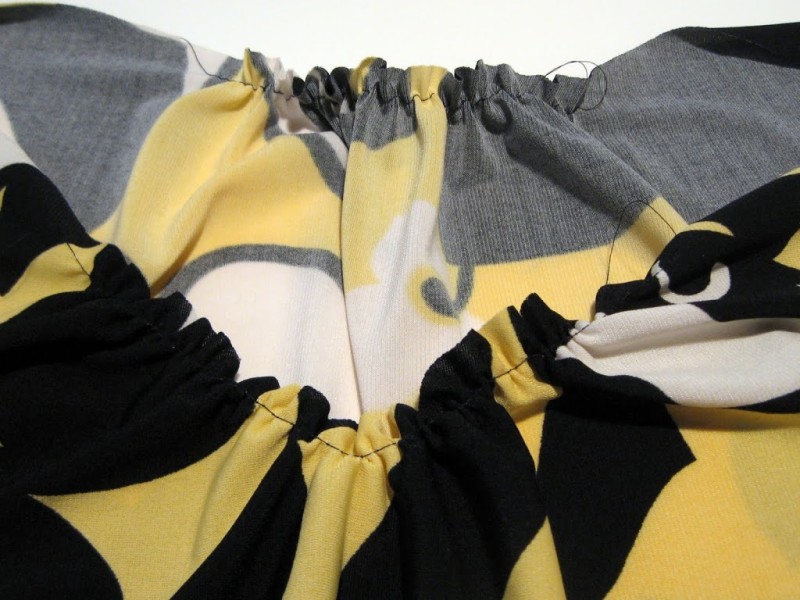
For the neckline I cut a deep, wide V and a gentle arc across the back. This would be on the fold at the top of the piece. I ran a gathering stitch on front and back to take up the extra fabric I allowed when cutting the side seams. I finished the neckline using strips of the fabric I cut away from the sides; making a long strip and folding it in half wrong sides together. I aligned all the raw edges with the strip on the right side of the top, sewed, finished the seams, and then turned the edges under and topstitched. You could easily do a folded edge, or use bias tape to finish the edges however you prefer.
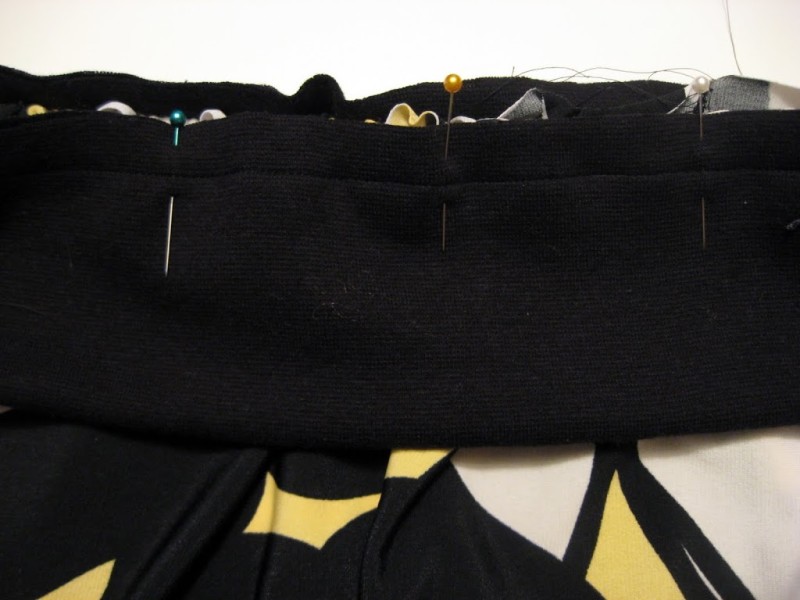
For the waistband, I cut a strip of ribbing to fit snug to my hips. I sewed a side seam and turned that seam inside to make a folded band. I ran a gathering stitch on the bottom of my shirt, but you could also just stretch the ribbing to match up to your shirt. With right sides together, I ligned up the raw edges and sewed a seam. Finish the edges, and then turn the edges inside and topstitch.
For the sleeve edges, I turned the edges under about 1/2″ twice and topstitched with two lines of stitching.
Voila! A pooch (or in this case bump!) hiding shirt in way under an hour!


See? There’s a baby in there!
Comments are closed.