
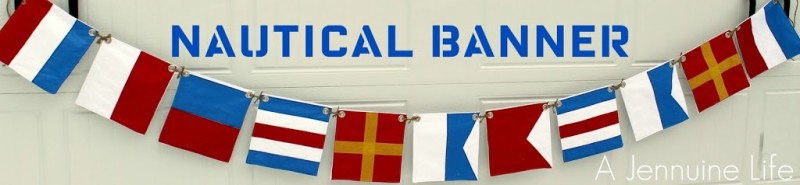
When I set out to make this banner for my parents I had intended to make it for their home – called “the crab trap“, but my Mom thought it might get more use on their golf cart – “the crab cart“. After I had finished the project it dawned on me that TRAP and CART only differ by one letter. So, I whipped up a “P” and took photos for a tutorial along the way.
First, I used this site to translate “the crab cart” into nautical signal flags. I decided to make the flags 9″ square because most of the pieces of the flags were divisible by 3. It would be even easier to make them 12″ square because then you would easily have halves, thirds, and quarters. I could be any size, just whip out a calculator and go to town.
Nautical FlagSkill Level – Beginner
Items Needed –
* Fabric
– white cotton canvas – 10″ width for every 3 flags desired
– ripstop nylon in blue, red, yellow and/or black as needed. I didn’t have any flags with black in them, but I, L, and Z do.
* coordinating thread
* grommet tool and grommets
* jute twine or whatever you want to use to connect the flags
* rotary cutter and self-healing mat
* sewing machine
* iron
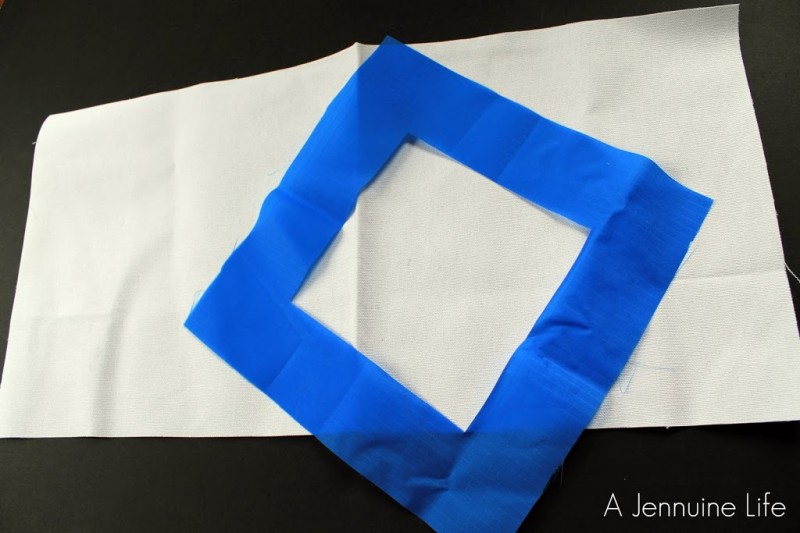
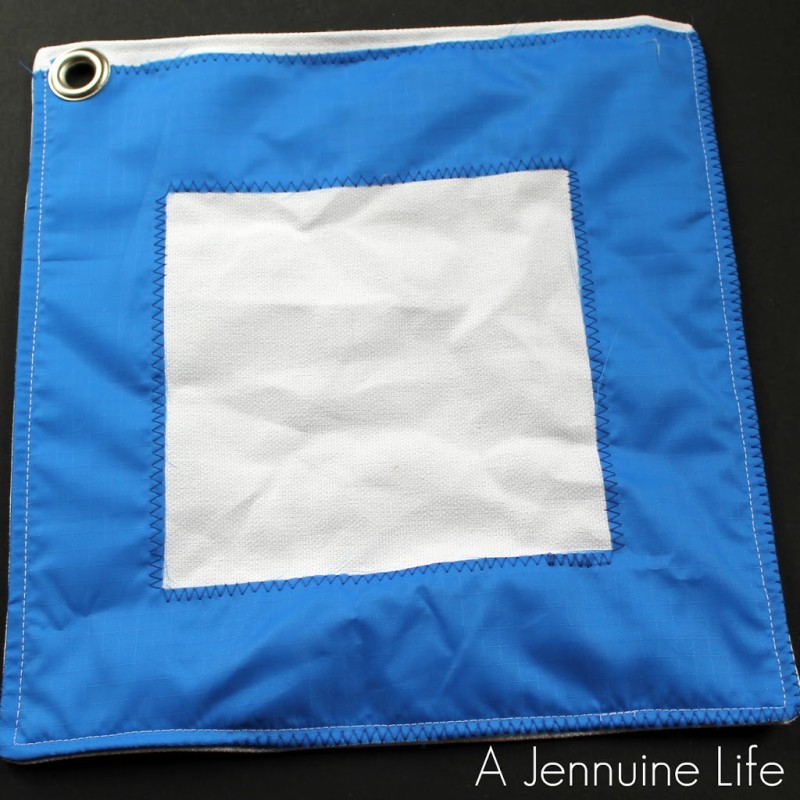
1. Using the rotary cutter and self-healing mat, cut the canvas into strips 9 1/2″ wide and then 18 1/2″ long for as many flags as you are planning.  It’s 18 1/2″ vs. 19″ because you don’t have a seam allowance on the fold. Cut the ripstop nylon – for this letter “P”, I cut a 9″ square and then folded in half each way and cut out the middle leaving a 2″ frame. The more accurate your cuts are for this step, the easier it will be to sew and will make a nicer flag.
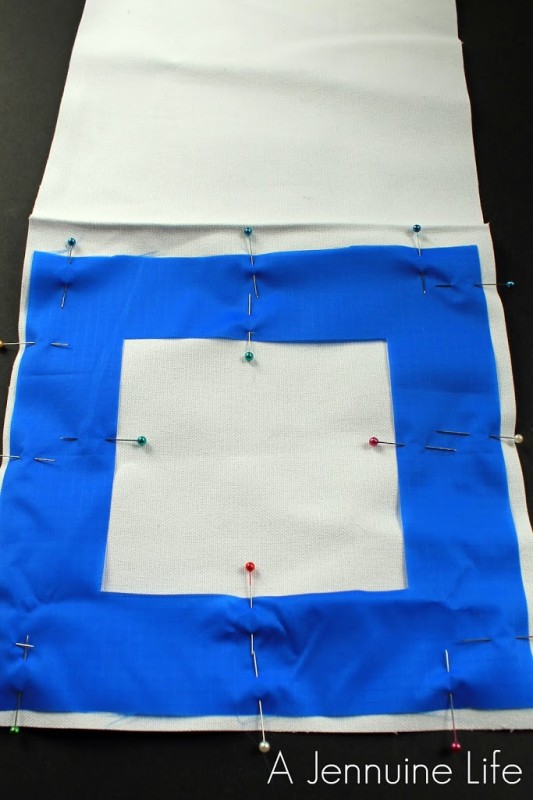
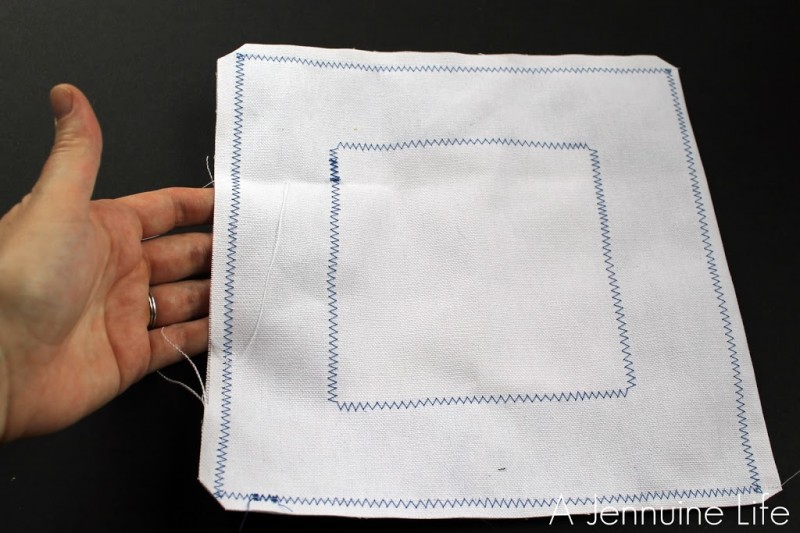
2. Pin the nylon in place on the bottom half of the canvas, leaving a 1/4″ border for the seam allowance. I placed mine at the bottom so the fold would be at the top making it easier to put the grommets in – less bulk from seams.
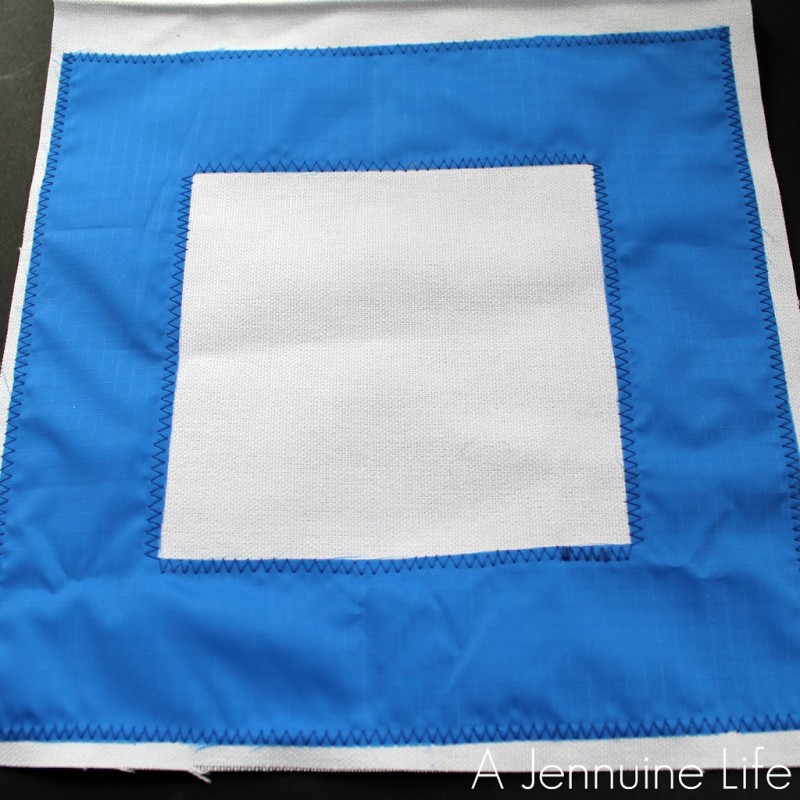
3. Using a zigzag stitch and coordinating thread, applique the nylon onto the canvas. I made my stitch slightly wider and shorter than the default for my sewing machine.
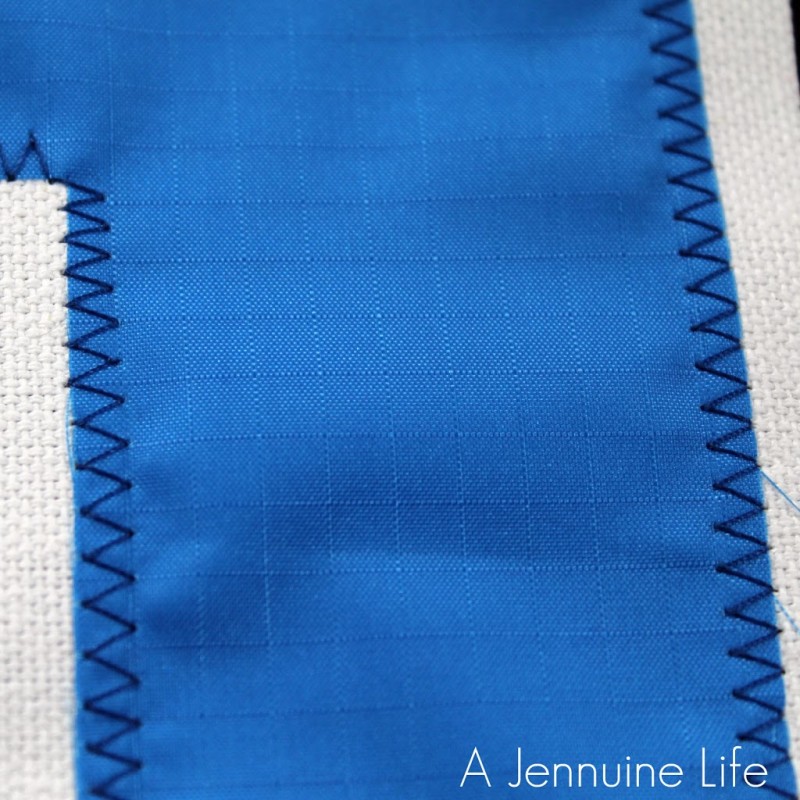
Make sure to test to see where the needle drops so you can sew right along the edge of the nylon.

4. With right sides together (RST), fold the flag in half. Switch the thread to white to coordinate with the canvas.
5. Leaving about a 4″ opening for turning and backstitching at beginnings and ends, sew along the three sides with a 1/4″ seam allowance. I found it unecessary to pin this step, I just started at the edges of the opening and sewed towards the fold for each side. Clip the corners to reduce bulk after turning.
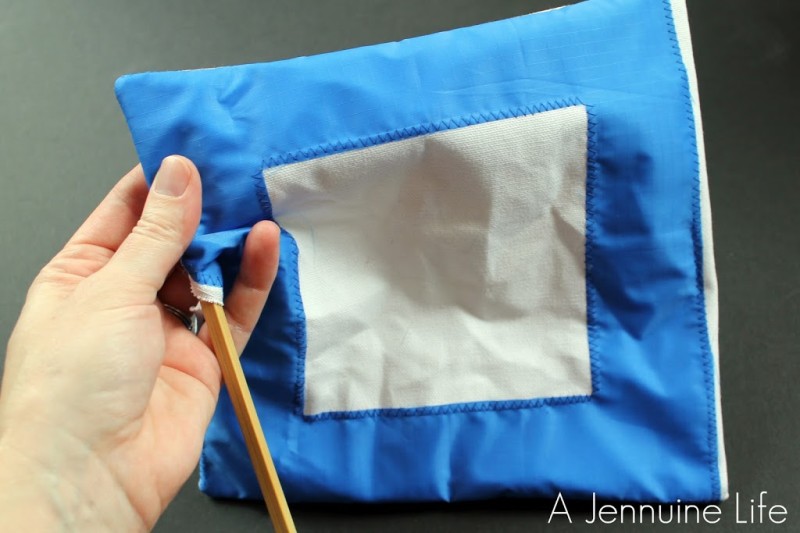
6. Turn the flag right side out. Use a chopstick or similar tool to push the corners out nice and square. Iron using a low heat setting appropriate for nylon. I also ironed from the backside.  (I skipped this step for the flag pictured because H was sleeping in the same room and I didn’t want to haul out the ironing board). Make sure the seam allowance along the opening is turned in and lined up.
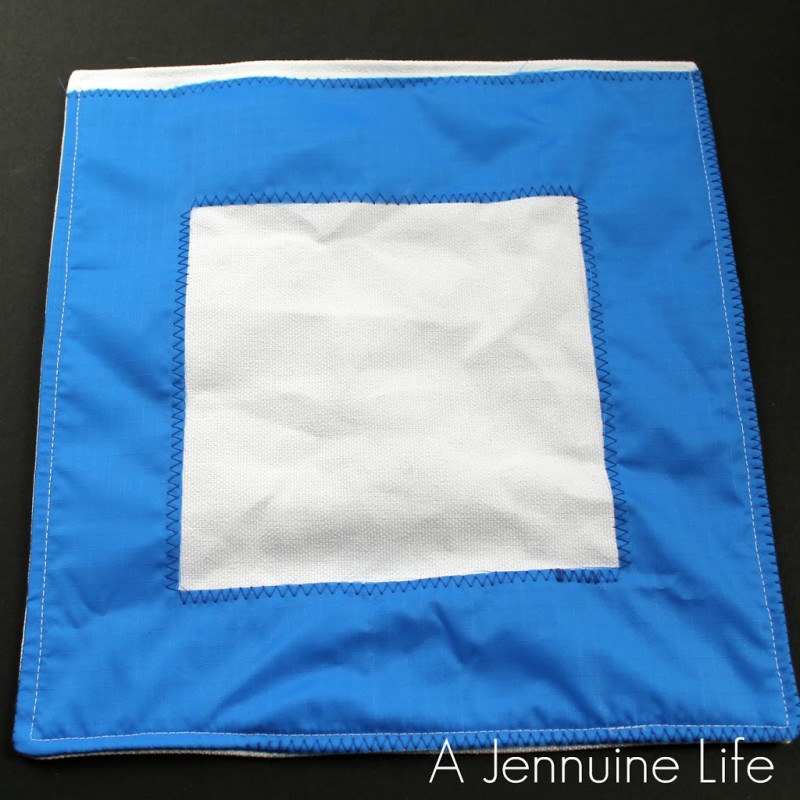
7. Topstitch about 1/8″ from the edge.

8. For the grommets, the cutting plate that’s part of the tool didn’t begin to cut through two layers of heavy cotton canvas, so I folded the flag over about 1″ from the top and sides and made a small cut to get an opening large enough to fit the grommets through.
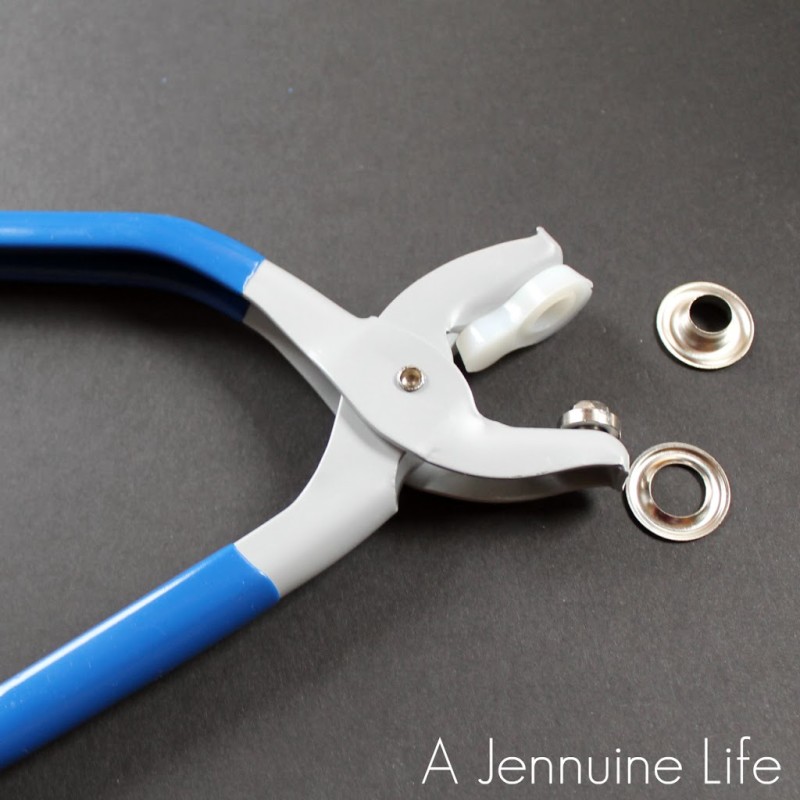
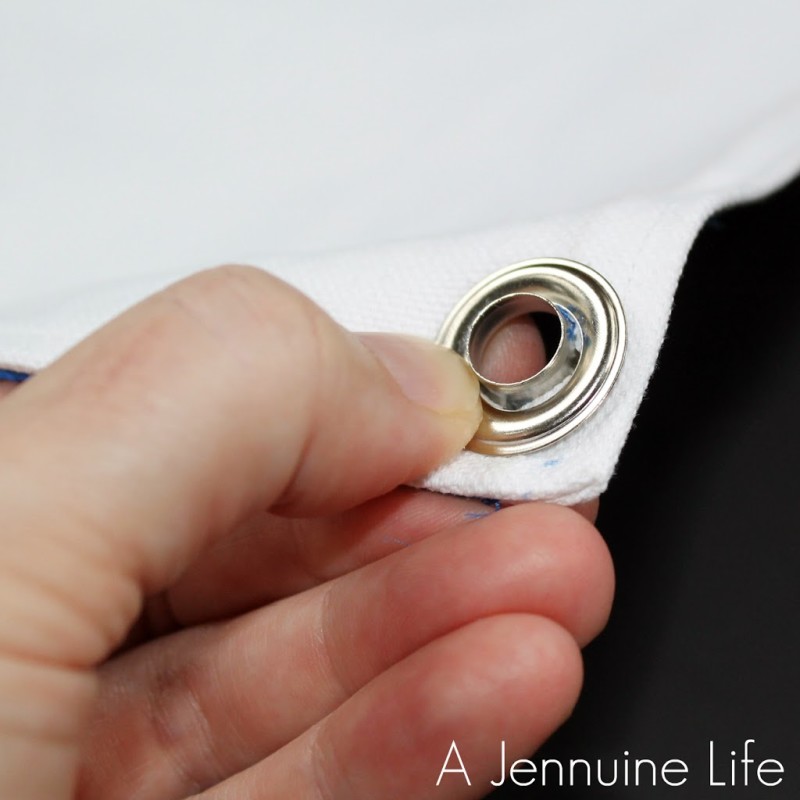
9. Put the part of the grommet with the cilindar sticking out through from the front side. That collar piece is what gets pinched and folded over and isn’t as pretty. Put the ring on from the backside with the domed side out.
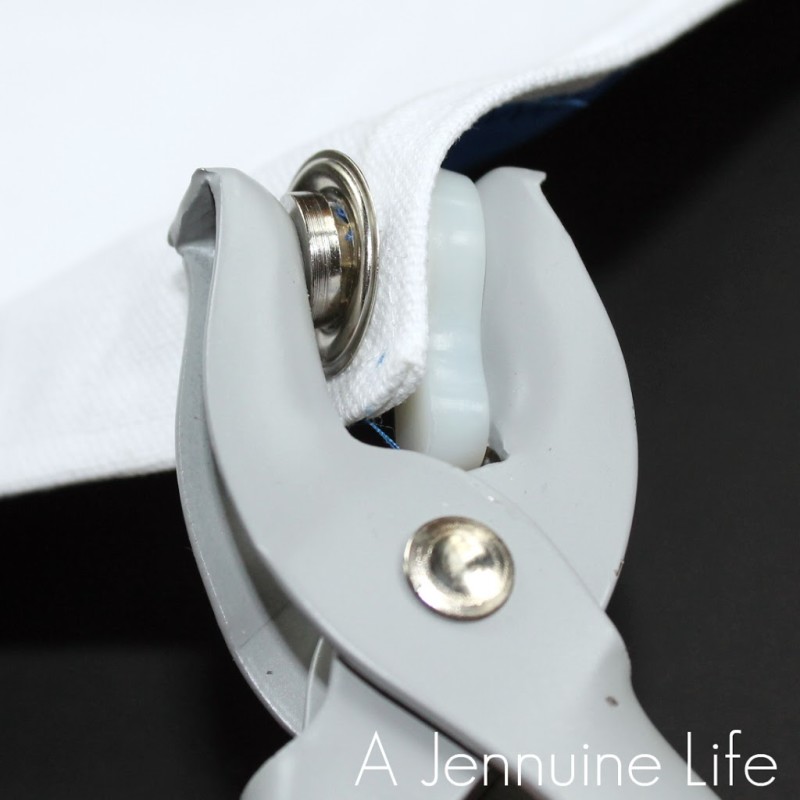
10. Line up the grommet pliers and squeeze with all your might. It gives good resistance and then you’ll feel it squeezing the collar piece.
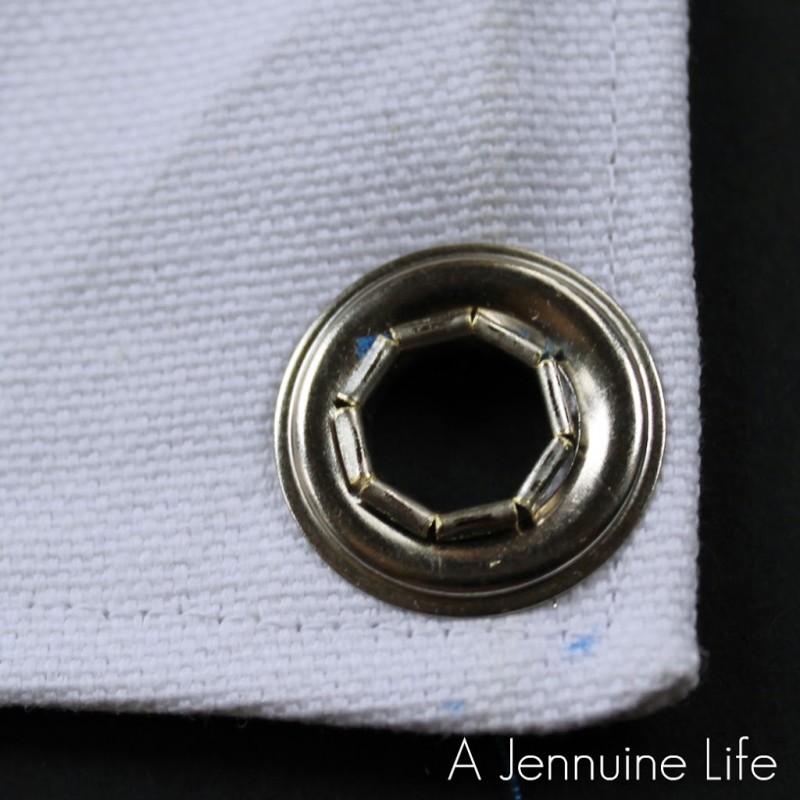
I’m one grommet short since I had to do a test one when I began the project to be sure I was doing it right.
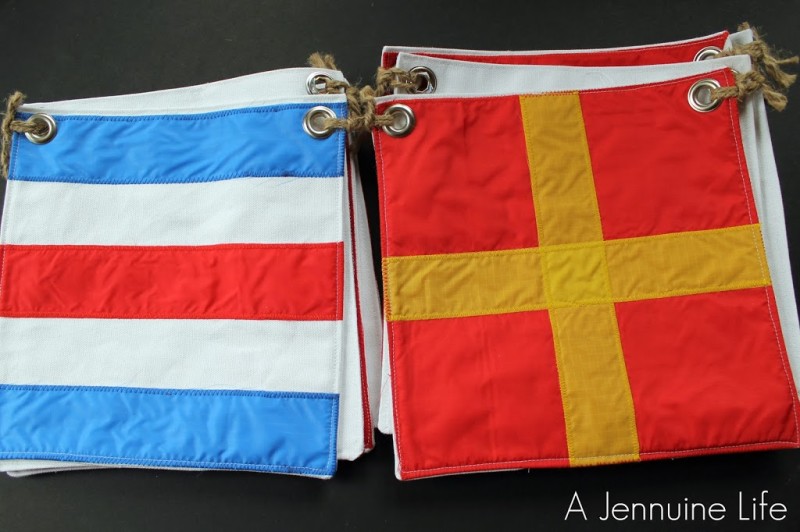
I cut 9″ lengths of the twine and put a looped end through one grommet, the cut ends through the loop and then through the next flag’s grommet and tied the ends around the part going between the flags.
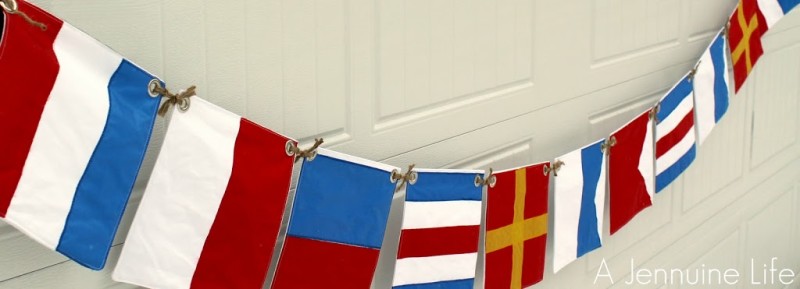
I really enjoyed this project – I think it would be fun for a boy’s room (or a girls!), or as part of cottage or coastal decor.

Linking to:
Comments are closed.