If you missed the first post for the Every Occasion Dress and the Ruffled Apron – check it out here.
This totorial is for the second of the two interchangeable aprons – the Banded Apron. This one is even easier than the Ruffled Apron since there is no gathering involved.
Every Occasion Dress – Banded Apron
Skill Level – Beginner
Items Needed –
Fabric – 1/2 yard main fabric and 1/3 yard coordinating fabric
Coordinating thread
Buttons
Sewing machine
Iron
Dimensions given are for a 2T apron. Adjust accordingly to get desired size – though the dimensions would probably work well for a pretty good range of sizes. Sew with a 3/8″ or 1/2″ seam allowance; keeping the same allowance throughout the project. I used a 3/8″ seam allowance.
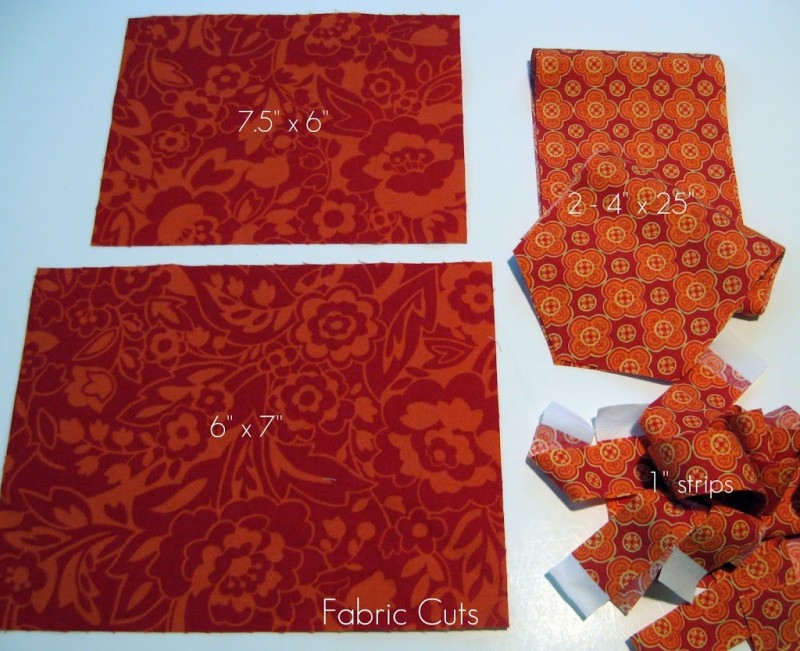
1. Cut Fabric – My cuts were 7.5″W x 6″H for the top, 6″W x 7″H for the bottom, 2 pieces cut 4″ x 25″ for the sash (cut angles at the edges to make an angle for the end), and several 1″ strips for the bands around the bottom and top.
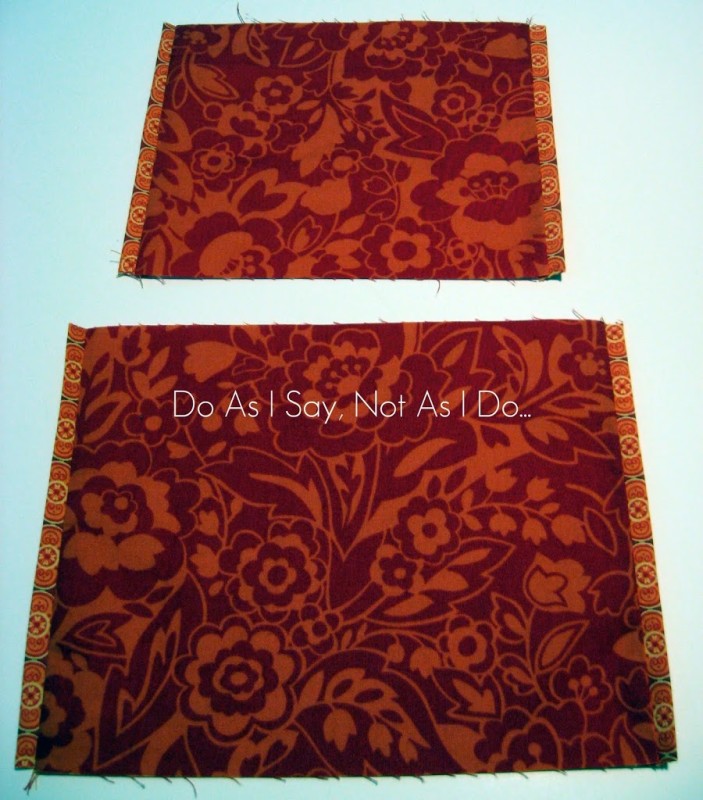
2. Sew Top and Bottom Bands – The photo is labeled Do As I Say Not As I Do because I overthought this step for this version and changed the order of attaching the bands thinking this would work better. It didn’t. Press your 1″ strips in half with wrong sides together (WST) and sew to the top of the top piece and the bottom of the bottom piece with raw edges aligned. Finish edges. Trim bands to line up with the outside edges. Press bands to the outside of the pieces.
3. Sew Side Bands – Since I had to get a bit creative with mine since I did it out of order, there’s no photo for this – sorry. Open one end of your pressed 1″ strip and fold 1/4″ inside then refold it closed. Align this edge with the bands attached in step 2’s outside edge of the piece and align raw edges as in the Top and Bottom Bands in step 2. Repeat with all four sides. Finish edges. Trim the bands to line up with the inside edges. Press bands to the outside of the pieces.
4. Finish Edges and Topstitch – Finish the edges of the bottom of the top piece and the top of the bottom piece using a serger or a zig-zag stitch. Topstitch close to the edges of both pieces.
5. Make Sash – This step is pretty self-explanatory, so no photos. Sew the short straight sides of the two pieces together with right sides together (RST). Press the seam open and then with RST and edges matching, sew from the outside edges to near the middle leaving a gap for turning and then continue sewing from near the middle to the other edge. Turn right side out through the gap , press, and topstitch around the entire sash near the edge; closing the opening left for turning.
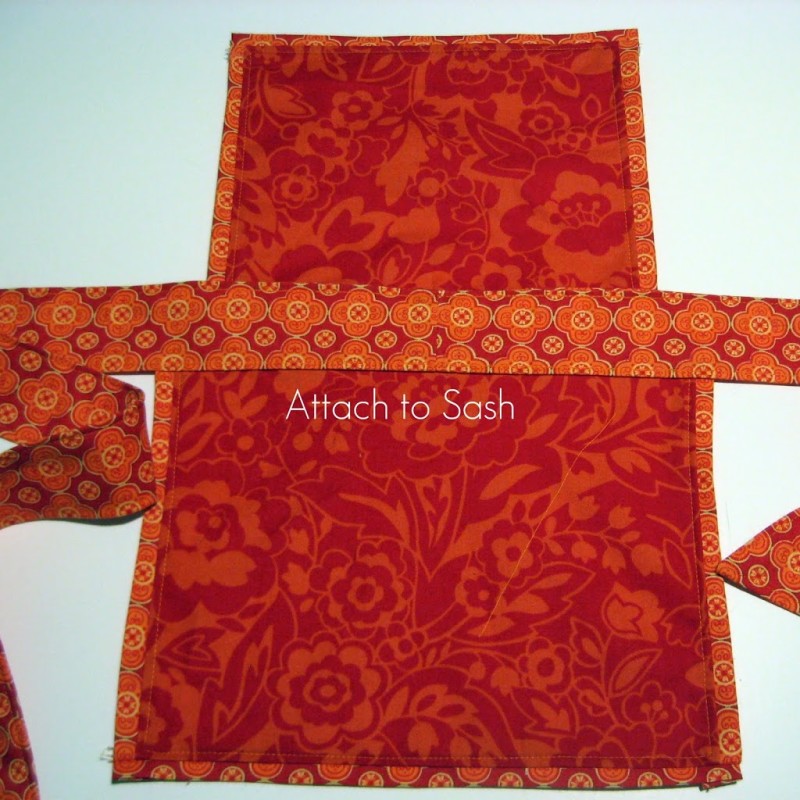
6. Attach Top and Bottom Pieces to Sash – Pinning from the top and lining up the inside edge of your finishing stitches with the topstitch line on the sash, attach the top and bottom pieces, making sure the centers of the sash and both pieces are in line. Stich in place over top of the topstitching on the sash.
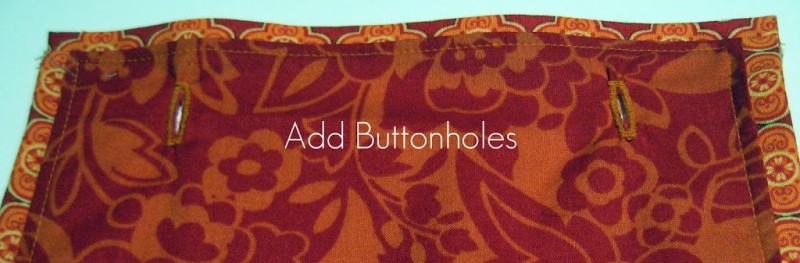
7. Add Buttonholes – 4.5″ apart from center of the top of the apron, and just below the toptitching. Normally, I would add a little interfacing behind since this is only one layer of fabric, but it’s only holding the top of the apron up and I didn’t think it was needed. You can add the interfacing if you’d like.
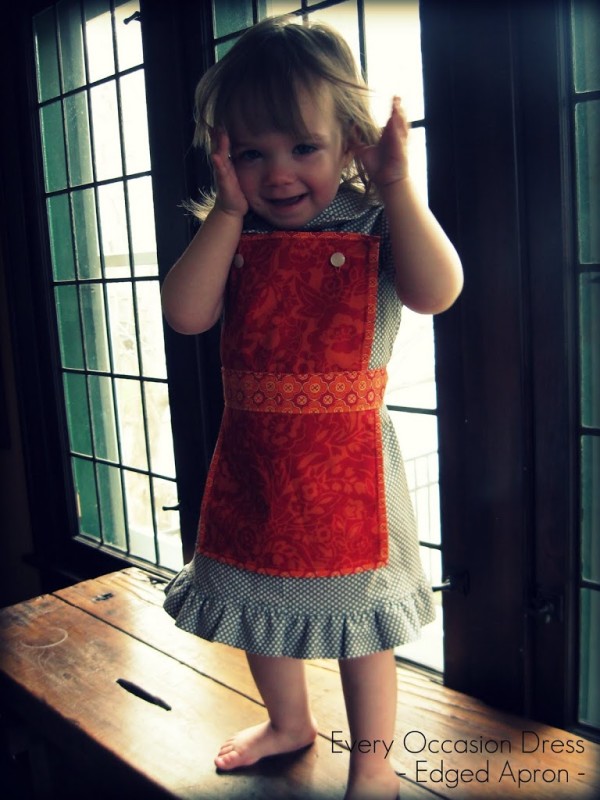
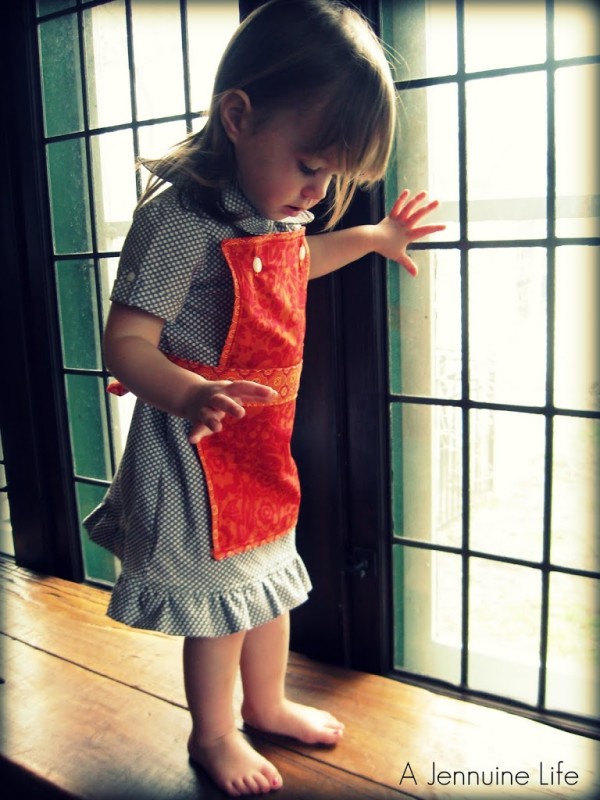
Button the top part to the dress and tie the sash around your little cutie’s waist and you’re all set for any occasion!

This is very cute, thanks for the tutorial.
so pretty! thanks for sharing!
This is such a well written tutorial. I’m pinning it and hope to make it soon. When I do I’ll link it up to your Thursday party so you can see it. My almost 3 year old son has been begging me for an apron, but I’ve been so busy trying to keep him in pants and shirts I haven’t had time to do it yet. Perhaps that’s a good thing as I think I like your version the best of the ones I’ve seen and pinned so far. I’m so glad I’ve found your blog!
Thanks so much! I’d love to see your version and how you adapt it for a little boy!