
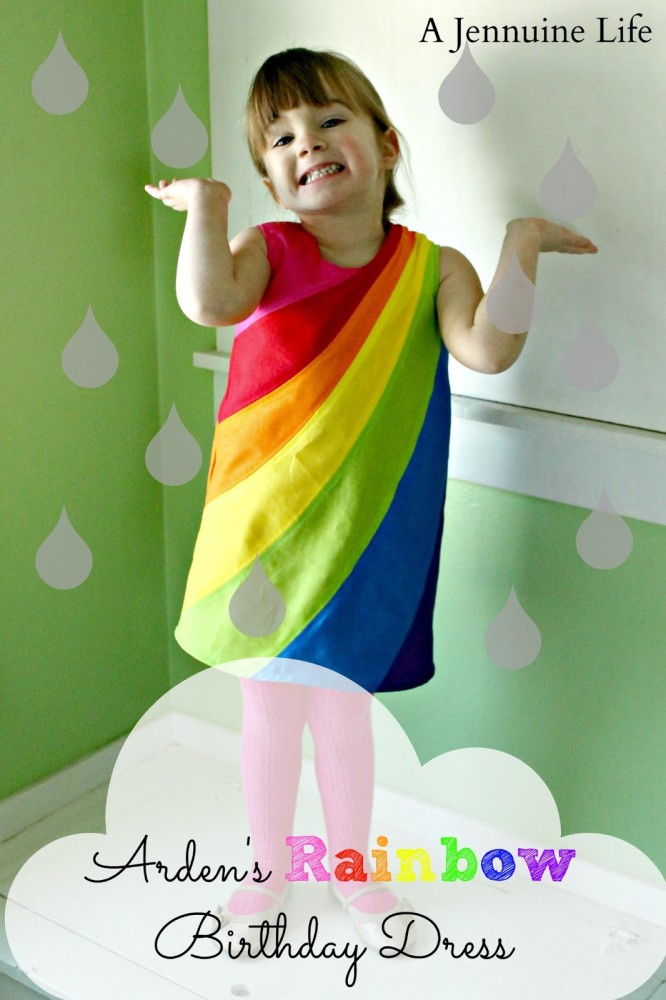
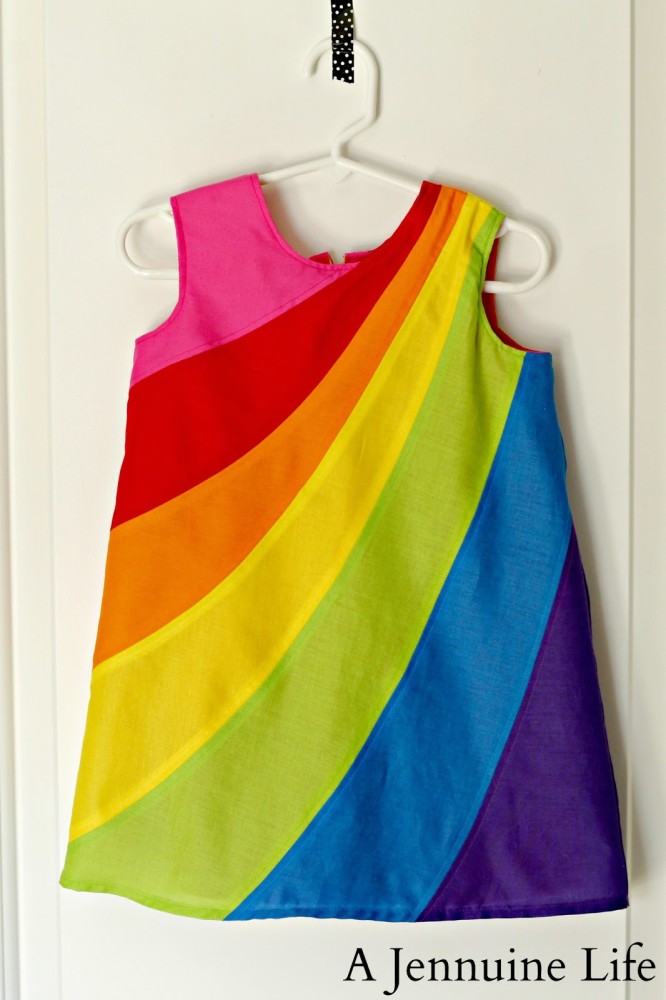
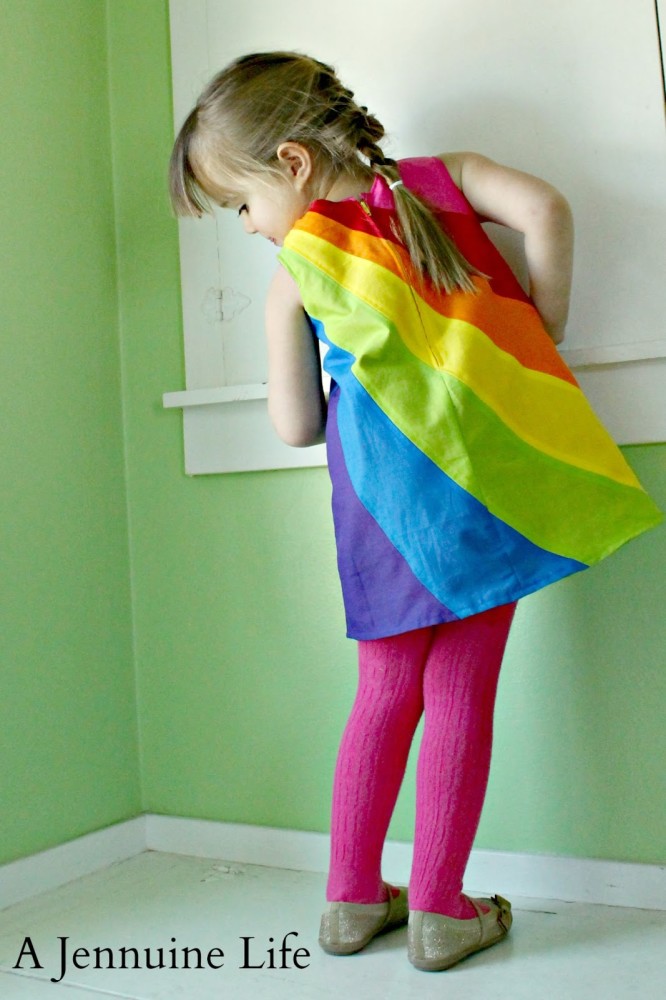
One of my really popular sewing projects was this pieced rainbow dress I made for Arden’s fourth birthday party. Â It’s been pinned like a bajillion times – don’t you just love Pinterest? Â When I posted it I said I would do a little tutorial for how to get nice flat seams when piecing curves – so here we go:
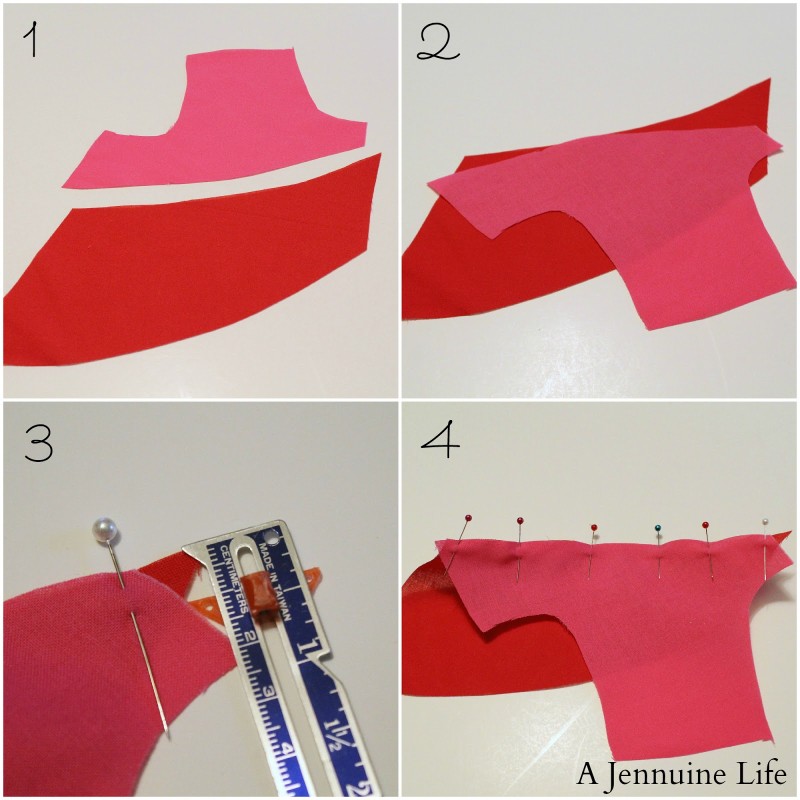
- You’ve got curved pieces which need to go together…
- But you can’t just match up the ends of the fabric because the stitching line is the width of the seam allowance away and that’s where you need to match up the ends…
- With the sewing edge aligned, slide the two fabrics until the point at which the edges begin to overlap is the same as your seam allowance. Â A sewing gauge comes in really handy for this.
- Repeat on the opposite edge and then ease the pieces together and pin.
If your sewing begins right at the intersection of the fabrics then you’ve done it right!
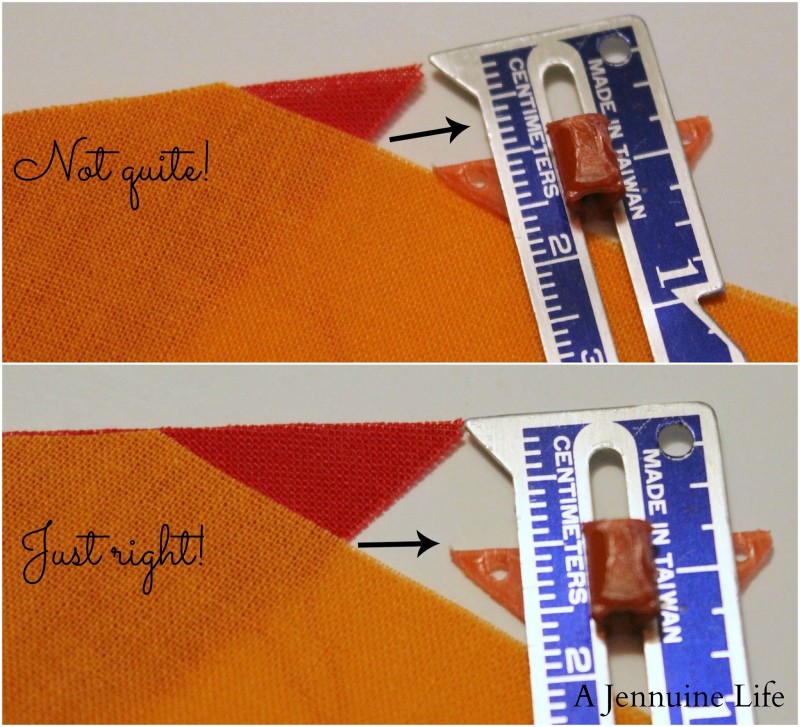
Clear as mud? Â Here’s another picture showing how I kept sliding the orange fabric to the left until the intersection lined up with the seam allowance shown on the sewing gauge. Â You want the ruler to be perpendicular to the sewing edge of the fabric.
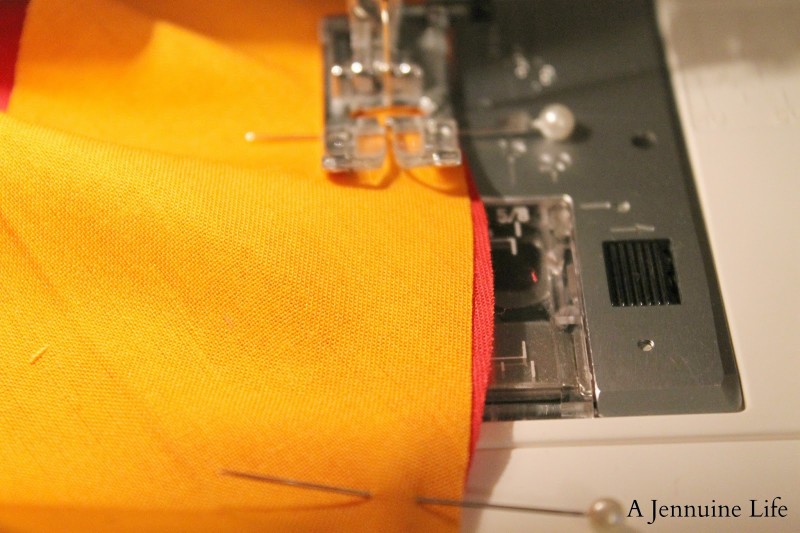
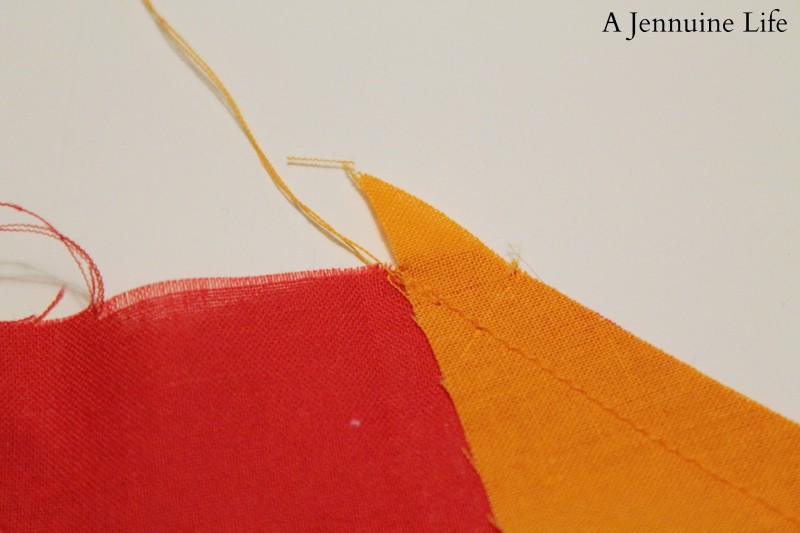
If you’re a lazy pinner like I am, then you might find this while you’re sewing. Â Here the two fabrics are not lined up along the sewing edge.
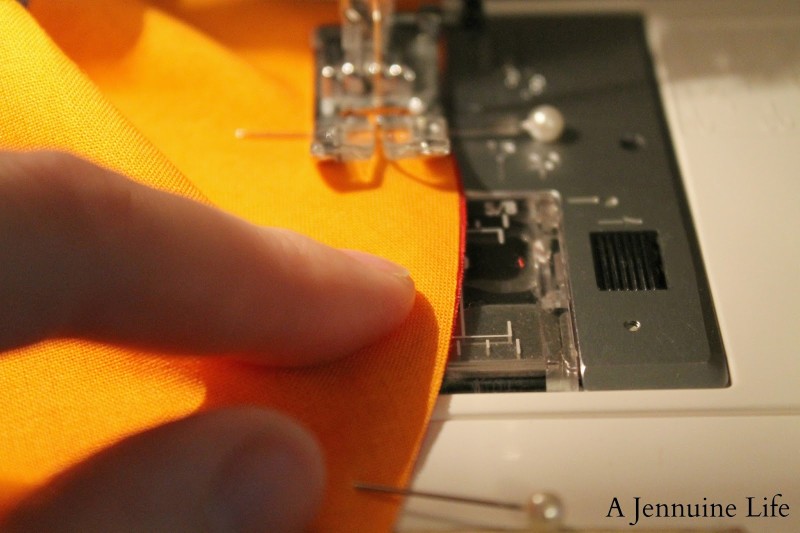
Just stretch and slide the fabrics until they match back up. Â The more precise you are in sewing these seams, the better your finished dress will be!
I even managed to line up the seams across the zipper; I’ll show my trick for how to do that:
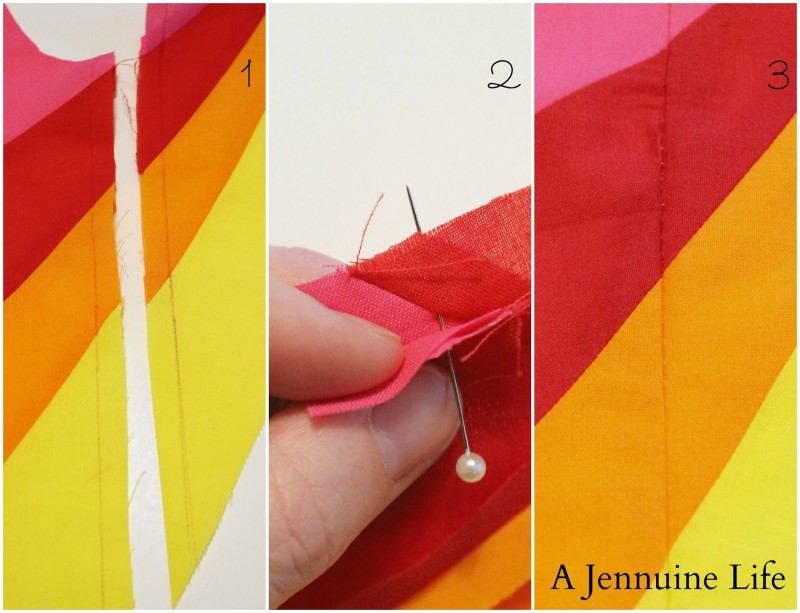
- Using a disappearing marker, draw a line where the seam will be on each side.
- Put a pin through each piece exactly where the line you drew and the seam cross. Â Then pin perpendicular to the sewing edge at each seam.
- Sitch (in this case baste since it’s the back where the zipper will be inserted) and admire all your matching seams!!

This is so cute. I love the bright colors. I bet your daughter loves it.
With Love,
Scary
Thanks for this. I came across your rainbow dress on Pinterest and am hoping to give it a go, as my daughter has just requested a rainbow dress. The curves look really cute – better than plain stripes. I hope mine turns out as good as yours… my daughter is 5 so it’ll take a lot of piecing!
I’m so glad! I’d love to see your dress!
HI, I love this dress,my granddaughter is turning 4 and I’d love to make this for her. What dress pattern did u use?