
Welcome to the first Fitting Files post! Â I intend for this to be a regular post here on A Jennuine Life as a companion to my Jennuine Design patterns. Â This post will cover how to make a narrow shoulder adjustment specifically for the Satya Romper pattern.
While kids generally require fewer fitting adjustments than adults, there are still some areas that can be improved to make garments as perfect as possible.  Patterns are drafted using body measurements that are averages of the population at specific ages (I use ASTM), so unless your child matches most of those averages for the key fitting size on the pattern it may not fit precisely as designed.
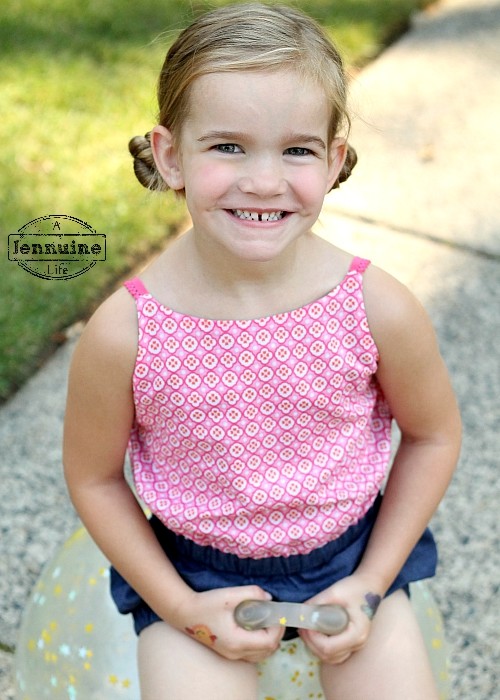
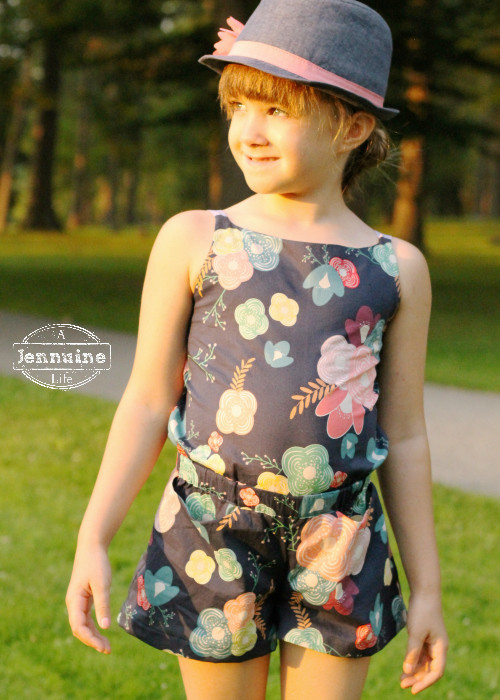
As you can see in these two photos, my daughters both have straight, square, and wide shoulders.  This narrow shoulder adjustment is not something I need to do.  If anything, I sometimes need to make a broad shoulder adjustment for them.  But if you find necklines gaping or shoulders slipping off your kids, you may need a narrow shoulder adjustment.
If you have a fitting text or search for a tutorial for a narrow shoulder adjustment, they typically address the shoulder itself, and slide or pivot the outer shoulder inward to make the line from the neckline to the shoulder narrower. Â With the straps of the Satya Romper and how the elastic attaches, we can’t just make it narrower. Â We also need to address the shoulder without making the waist any narrower, since that fits to the waistband without gathering and needs to stay the same.
So let’s get to adjusting the Satya Romper for kids with a narrower shoulder than the ASTM measurements!
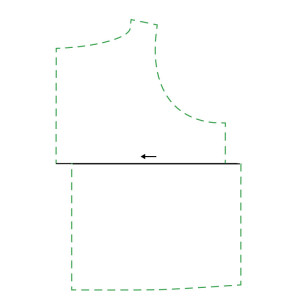
Starting with your front bodice pattern piece, grab a pair of paper scissors, tape, a pencil, and paper to fill in as you make adjustments. Â To see how much you need to move the shoulder, take a measuring tape and measure from one shoulder to the other where you want the straps to go over the shoulder. Â A good spot to aim for is where the shoulder dips downward at the end of the clavicle and the trapezius muscle attaches at the shoulder. Â Take half of this measurement and calculate the difference between that and the distance from center front to the middle of the strap attachment. Â This is the amount of your narrow shoulder adjustment.
If you’ve already made a Satya Romper and discover you need this adjustment, pinch out and pin the center front of the bodice until the shoulders sit nicely on your child’s frame. Measure one side of that pinch.

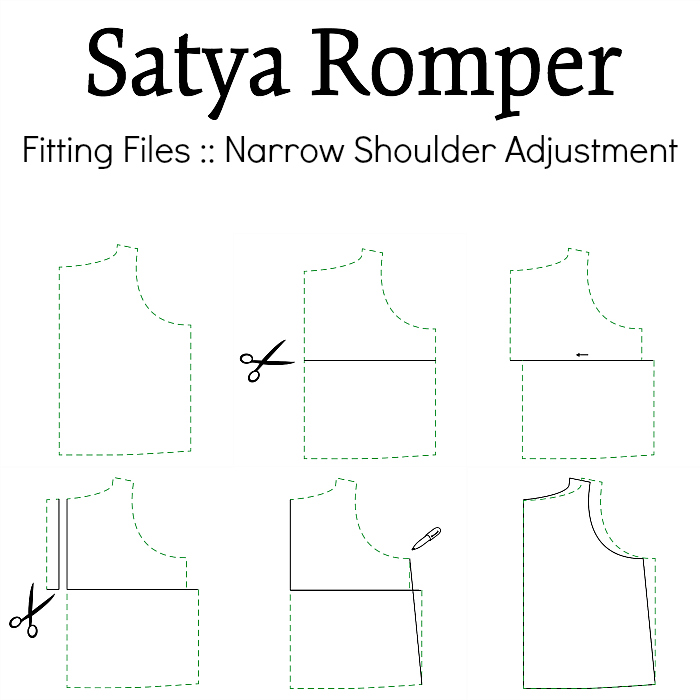
Slash horizontally across the pattern piece somewhere between the bottom of the armscye and the bodice bottom.
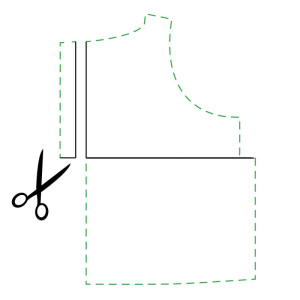
Slide the top of the bodice over the amount you calculated. Â Tape this in place.
Trim the excess off the center front creating a straight line at center front.
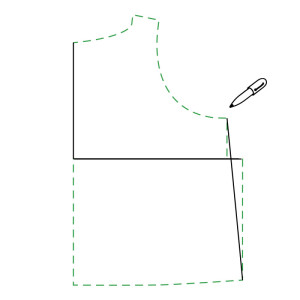
Draw a line from the bottom of the armscye to the waist edge, filling with paper as needed.
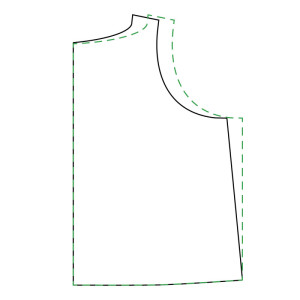
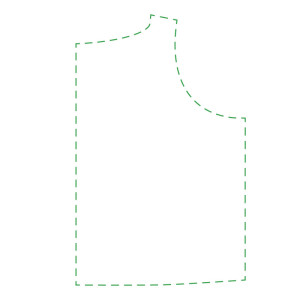
This is a comparison of the new pattern piece to the original. Â The strap attachment is the same width, at the same angle, and the waist length remains unchanged. Â The bodice back can be adjusted in the same manner, or more simply: move the strap placement marking inward the same amount.
If you have fitting questions please let me know, and I’d love to hear if this fit adjustment helps you!
No comments yet.