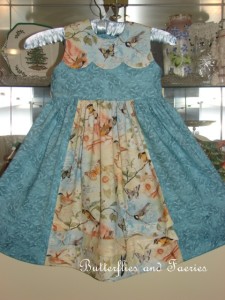
Karen is with us today from Butterflies and Faeries. I was blown. away. by Karen’s detail work showing up in the sew along pool for Project Run & Play. And it wasn’t all embroidery and smocking – her attention to detail is admirable, as displayed in this lovely birds and butterflies dress with perfectly crisp scallops and not an exposed seam to be found:
Smocking originated as a means to gather fabric so that it could stretch. Before elastic, smocking was commonly used in cuffs, bodices, or necklines where buttons were undesirable. Smocking developed in England in the middle ages and is unusual among embroidery methods in that it was often worn by the working class. Most other styles of embroidery are purely decorative and would be worn by the wealthy as a status symbol. Smocking was practical for garments to be both form fitting and flexible, hence its name is derived from smock – a farmer’s work shirt. Smocking was used most extensively in the eighteenth and nineteenth centuries.
Source:
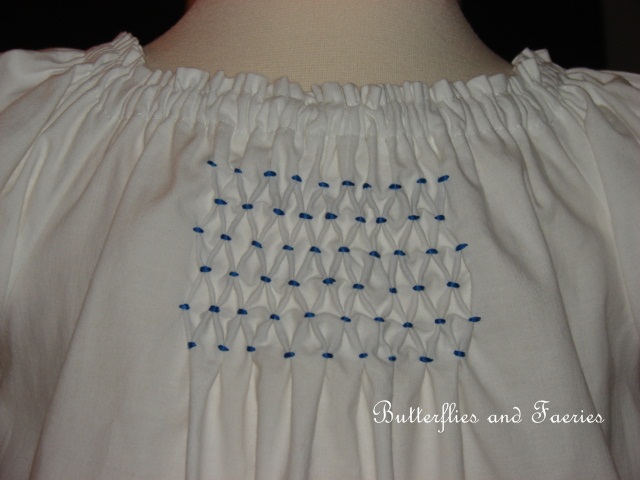
Here’s Karen with her honeycomb smocking project:
Hi! I’m Karen from Butterflies and Faeries. I am so honored to have been asked to guest blog for Jenn for this wonderful sewing series: Lost Arts of Sewing. I love to smock and embroider and find all handwork quite relaxing. I wanted to combine my two favorite forms of handwork for this project but didn’t want anyone who didn’t have a pleater to feel that they couldn’t duplicate the smocking. Sooo… I chose to do the oldest form of smocking using dots drawn on the right side of the fabric: Honeycomb Smocking.
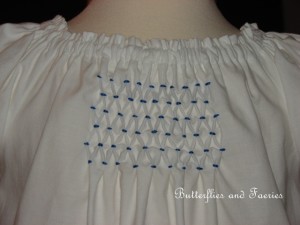 |
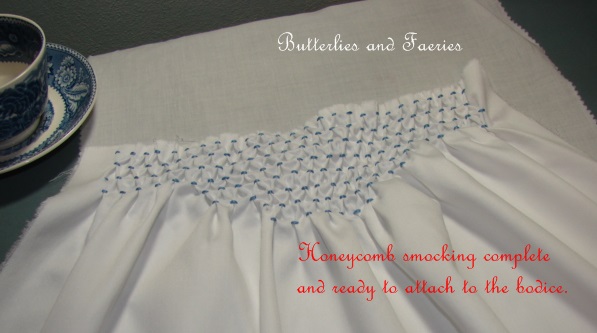
| Honeycomb smocking on a vintage pillowcase dress I made earlier this year. |
Honeycomb smocking is a wave stitch worked over dots evenly spaced on the surface of the fabric so that satin stitched dots appear on the front. These dots control the resulting pleats which brings in the fullness of the fabric. This form of smocking is sometimes referred to as seed smocking in old books because the dots resemble little colorful seeds.
I have been smitten with the paintings by Sally Swatland. Her beach scenes with children in vintage style clothing charm and inspire me. I drew my inspiration for the colors in my outfit from this painting.
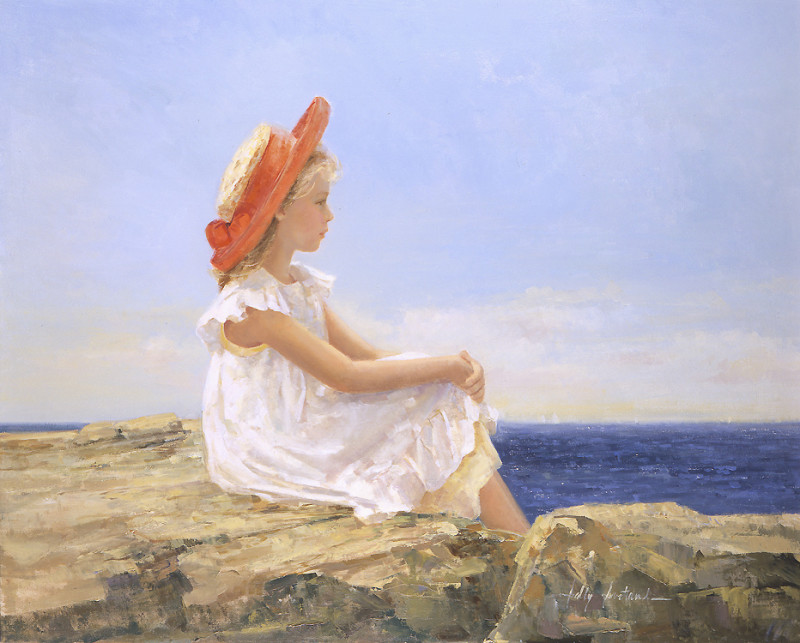 |
| From: http://www.rehs.com/sally_swatland_memories_of_summer.htm?page=65 |
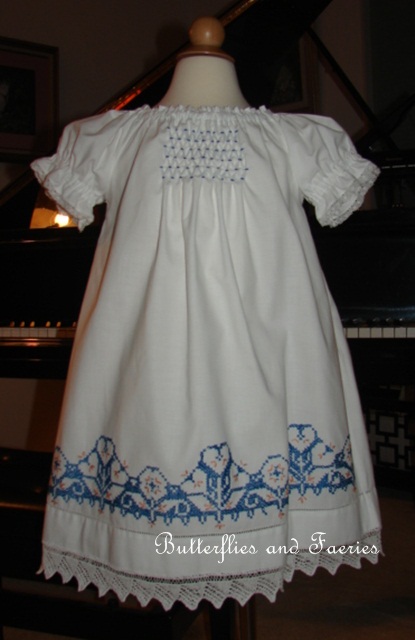
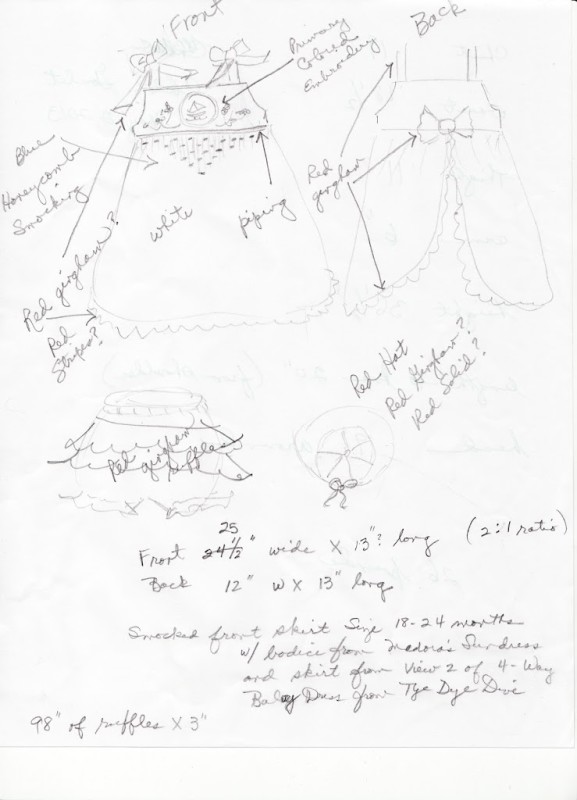
I looked over the sundress and pinafore patterns that I have and decided to combine two of them: Madora’s Sundress by Beaucoup for the bodice and 4-Way Baby Dress by Tie Dye Diva for the skirt section. The following drawing is my sketch of the outfit. I didn’t get the hat made but that can be done at another time.
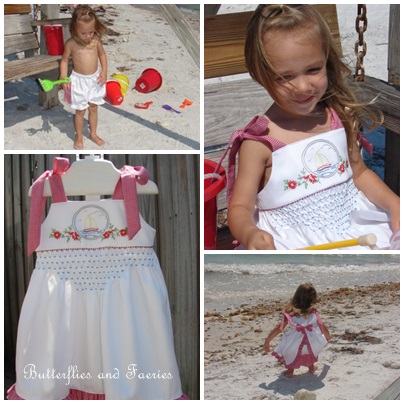
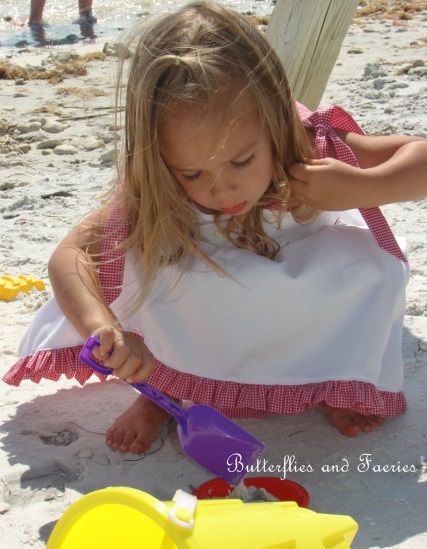
The finished dress and bloomer set is modeled by my friend Kaye’s little girl Chloe. I made the outfit in a size 18-24 months and Chloe is two and a half years old. It was made for my grandmother’s hope chest and I am anticipating my daughter to have chubbier children than Chloe so the outfit is large on her (but still adorable on the beautiful Miss Chloe!).
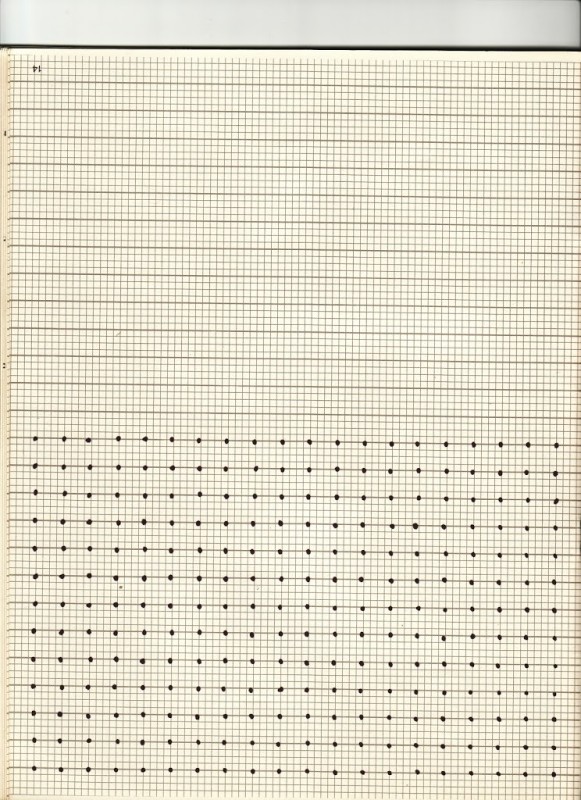
The first steps in honeycomb smocking are to chose fabric that you can see through over a light board or window and paper with dots 1/4 to 1/2 inch apart. I used the dotted paper below. It has the dots spaced approximately 1/2 inch apart.
The next sheet has dots drawn on smocking graph paper that has the dots spaced approximately 3/8′ (1 cm) apart.
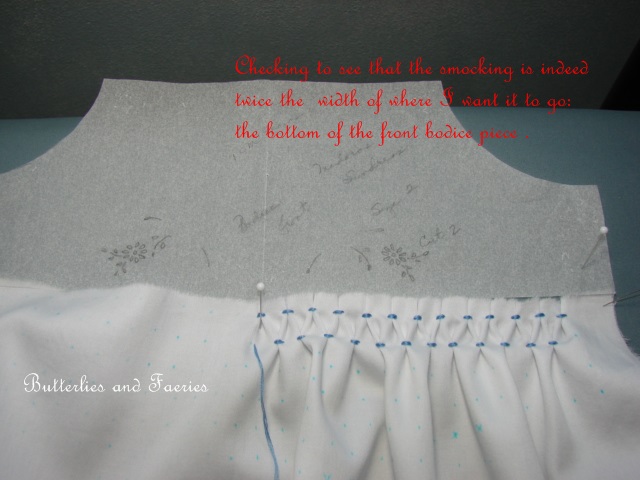
The next step is to determine how much fabric you will need for your chosen project. I wanted the smocking to go from seam to seam just under the front bodice. This type of smocking needs a ratio of 2:1. (Example: if you want 6 inches of smocking width then you will need 12 inches of fabric width plus seam allowances.)
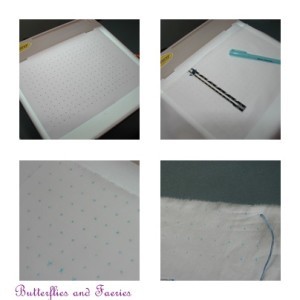
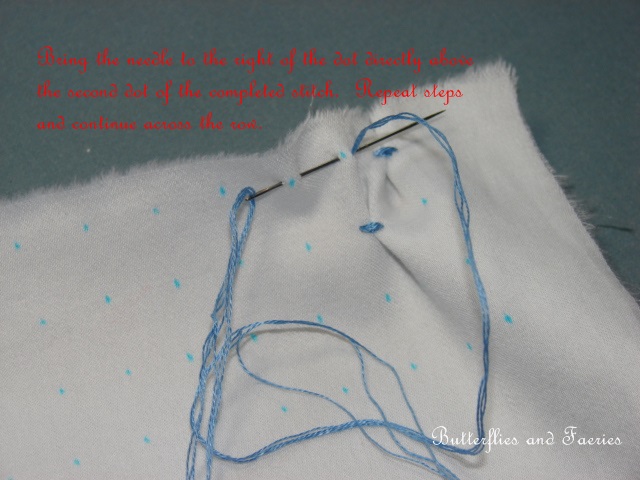
The following picture collage has the paper on the light board, then with the fabric taped over the board showing the first row of dots below the seam allowance and the washable pen, marking the dots with the blue washable pen, and inserting the threaded needle just to the right of the first dot on the far right of the fabric. (Honeycomb smocking is smocked from right to left unlike regular geometric smocking which is from left to right.) PLEASE CLICK ON THE PHOTOS TO ENLARGE THE PICTURES TO SEE THE STITCHES, ETC. MORE CLEARLY.
I used a #7 darner needle and DMC stranded cotton thread (embroidery floss). It comes in lengths of six strands combined. You will need to separate the floss to use 2 or 3 strands for your smocking. Two strands gives a smaller seed/dot and a more delicate appearance. I used 3 strands for my smocking on this project.
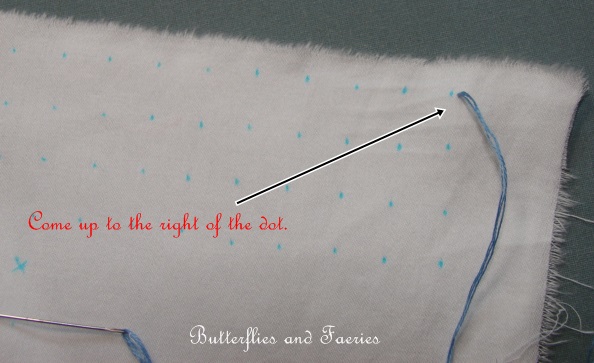
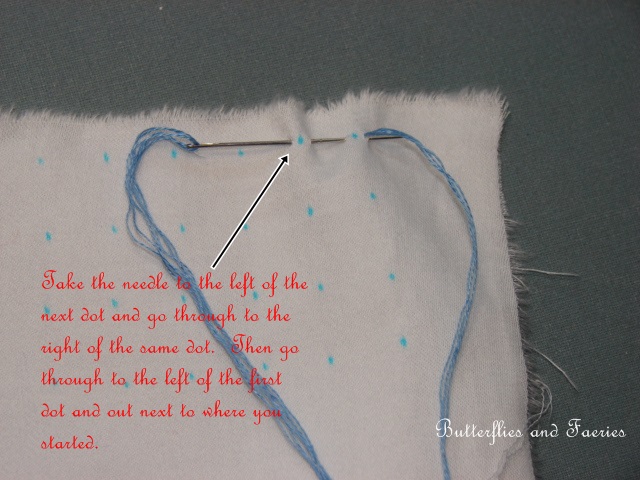
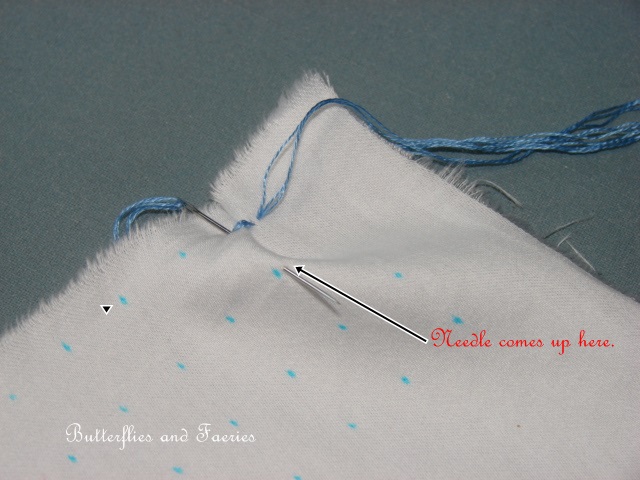
Step 1: Taking the first stitch: Begin by threading the needle with the three strands of floss and knotting the end of the thread. Bring the needle up just to the right of the first dot on the first row to the right of the fabric.
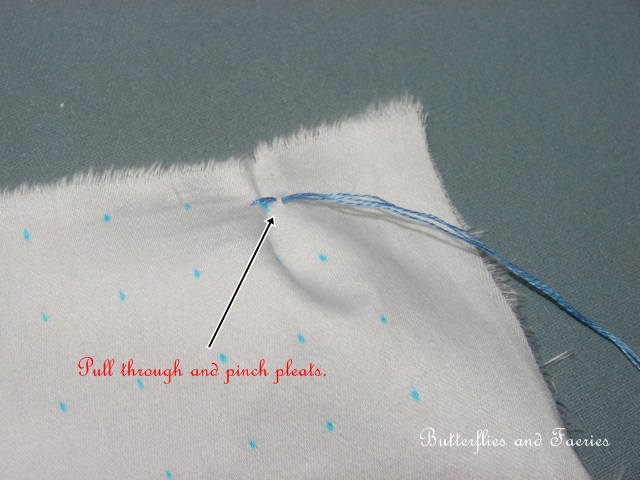
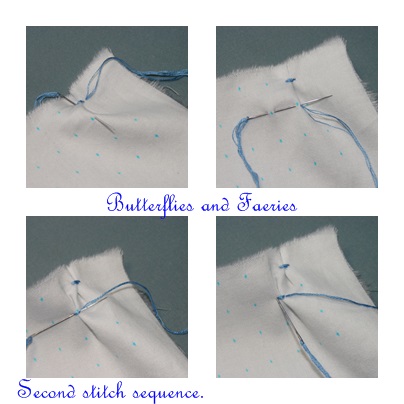
Step 2:
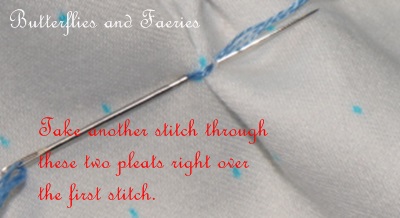
Step 3:
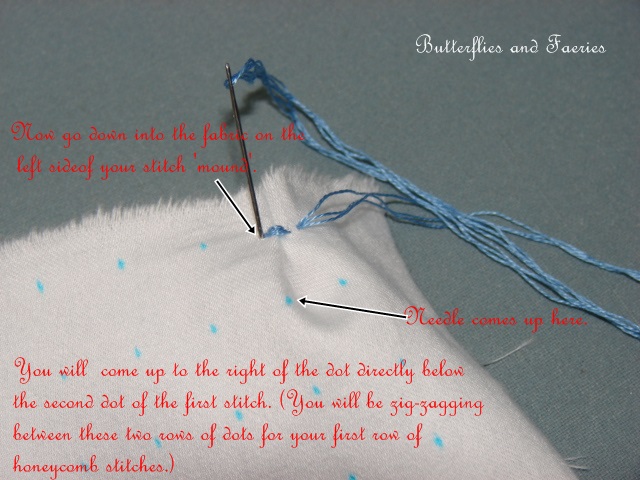
Step 4:
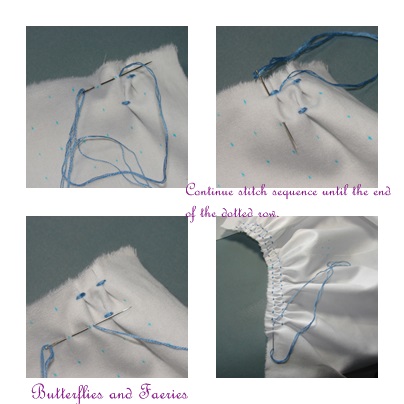
Step 5:
Step 6:
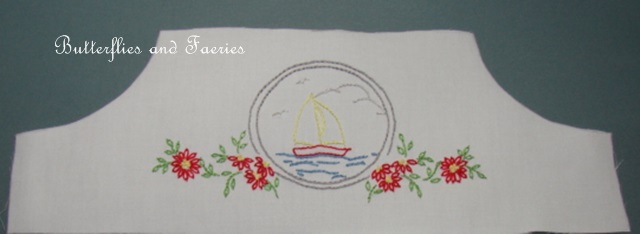
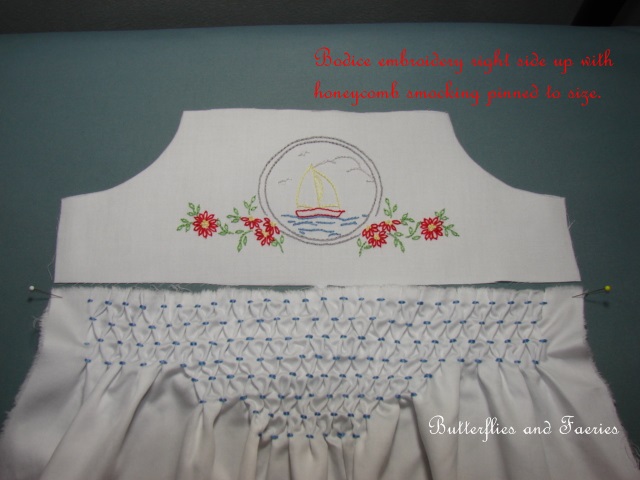
I embroidered a little vintage sailboat scene using two strands of the DMC floss. I love how the sailboat appears to be visible through a ship’s porthole! I used shadow work for the hull of the boat but the satin batiste was too opaque to show the stitch to advantage. I also used these common stitches in the embroidery: lazy daisy, stem stitch, outline stitch, and French knots.
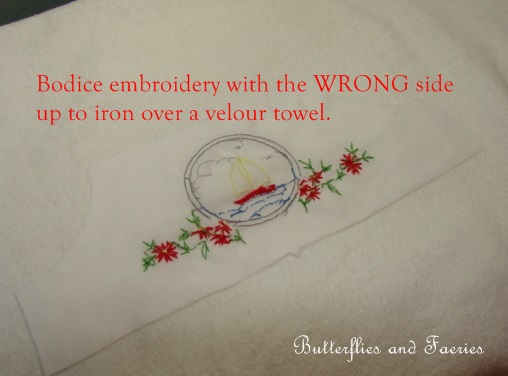
Always iron hand embroidery from the back. I spritzed this with water and then spray starch and let it sit for a few moments. Then I placed a scrap piece of white batiste over the back of the embroidery to iron it over a velour towel.
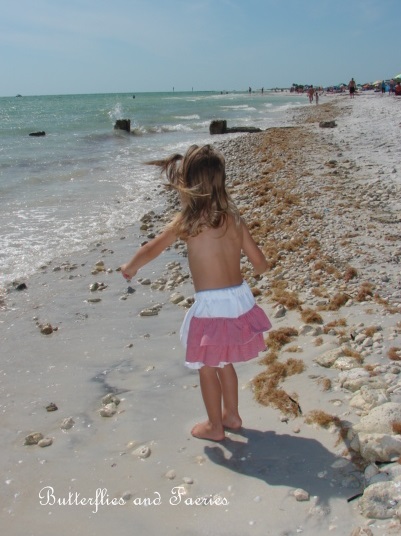
The beautiful Miss Chloe did a wonderful job modeling for me on a beach on the Tampa Bay. For a two and a half year old she was remarkably cheerful and biddable…just very fast and ‘busy’. I understand now why professional photographers say that for every good photo of a little one, they have 20 ‘out-takes’!
As you can see, the outfit was very comfortable to wear.
I did make some fancy bloomers to go beneath the open-backed pinafore dress.
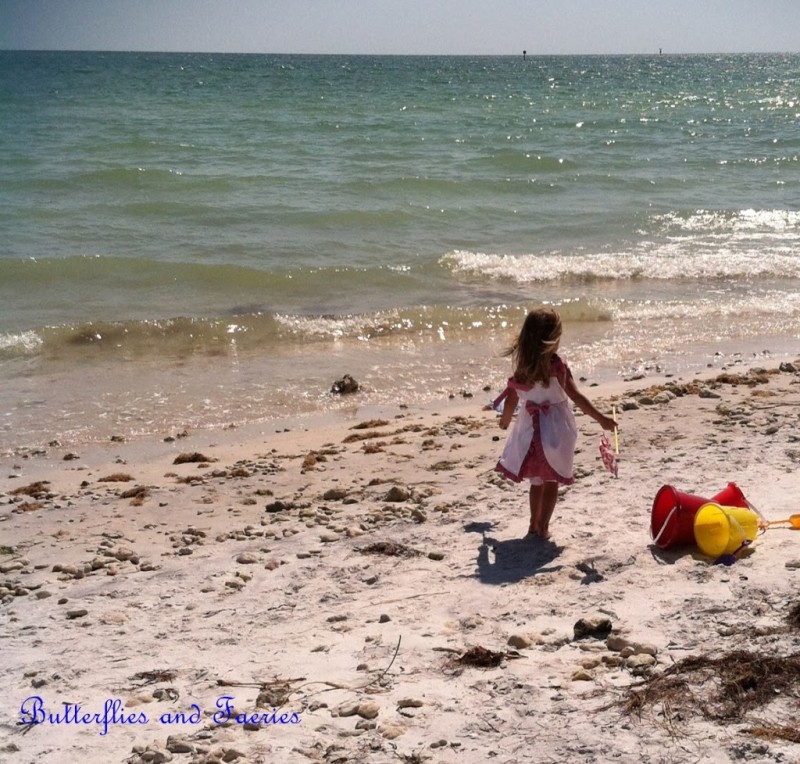
I just love this next photo that Chloe’s mommy took!
I hope that this post has inspired you to try honeycomb smocking. It really is an easy way to get your feet wet with smocking! Blessings, Karen
Thanks so much Karen! I’ve always wanted to try smocking, but I’ve been intimidated to try. Your tutorial for this style looks very do-able!


Great post on how to do honeycomb smocking! The dress and ‘fancy’ bloomers are an adorable set.:)
This is a great tutorial! Each step is so clearly explained and illustrated by the photo. Though English smocking has enjoyed an enthusiastic revival, it’s requirement of a pleater or hours of hand pleating discourage many. Anyone can smock this way, thanks to Karen! The little dress is precious.
Thanks so much for making this tutorial!! The intricate detail looks intimidating, but your instructions make it so simple! Do you always have to do an even number of rows (dots) since you move back and forth between the two as you stitch?