
If this is the first time you’re joining the series, be sure to review the first lessons on setup and safety, getting familiar with the machine, practicing with a needle, sewing on paper, sewing on fabric and using Wonder Tape instead of pins, sewing a pillowcase and making a teddy bear sleeping bag.
I have purposely delayed covering how to thread the machine. Â I did this because I was breaking the lessons into very small units and wanted to only teach the necessities of safety and basic skills in order to get Arden ready to create some simple projects. Â Now that she’s gained confidence and practiced what she’s learned, the time seemed appropriate to tackle threading.
Threading most modern machines will be fairly similar. Â I’ve sewn on borrowed machines and taught friends how to thread theirs and they’ve all been pretty much the same. Â If your machine is significantly different, reference the owner’s manual for threading. Â I showed Arden how to thread once and then walked her through doing it herself. Â From this point forward, I’ll begin each lesson with her threading her machine.
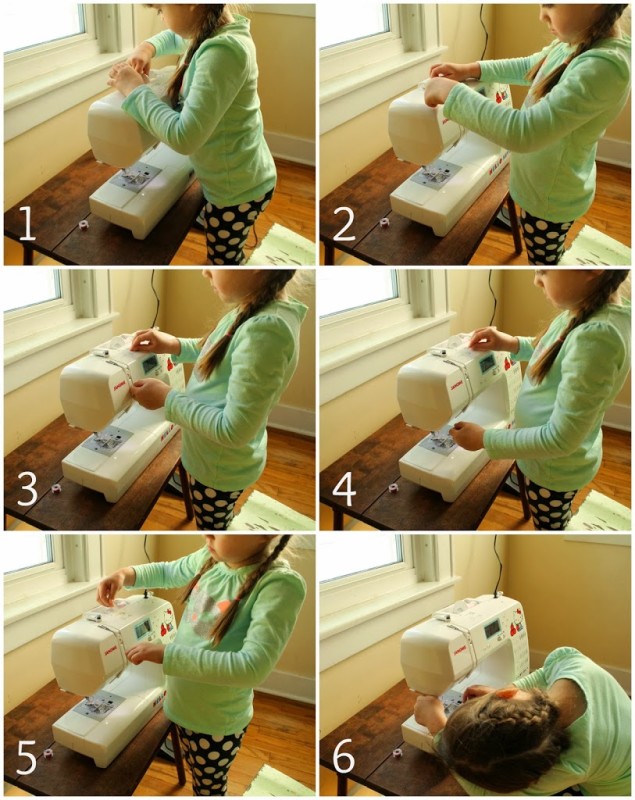
- Place the spool of thread on the spindle and put the spool holder in place. Â If your machine has a vertical spindle, simply put the spool of thread on it.
- Using the right hand to keep light tension on the thread coming off the spool, guide the thread around the top thread guide.
- Follow the arrows to bring the thread down the right hand slot,
- Up the left hand slot,
- And around the thread uptake lever, taking care to be sure it slides into the hook at the front by bringing the thread around the backside and down the left hand slot again.
- I didn’t get a clear picture of the last steps, but there will be two thread guides near the needle, one at the top, and one closer to where the needle fastens the the shank. Â Slide the thread behind these guides.
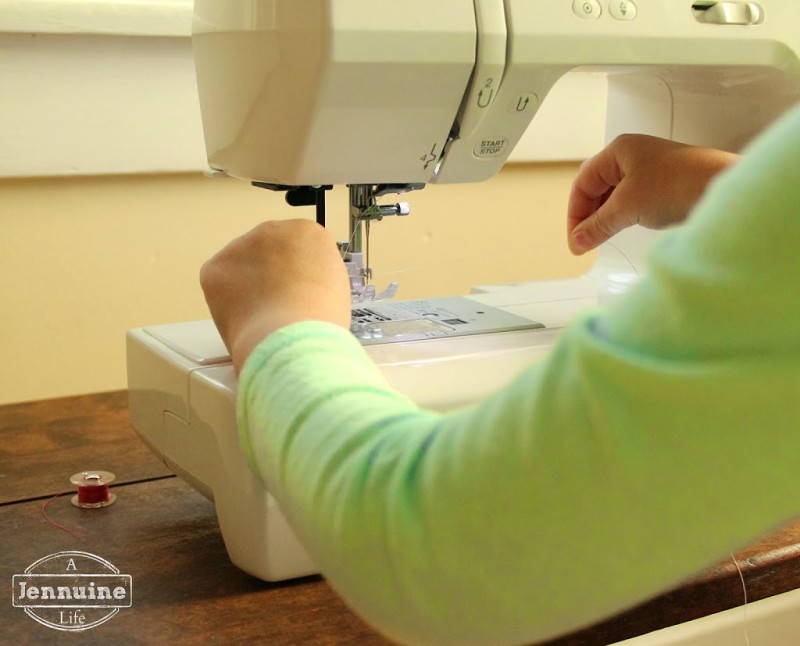
Arden’s machine has an auto threader, so we took advantage of this feature. Â Push down and hold the threader until the hook is lowered and rotated into the eye of the needle. Â Hold the thread across the two plastic notches along the bottom. Â Release the threader and let go of the thread to allow a loop to be pulled through the eye. Â Pull this loop until the thread is fully through the needle.
If you don’t have an auto threader, you might need to thread the needle for very young students. Â The hand-eye coordination required to thread by hand can be challenging.
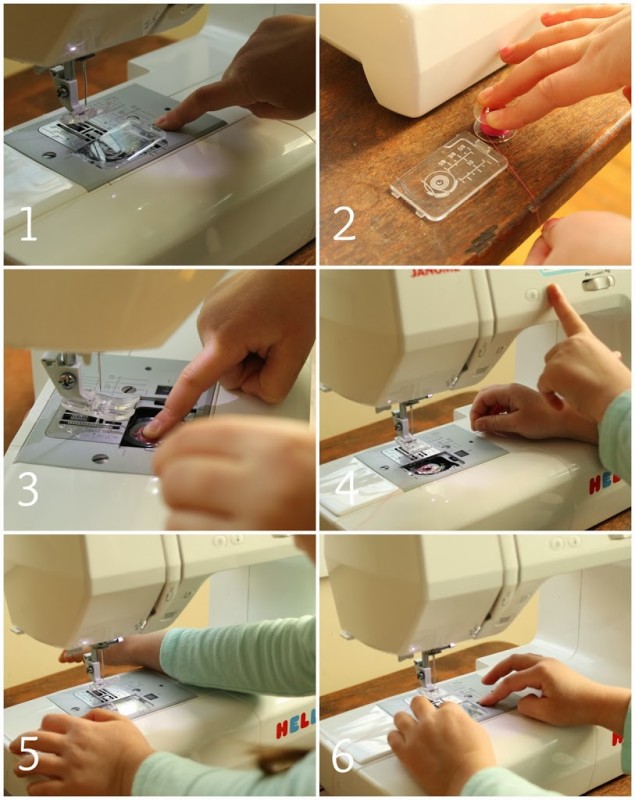
- To thread the bobbin, slide the bobbin cover release to the right and remove the cover.
- Compare the direction of thread coming off the bobbin to the diagram on the cover or on the machine. Â For Arden’s machine it should be coming off the bobbin counter-clockwise.
- Place the bobbin into the bobbin housing. Â Hold it in place with one finger and guide the thread through the slot on the right and out the one on the left.
- While holding the top thread, lower and raise the needle using the needle up/down button, or my rotating the hand crank.
- Pull the top thread until the bobbin thread pulls up, and then pull both threads to the back of the presser foot. Â Make sure the top thread goes between the “toes” of the presser foot.
- Replace the bobbin cover, and you’re ready to go!


No comments yet.