
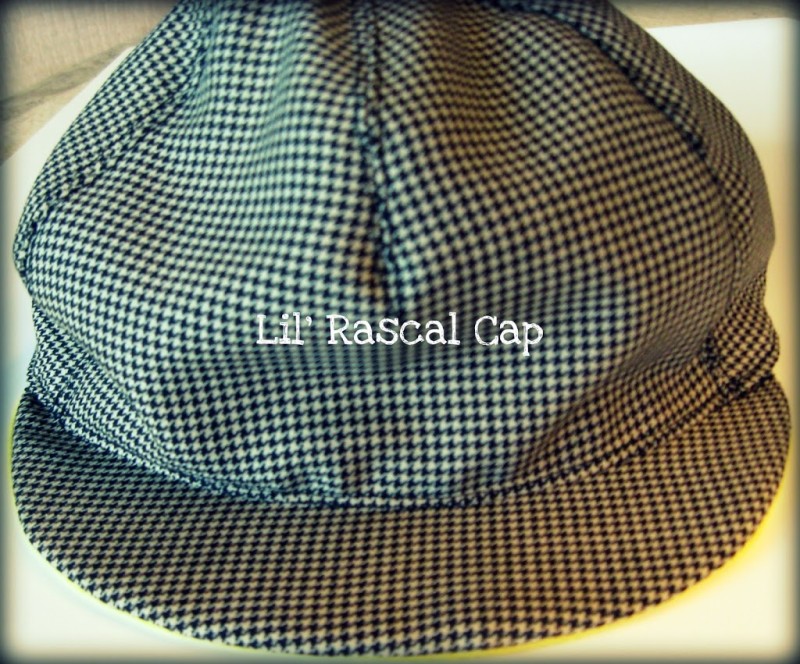
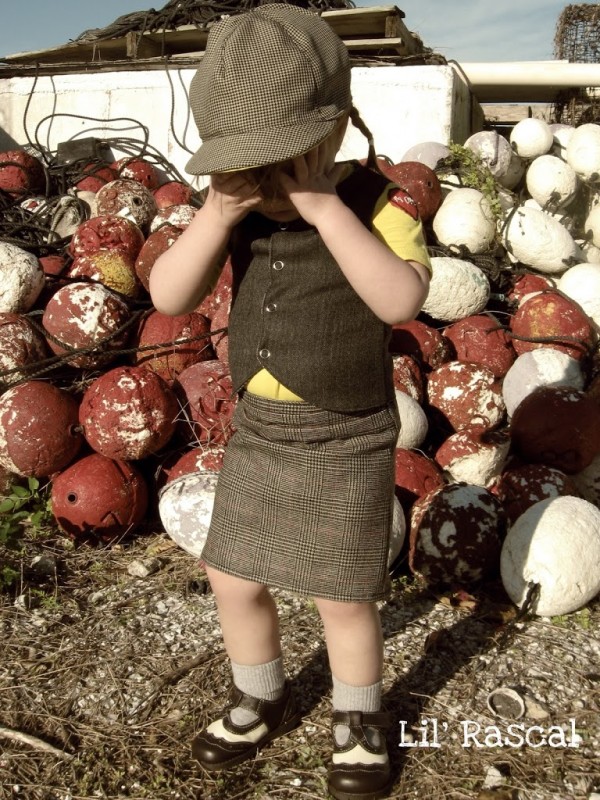
This was another part of my project for Week 4 of Shwin&Swhin’s Project Toddler Runway. The challenge for this week Inspired by Boy. I had a little hat that fit Arden well to use as a guide, but you could easily measure your child’s head and go from there.
Lil’ Rascal Cap
Skill Level – confident beginner to intermediate
Items Needed
main fabric – 1/4 yard
lining fabric (something soft) – 1/4 yard
flexible cutting mat
1″ elastic – about 4-5″
paper, scrap fabric, or pattern fabric
matching thread
Sew with a 5/8″ or 1/2″ seam allowance; keeping the same allowance throughout the project. I used a 1/2″ seam allowance.
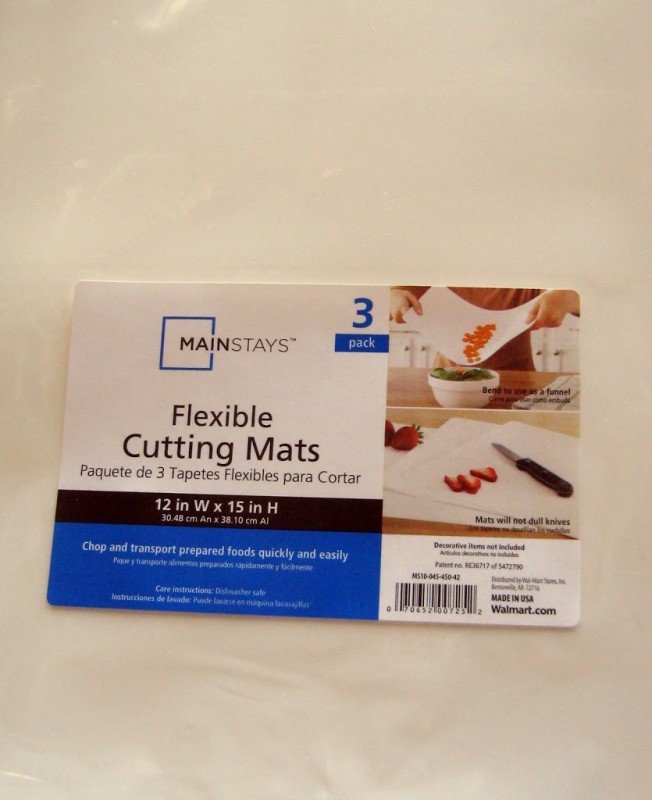
These were the cutting mats I found to use for this project. They’re from WalMart, and they’re just right for this – easy to cut with kitchen shears, and stiff enough to keep the brim shape on the hat.
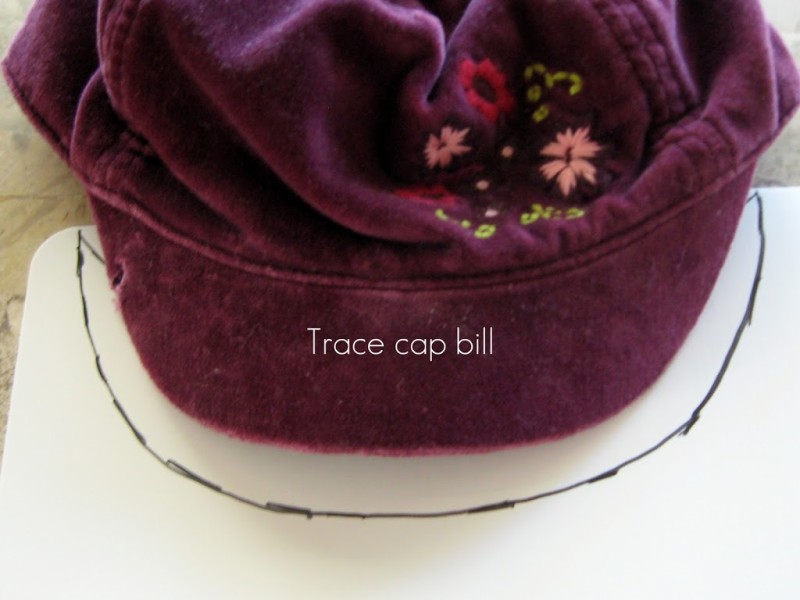
1. Trace the bill of the cap. Press down so it spreads out, and trace the outer and inner edges. Cut out with scissors or kitchen shears – not your good fabric shears, as they should only be used to cut fabric to keep their sharp edge. Snip a tiny bit of the pointed edge off so it doesn’t poke through your fabric or into your child.
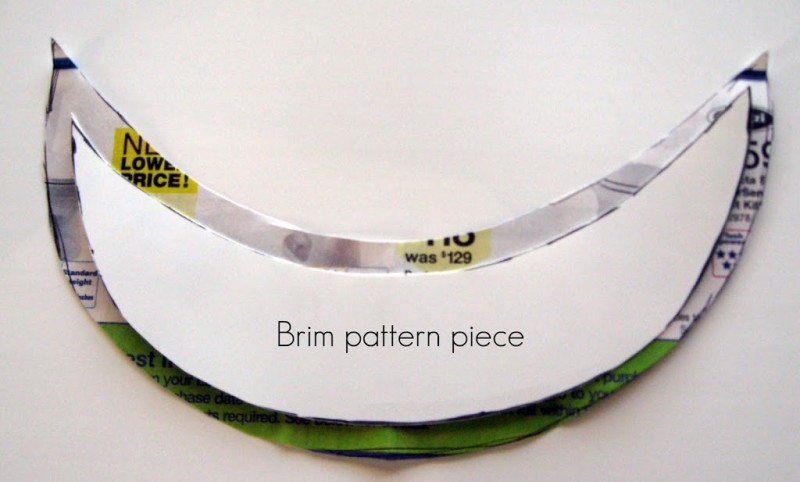
2. Make brim pattern piece. Trace an outline around the bill giving a 1/2″ or 5/8″ seam allowance.
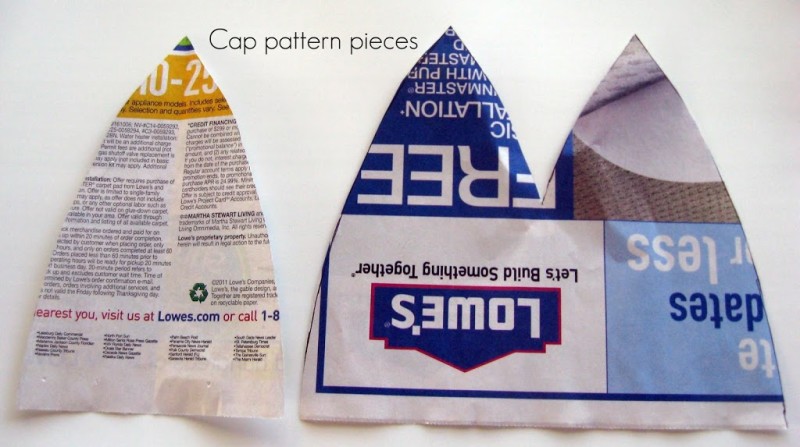
3. Make pattern pieces. I traced my hat to get these pieces. You could probably get pretty close sketching them yourself – the single pointed one is 4 1/2″ wide and then curves to the point 6 3/4″ high. The double pointed one is made tracing the edges of the single point with an overlap to create a piece 7 3/4″ wide.
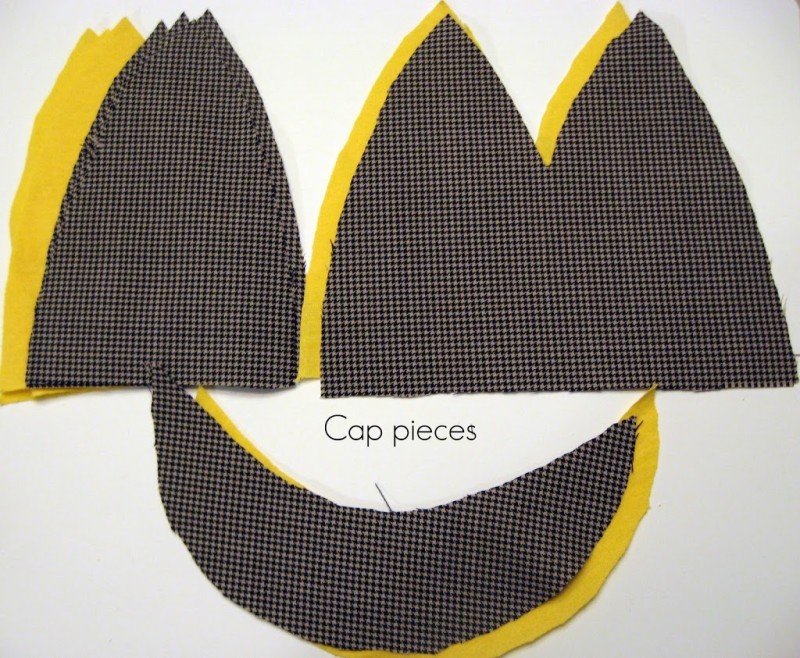
4. Cut cap pieces. Cut one bill piece from each of your main and lining fabrics. Cut four of the single pointed pieces from each fabric. Cut one each of the double pointed piece.
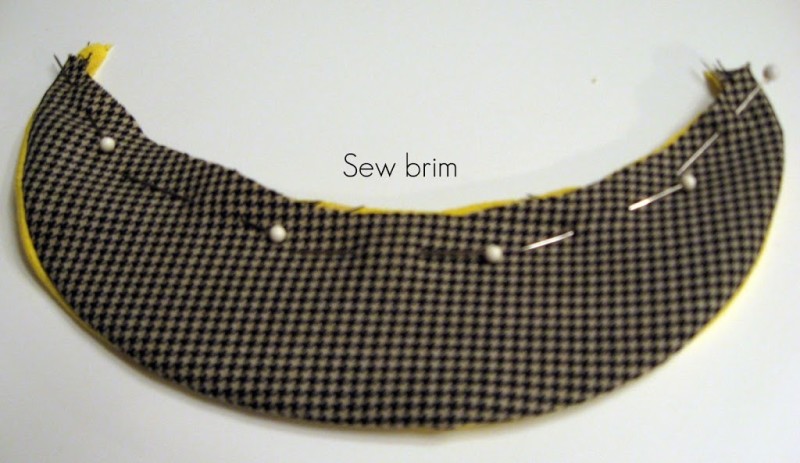
5. Sew brim edge. First sew the outer brim edges right sides together (RST). Turn and insert the piece cut from the cutting mat, keeping the seam allowances to the bottom of the brim. Pin right at the edge of the mat and stitch as close to the mat piece as possible, encasing it in the fabric.
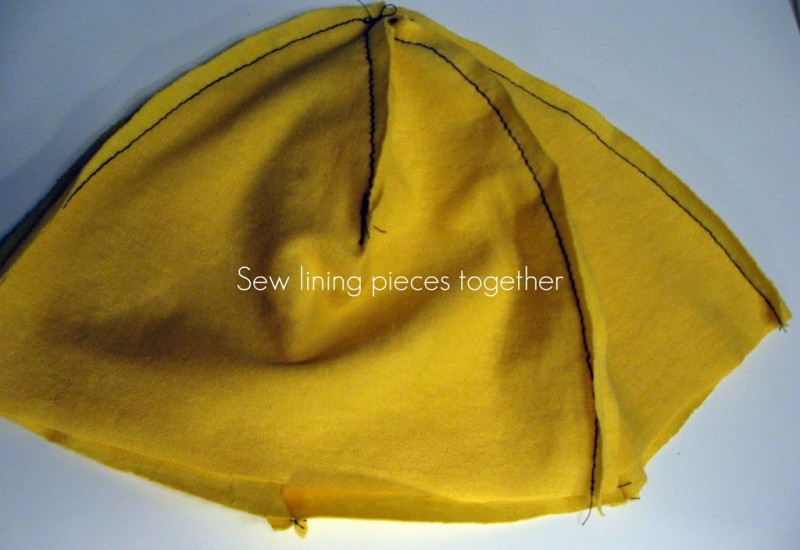
6. Sew lining pieces together. I found it easiest to sew half the hat and then sew the halves together in one seam across the top. Sew the double point seams together as shown like a dart. Repeat with main pieces.
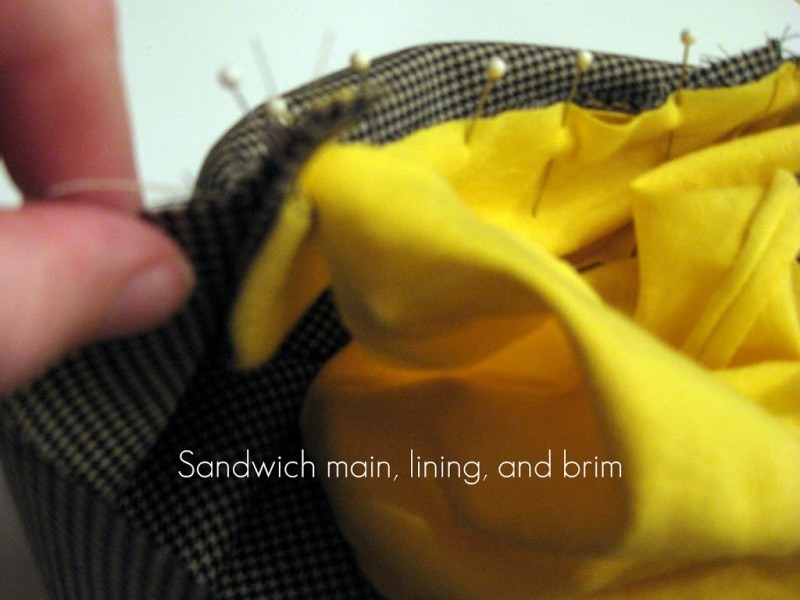
7. Sandwich main, lining and brim. Sorry about the photo on this one. It was difficult to show this in a photo. With RST and the brim facing the matching fabric, pin the main, lining and brim together aligning raw edges. The rigid brim will make this look pretty funky, but just pin like crazy. Sew around the edge, leaving a 4″ opening at the back of the hat to turn.
I had to go back and sew closer to the brim after my first pass. It looked much better one I got right on the edge of the plastic mat.
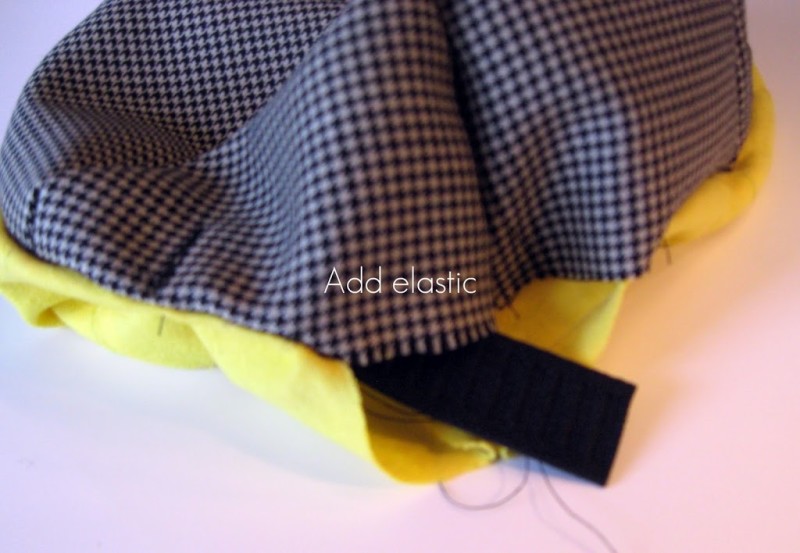
8. Add elastic to the back. Slip the elastic in the opening at the back, keeping it close to the bottom edge. Stitch one side down with a couple of rows of stitching. I think I used about 4″ of elastic and spanned 6″ of the back of the hat. Stitch the other side down to match. Sorry, the photos I took of this step didn’t turn out.
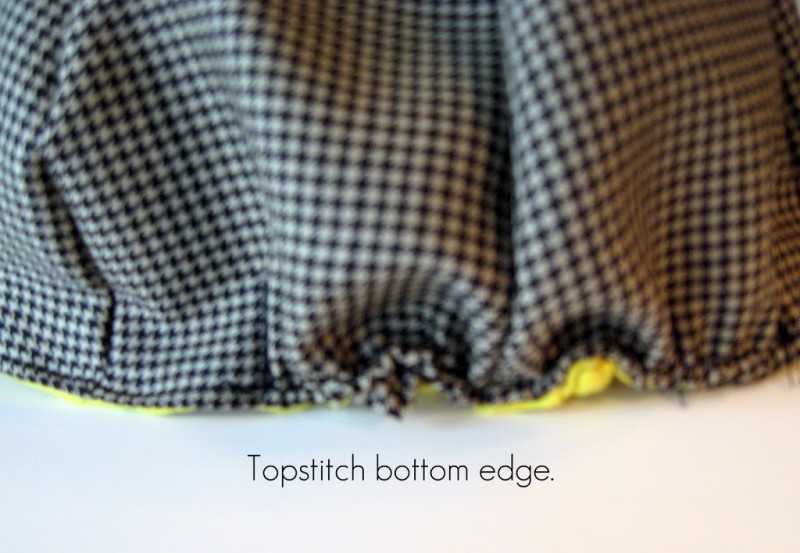
9. Topstitch the bottom edge. Turn the raw edges in and stretch the hat so the elastic is taut. Sew about 1/8″ from the bottom edge all the way around. Go back and make a few lines of stitching on top of the elastic with it pulled taut.
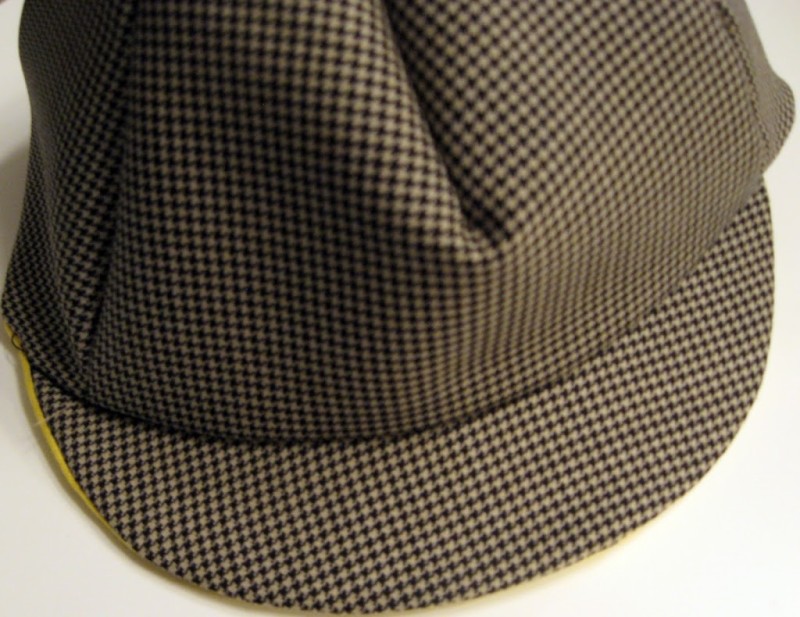
10. Topstitch all seams on the cap. This also traps the lining up against the main fabric so it doesn’t pull out when you take the hat off.
This was relatively easy and turned out better than I had hoped. I hope yours turns out as well!

This will be linked up at Shwin&Shwin as well as the linky parties in my Linky Party Directory and to:

oh my goodness! thank you soooo much. I have been trying to figure out what to use in hat brims for a year now! I have seen some people stitch all over a few pieces of muslin to make it stiff, but its just not the same! I am so pumped I want to go make a hat right now…but it’s too cold for sewing right now!!!! your just to clever!
You are brilliant! It kills me that I always find great tutorials AFTER I but a pattern for an item. Great hat!
SUPER cute! I think the whole outfit is ADORABLE!
Thanks for linking up to Making It With Allie! I can’t wait to see what you have for next week!
AllieMakes.Blogspot.com
So fun! I am featuring this on somewhatsimple this Tuesday! Thanks for the idea!
-Steph