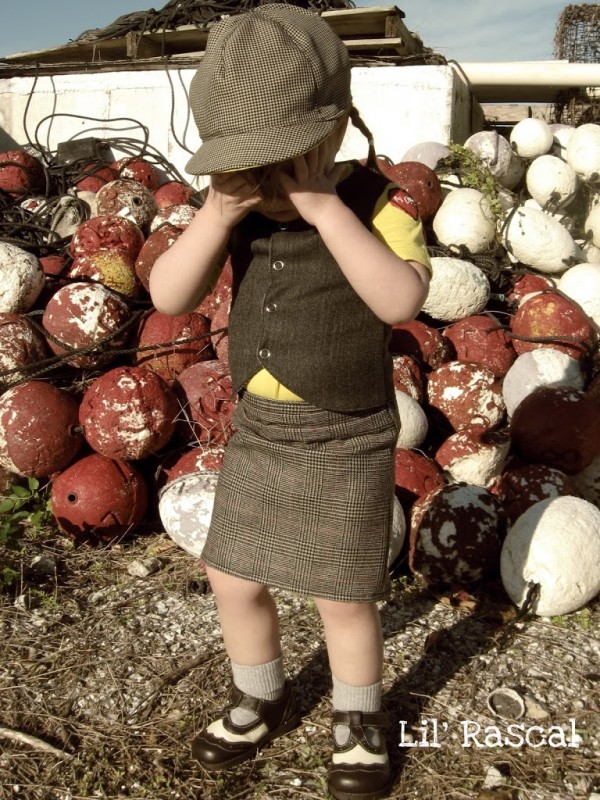
This was part of my project for Week 4 of Shwin&Swhin’s Project Toddler Runway. The challenge for this week Inspired by Boy. Someday I’ll get access to a scanner and show you the doodles I do for each week’s challenge to come up with my concept. For this one I wrote a few keywords: Menswear, Mondo, and Little Rascals. I also drew a few sketches of skirts and the “Mom” tattoo idea. I had seen some great men’s wool suiting at Fabric Fair, my local fabric store and when this challenge came up, I knew immediately that’s what I was going to use. I originally was thinking suspenders, but things evolved and this little vest is what I ended up making.
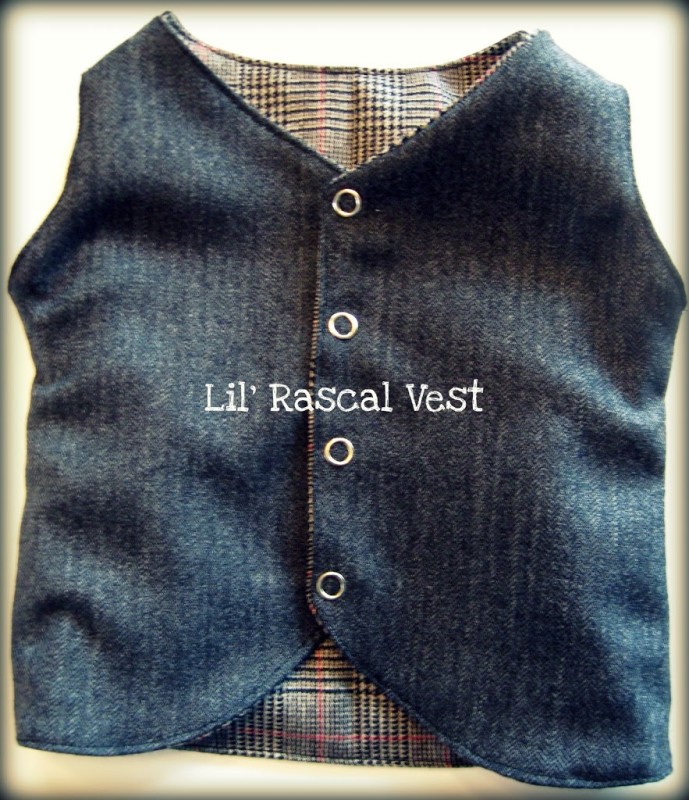
Lil’ Rascal Vest
Skill Level – beginner
Items Needed
main fabric – 1/2 yard
reverse fabric – 1/2 yard
snaps
snap tool
paper, scrap fabric, or pattern fabric
matching thread
Dimensions shown are for a 2T vest. Adjust measurements and fabric requirements accordingly to get desired size. Sew with a 5/8″ or 1/2″ seam allowance; keeping the same allowance throughout the project. I used a 1/2″ seam allowance.
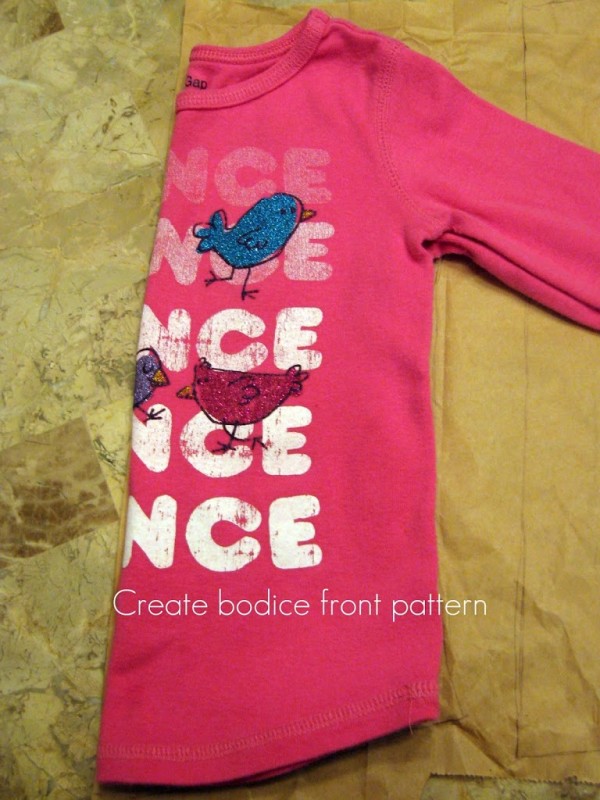
1. Create bodice front pattern.  I used a t-shirt that fit my daughter well as the basis for the vest pattern. This was first used to make the t-shirt, but that’s pretty straightforward so I’m not planning to share a tutorial. We’ll modify this pattern piece a little bit to make the vest. Trace around the shirt, being sure to add seam allowances. Tuck the sleeves into the shirt if necessary to help draw the arm openings. I made this at my parent’s house while on vacation, so my pattern is made from a paper bag I opened up.
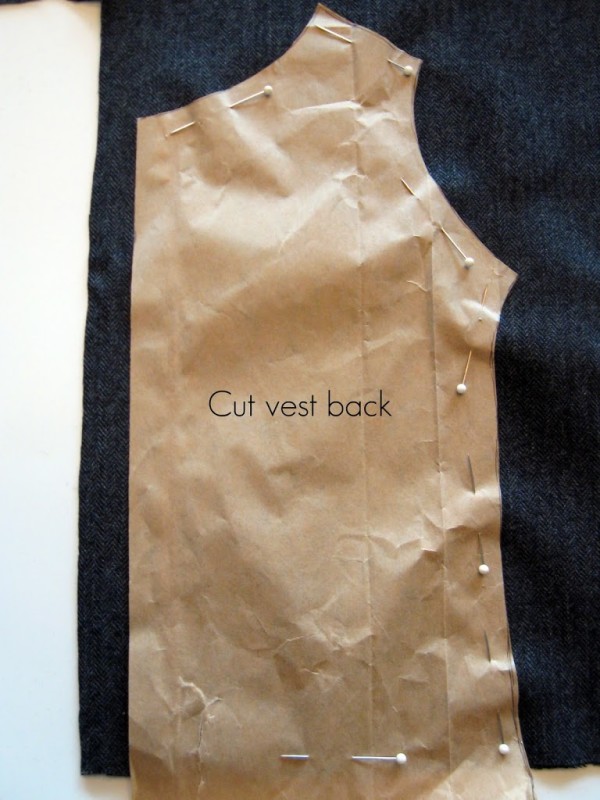
2. Create bodice back pattern. Pretty similar to the front pattern piece. The back piece has a higher neck opening.
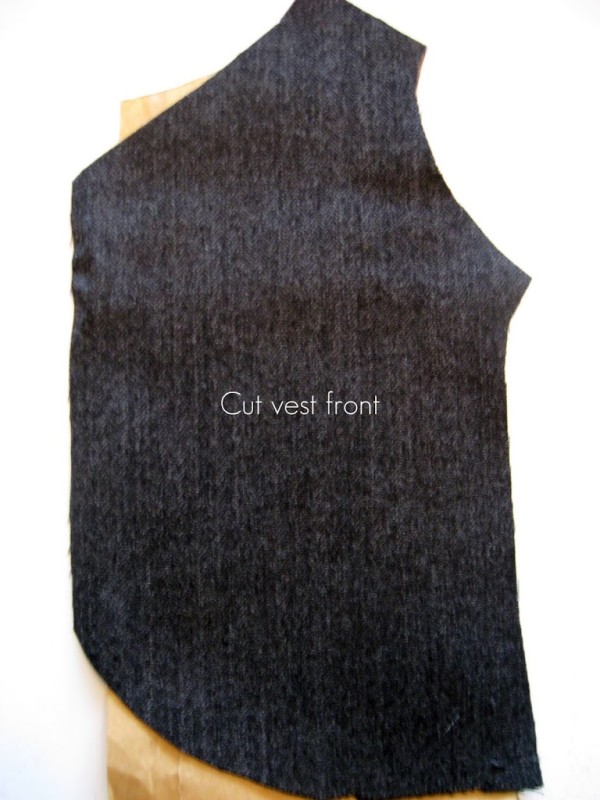
3. Cut front pieces. The main difference between the pattern made above and how this was cut is that I 1. angled the neck down to form a “v”, 2. allowed extra on the front middle seams for the overlap and seam allowances (I should have allowed a bit more than shown – it’s a tad snug!), and 3. the bottom edge is shorter than the pattern to hit about hip height and angled. This is not cut on the fold like it would have been for the t-shirt. Repeat with reverse fabric.
4. Cut back pieces. Match the length used to cut the front pieces and cut on the fold. I’m not sure why this picture shows it shifted over to the right – this may actually be a picture of the front pattern, but you get the idea. Repeat with reverse fabric.
Vest pieces
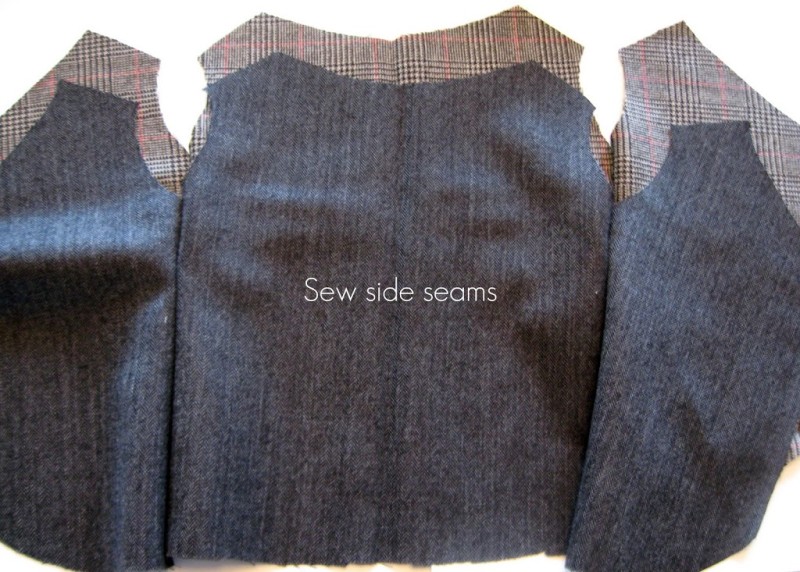
5. Sew side seams. Sew side seams right sides together (RST). Press seams open. I found it nearly impossible to press this 100% wool while working it, so I abandoned pressing.
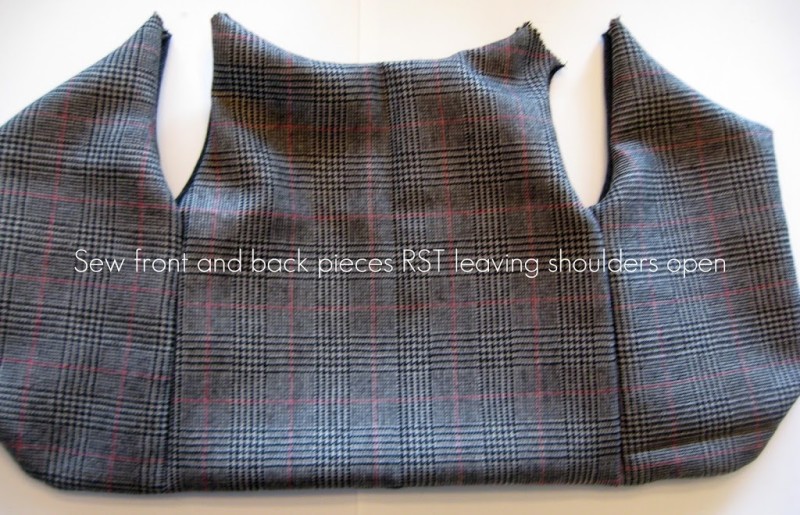
6. Sew main and reverse fabrics. Sew RST matching side seams and shoulder openings. Do not sew shoulder seams. Clip and notch seam allowances. Turn right side out using one of the shoulder openings to turn.
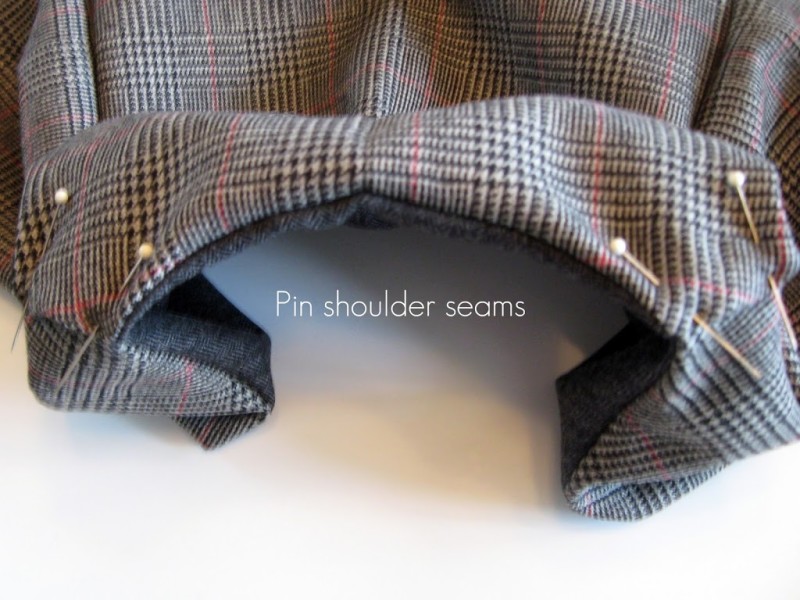
7. Pin and sew shoulder seams. Turn the back shoulder opening inside itself about 1/2″ and then insert the front piece. Pin in place and sew about 1/8″ from edge on the back piece.
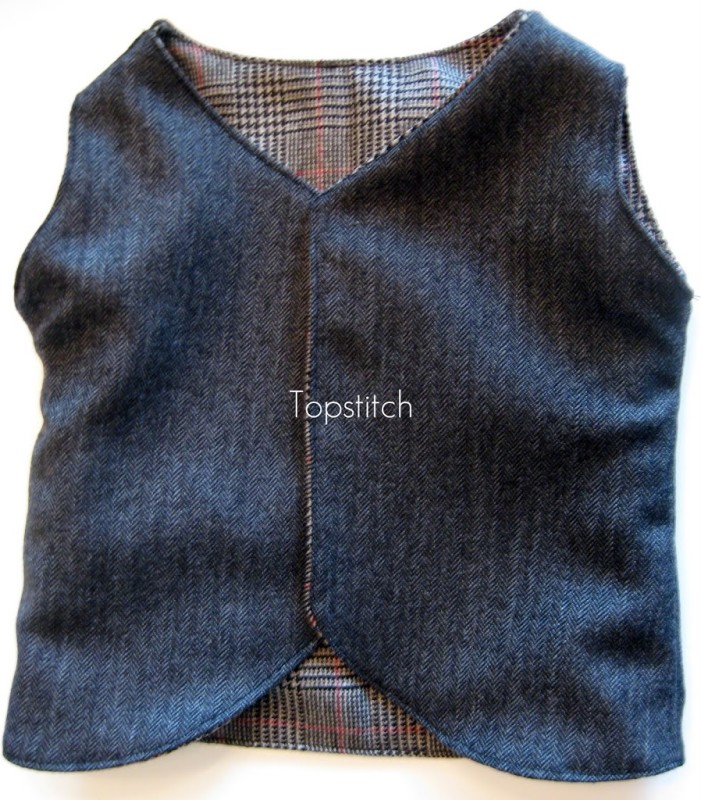
8. Topstitch. About 1/8″ from edge all the way around.
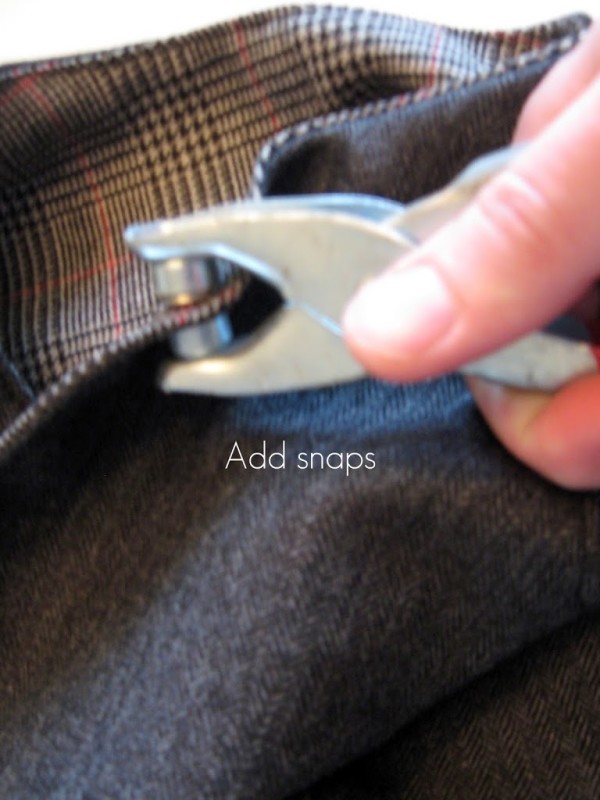
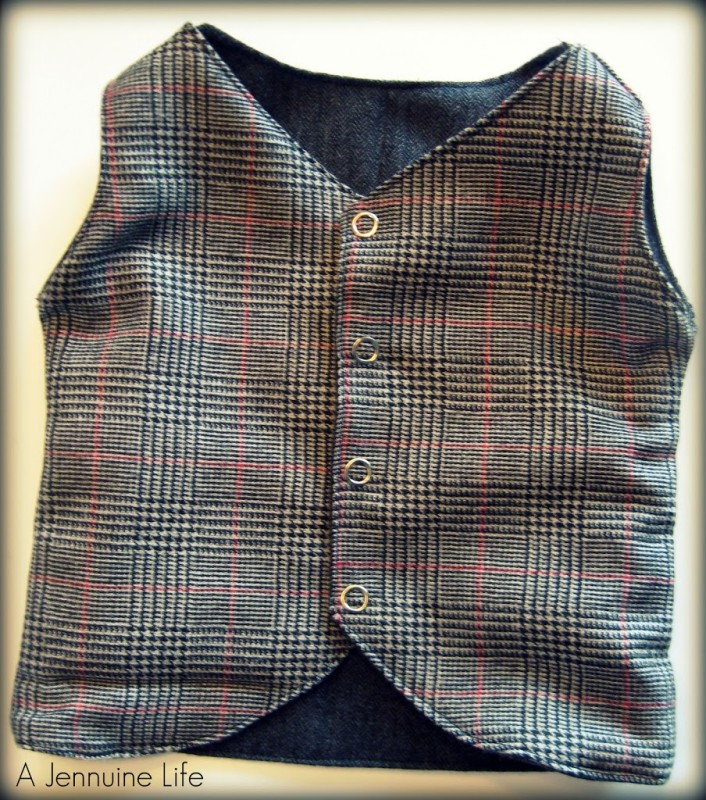
9. Add snaps. Using a snap plier tool, attach snaps. These were 7/16″ snaps. Eyeball the top and bottom snaps and then measure the placement of the ones in the middle.
Find yourself a Lil’ Rascal to wear your new creation!
I’ll be linking up to Shwin&Shwin, the parties in my Linky Party Directory and to:


Adorable! And how perfect are her little shoes for this outfit?! Fabulous! 🙂
The shoes are from See Kai Run. I don’t see them on their website anymore, so probably discontinued – I got them quite a bit ahead during one of their sales. I love their shoes!
Wow! Great job with this adorable outfit!
This is stinkin’ adorable! I love it with the skirt!
Thanks for linking up to Making It With Allie! I can’t wait to see what you have for next week!
AllieMakes.Blogspot.com
SO CUTE!!! Good work, I love the whole little ensemble…AND the background for the pic.